E n g l i s h
Connections
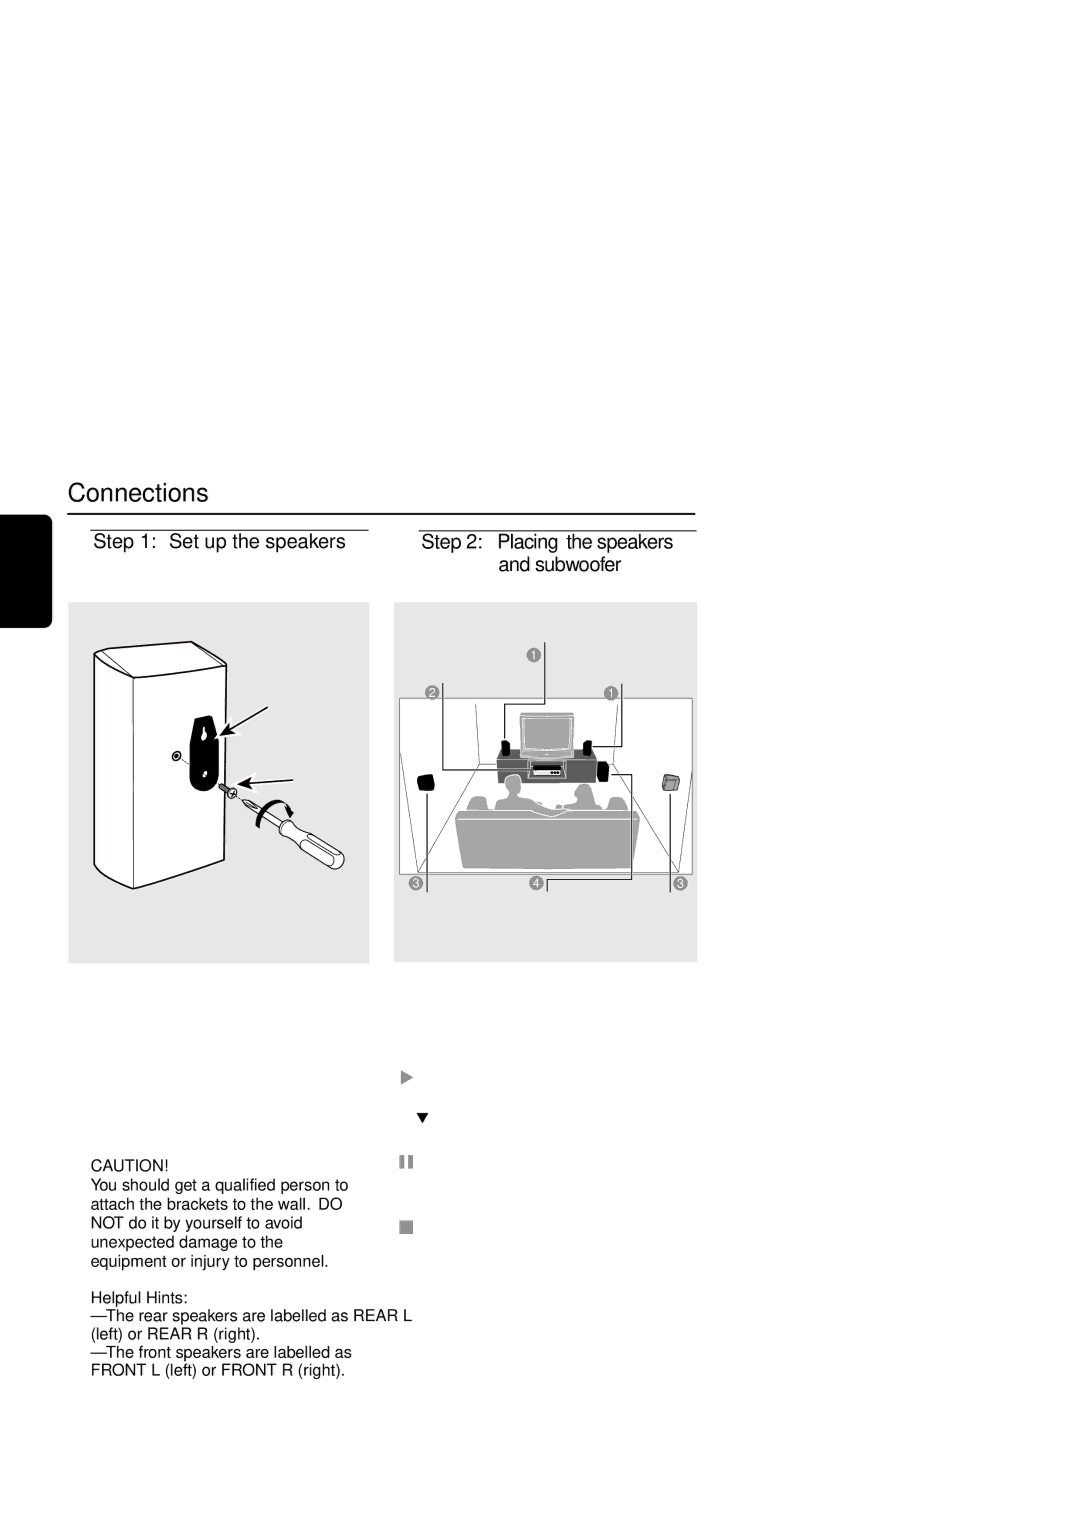
Step 1: Set up the speakers | Step 2: Placing the speakers | |||||||||||
|
|
| and subwoofer | |||||||||
|
|
|
| Front Speaker |
|
|
| |||||
|
|
|
|
| (Left) |
|
|
| ||||
| Center speaker | 1 |
|
|
| Front Speaker | ||||||
|
|
|
| |||||||||
| and DVD system |
|
|
|
|
|
|
|
| (Right) | ||
bracket | 2 |
|
|
|
|
|
|
|
| 1 |
| |
|
|
|
|
|
|
|
|
| ||||
|
|
|
|
|
|
|
|
|
|
|
| |
|
|
|
|
|
|
|
|
|
|
|
| |
|
|
|
|
|
|
|
|
|
|
|
|
|
|
|
|
|
|
|
|
|
|
|
|
|
|
|
|
|
|
|
|
|
|
|
|
|
|
|
|
|
|
|
|
|
|
|
|
|
|
|
|
 screws
3 | 4 | 3 |
Rear Speaker | Subwoofer | Rear Speaker |
(Left) |
| (Right) |
You can choose to hang the speakers on the wall. Attach the supplied bracket firmly to the rear of speakers using the supplied screws. Then mount a screw (not supplied) on the wall where the speaker is to be hung and hook the speaker securely onto the mounted screw.
CAUTION!
You should get a qualified person to attach the brackets to the wall. DO NOT do it by yourself to avoid unexpected damage to the equipment or injury to personnel.
Helpful Hints:
–The rear speakers are labelled as REAR L (left) or REAR R (right).
–The front speakers are labelled as FRONT L (left) or FRONT R (right).
For best possible surround sound, all the speakers (except subwoofer) should be placed at the same distance from the listening position.
1Place the front left and right speakers at equal distances from the TV and at an angle of approximately 45 degrees from the listening position.
2Place the center speaker above the TV or the DVD system so that the center channel’s sound is localized.
3Place the rear speakers at normal listening ear level facing each other or hang on the wall.
4Place the subwoofer on the floor near the TV.
10