Before Use
The One-touch Free Style Grip Belt
ªTo Use as a Grip Belt
Adjust the length of the Grip Belt to the size of your hand.
1Detach the end of the Grip Belt.
2Adjust the length of the Grip Belt to the size of your hand.
3Reattach the Grip Belt.
ªTo Use as a Hand Strap
Using the Grip Belt as the hand strap makes it easier to handle and carry a Palmcorder. It is more convenient to use with the Magic Wire Remote Control with Narration Mic.
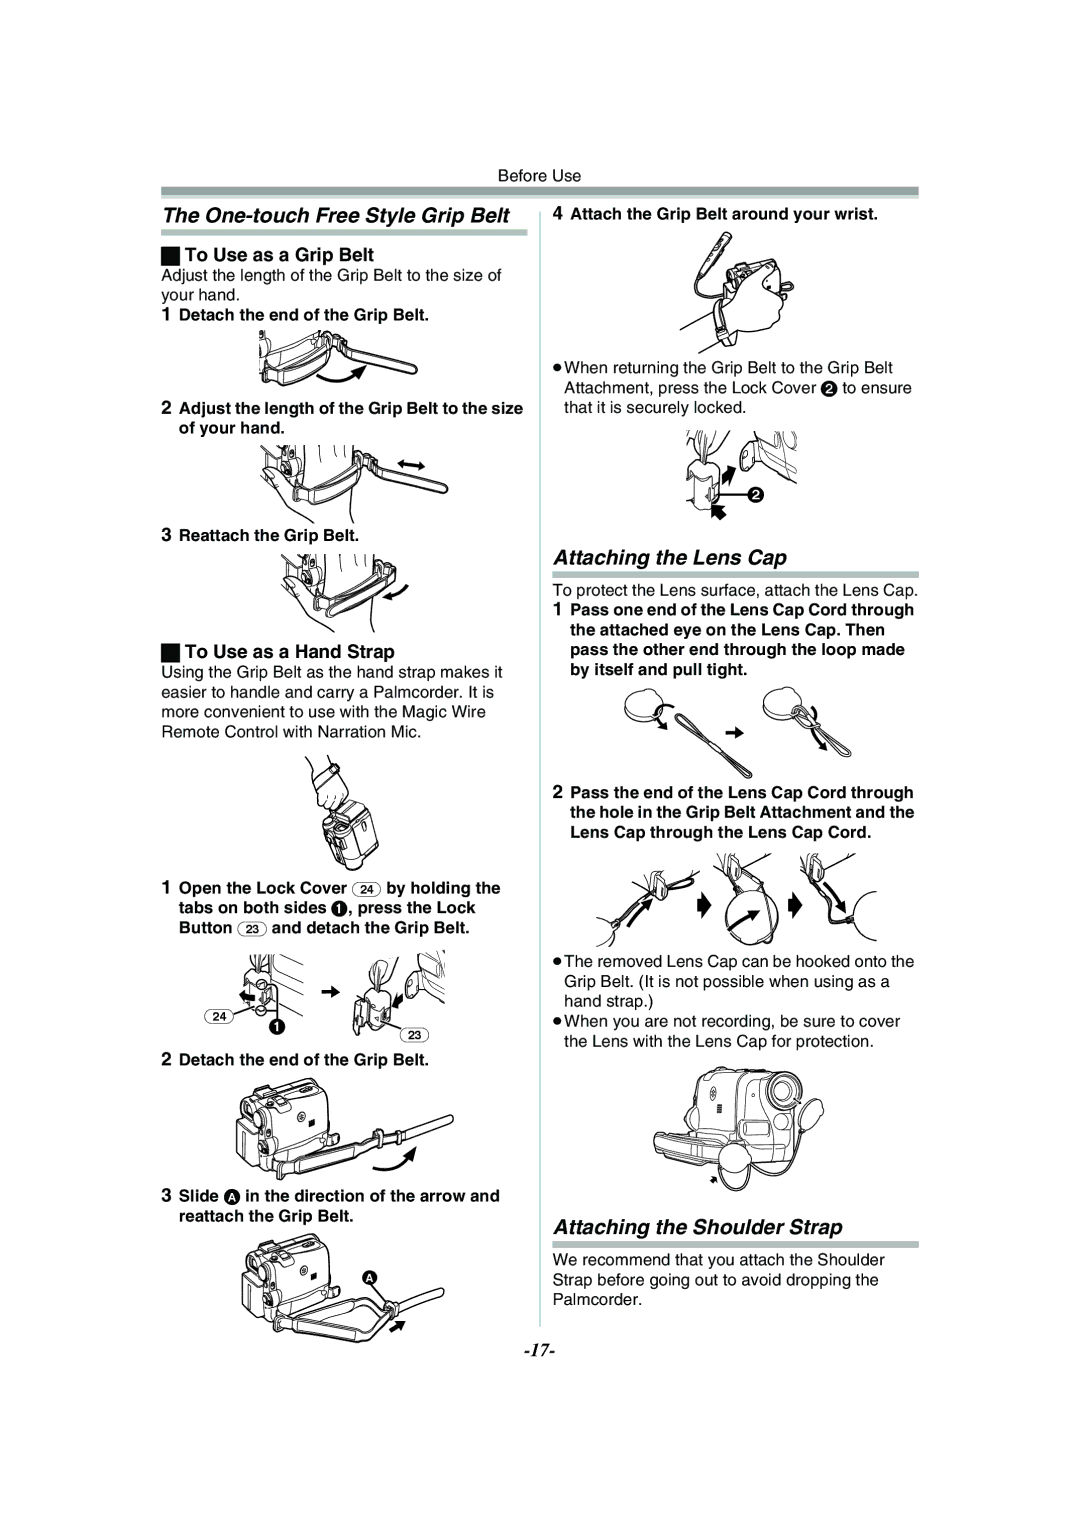
1Open the Lock Cover (24) by holding the tabs on both sides 1, press the Lock Button (23) and detach the Grip Belt.
(24) | 1 |
|
| (23) | |
|
|
2Detach the end of the Grip Belt.
3Slide A in the direction of the arrow and reattach the Grip Belt.
A
4Attach the Grip Belt around your wrist.
≥When returning the Grip Belt to the Grip Belt Attachment, press the Lock Cover 2 to ensure that it is securely locked.
![]() 2
2
Attaching the Lens Cap
To protect the Lens surface, attach the Lens Cap.
1Pass one end of the Lens Cap Cord through the attached eye on the Lens Cap. Then pass the other end through the loop made by itself and pull tight.
2Pass the end of the Lens Cap Cord through the hole in the Grip Belt Attachment and the Lens Cap through the Lens Cap Cord.
≥The removed Lens Cap can be hooked onto the Grip Belt. (It is not possible when using as a hand strap.)
≥When you are not recording, be sure to cover the Lens with the Lens Cap for protection.
Attaching the Shoulder Strap
We recommend that you attach the Shoulder Strap before going out to avoid dropping the Palmcorder.