Setting the Display Mouting Location
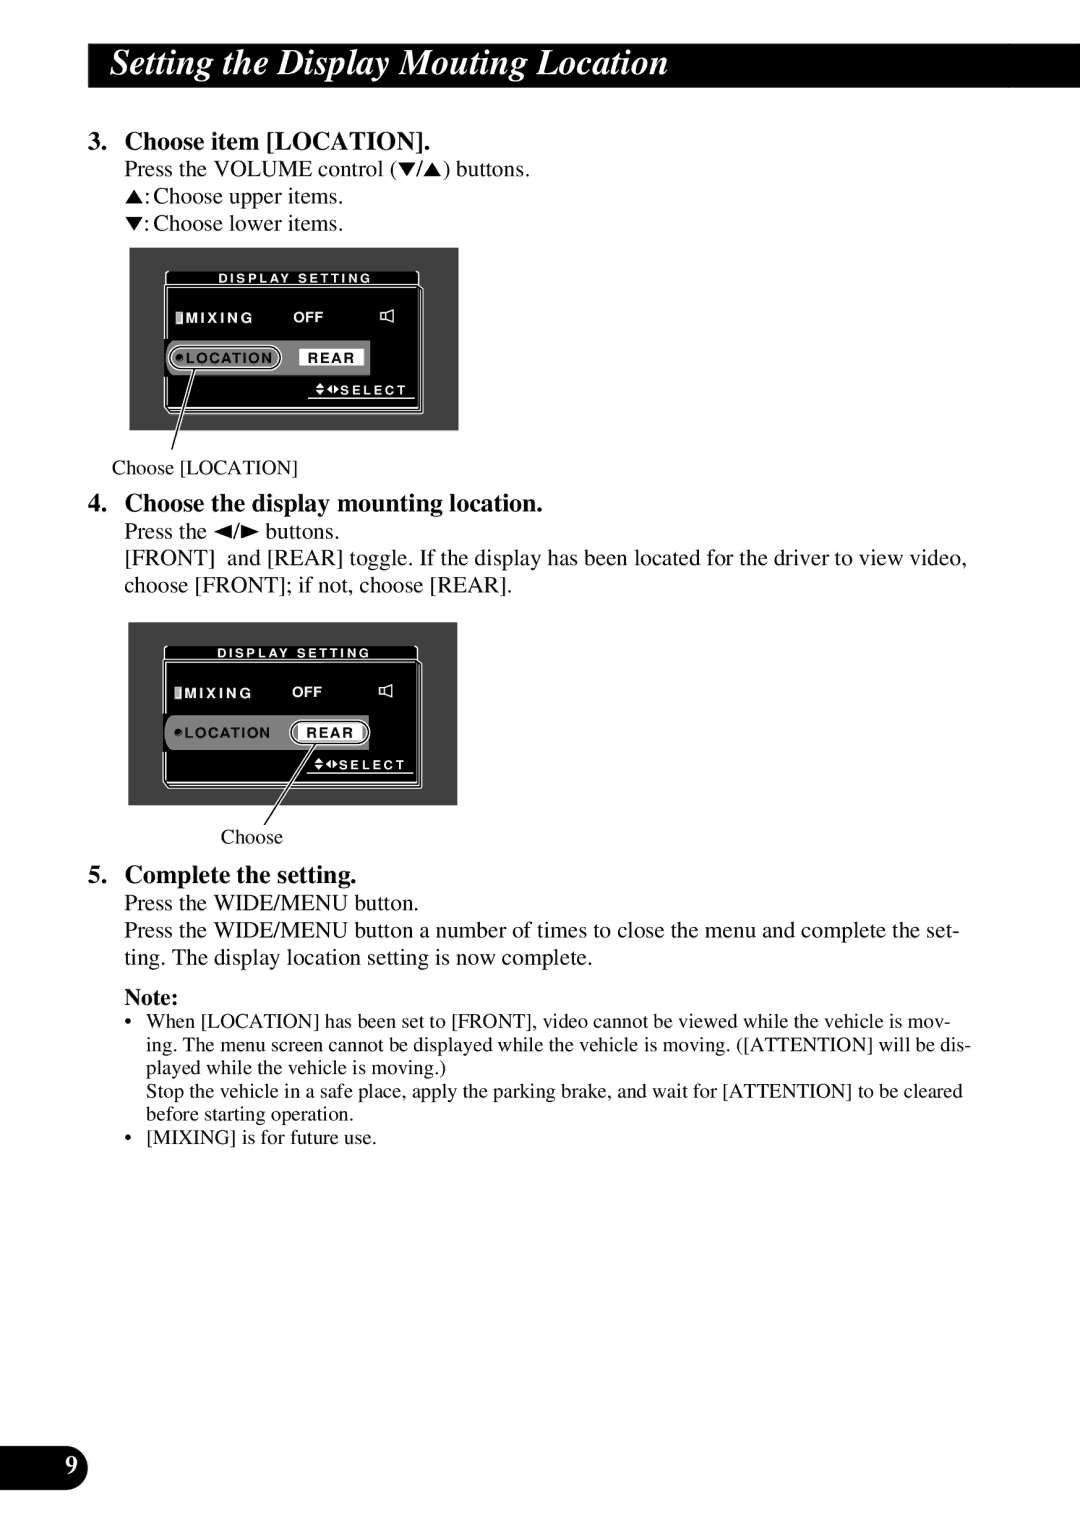
3.Choose item [LOCATION].
Press the VOLUME control (°/5) buttons. 5: Choose upper items.
°: Choose lower items.
D I S P L AY S E T T I N G | |
M I X I N G | OFF |
L O C AT I O N | R E A R |
| S E L E C T |
Choose [LOCATION]
4.Choose the display mounting location.
Press the 2/3buttons.
[FRONT] and [REAR] toggle. If the display has been located for the driver to view video, choose [FRONT]; if not, choose [REAR].
D I S P L AY S E T T I N G
M I X I N G | OFF |
L O C AT I O N | R E A R |
![]()
![]() S E L E C T
S E L E C T
Choose
5.Complete the setting.
Press the WIDE/MENU button.
Press the WIDE/MENU button a number of times to close the menu and complete the set- ting. The display location setting is now complete.
Note:
•When [LOCATION] has been set to [FRONT], video cannot be viewed while the vehicle is mov- ing. The menu screen cannot be displayed while the vehicle is moving. ([ATTENTION] will be dis- played while the vehicle is moving.)
Stop the vehicle in a safe place, apply the parking brake, and wait for [ATTENTION] to be cleared before starting operation.
•[MIXING] is for future use.
9
