Adjusting the 3 band parametric equalizer <FINE> (Open state)
About the adjustment using the parametric equalizer
The parametric equalizer can make the following adjustments.
Separate 3 band adjustment for left/right
It is possible to set up the left and right equalizer curves separately. Among the 31 frequen- cies, three bands (frequencies) each can be selected to serve as the left and right central frequencies, enabling level adjustments.
Frequency point: 20 Hz to 20 kHz (Every 1/3 octave, total 31 points)
Level adjustment range:
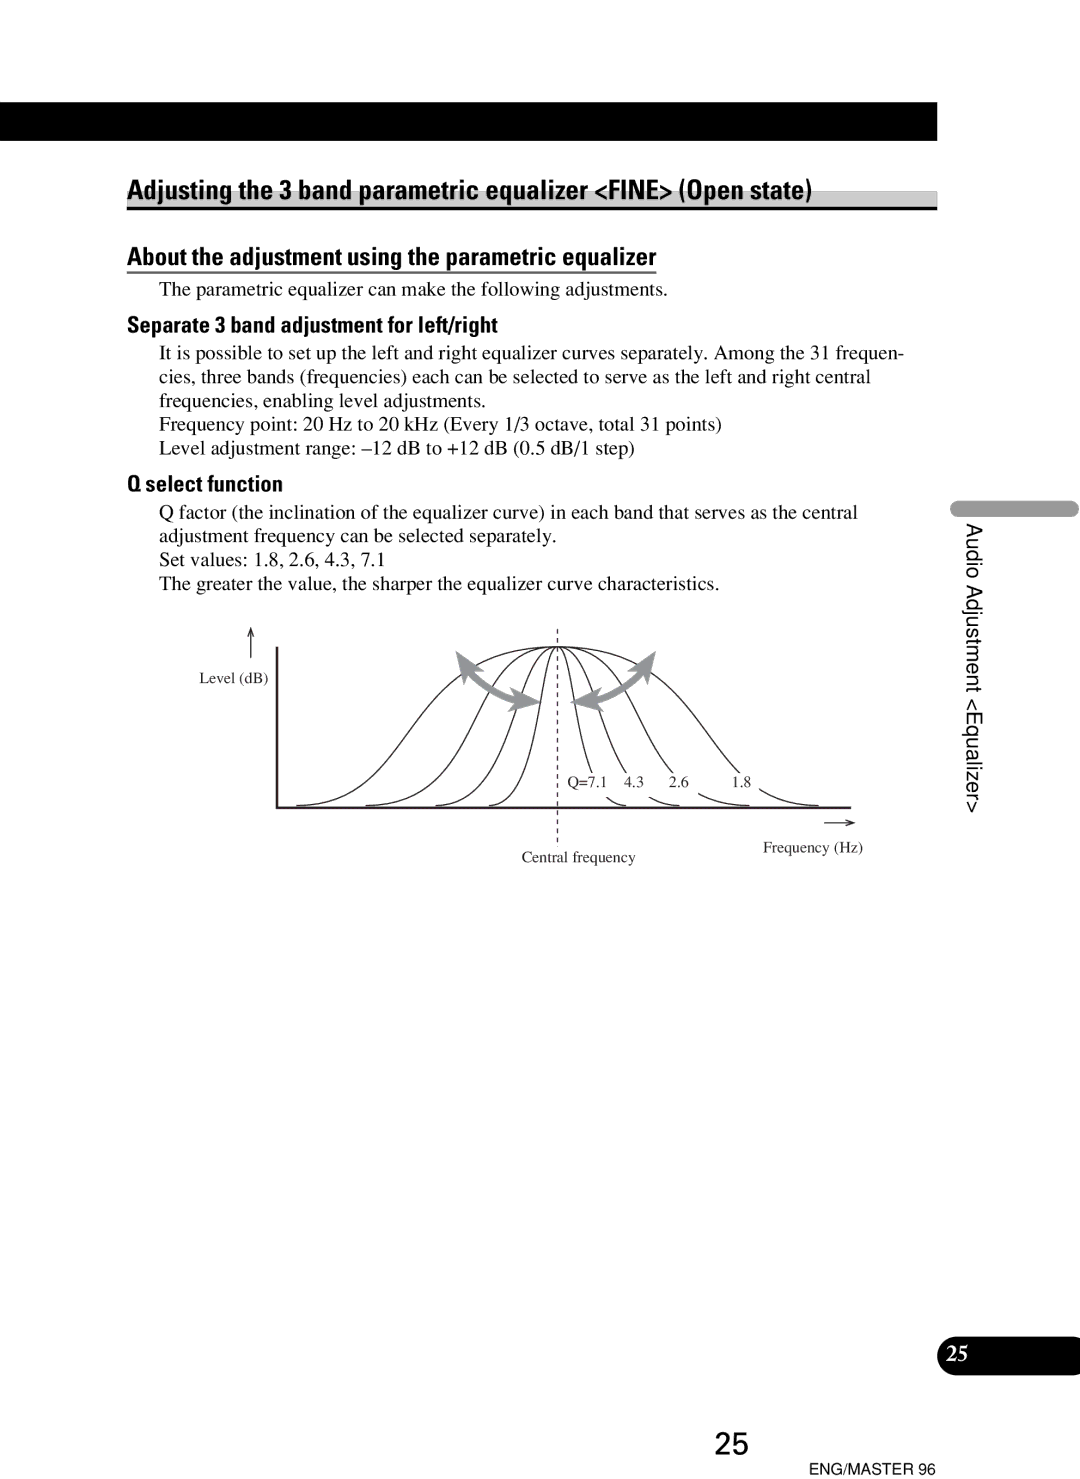
Q select function
Q factor (the inclination of the equalizer curve) in each band that serves as the central adjustment frequency can be selected separately.
Set values: 1.8, 2.6, 4.3, 7.1
The greater the value, the sharper the equalizer curve characteristics.
Level (dB)
Q=7.1 | 4.3 | 2.6 | 1.8 |
Audio Adjustment <Equalizer>
Central frequency
Frequency (Hz)
25
25
ENG/MASTER 96