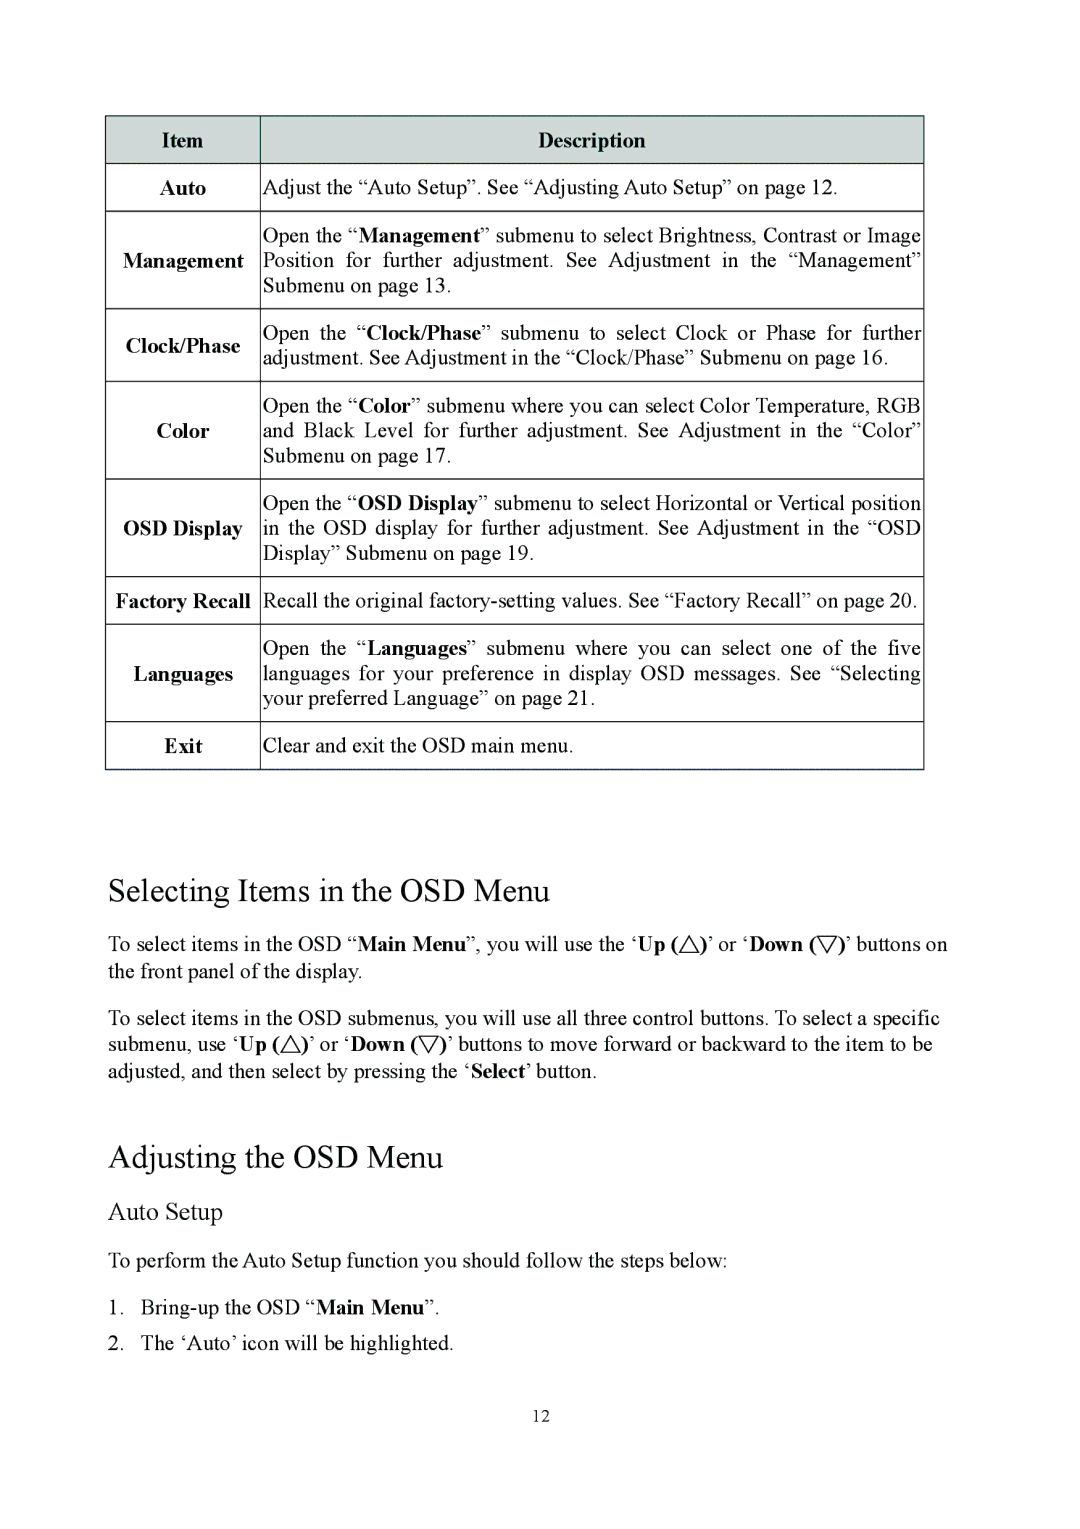
Item | Description |
|
|
Auto | Adjust the “Auto Setup”. See “Adjusting Auto Setup” on page 12. |
|
|
Management | Open the “Management” submenu to select Brightness, Contrast or Image |
Position for further adjustment. See Adjustment in the “Management” | |
| Submenu on page 13. |
|
|
Clock/Phase | Open the “Clock/Phase” submenu to select Clock or Phase for further |
adjustment. See Adjustment in the “Clock/Phase” Submenu on page 16. | |
|
|
Color | Open the “Color” submenu where you can select Color Temperature, RGB |
and Black Level for further adjustment. See Adjustment in the “Color” | |
| Submenu on page 17. |
|
|
OSD Display | Open the “OSD Display” submenu to select Horizontal or Vertical position |
in the OSD display for further adjustment. See Adjustment in the “OSD | |
| Display” Submenu on page 19. |
|
|
Factory Recall | Recall the original |
|
|
Languages | Open the “Languages” submenu where you can select one of the five |
languages for your preference in display OSD messages. See “Selecting | |
| your preferred Language” on page 21. |
|
|
Exit | Clear and exit the OSD main menu. |
|
|
Selecting Items in the OSD Menu
To select items in the OSD “Main Menu”, you will use the ‘Up (△)’ or ‘Down (▽)’ buttons on the front panel of the display.
To select items in the OSD submenus, you will use all three control buttons. To select a specific submenu, use ‘Up (△)’ or ‘Down (▽)’ buttons to move forward or backward to the item to be adjusted, and then select by pressing the ‘Select’ button.
Adjusting the OSD Menu
Auto Setup
To perform the Auto Setup function you should follow the steps below:
1.
2.The ‘Auto’ icon will be highlighted.
12