ADJUSTING 90 AND 45 DEGREE POSITIVE STOPS
Positive stops are provided to quickly and accurately position the blade at 90 and 45 degrees to the table. To check and adjust the positive stops, proceed as follows:
DISCONNECT MACHINE FROM POWER
SOURCE.
1.Raise the saw blade all the way to the top and turn the blade tilting handwheel clockwise as far as it will go.
2. Using a square, check to see if the blade is 90 |
degrees to the table Fig. 32. If an adjustment is |
necessary, turn the blade tilting handwheel |
counterclockwise. Loosen locknut (A) Fig. 34, and tighten |
or loosen adjusting screw (B) until head of screw (B) |
contacts casting on front trunnion when the blade is at 90 |
degrees to the table. Then tighten locknut (A). |
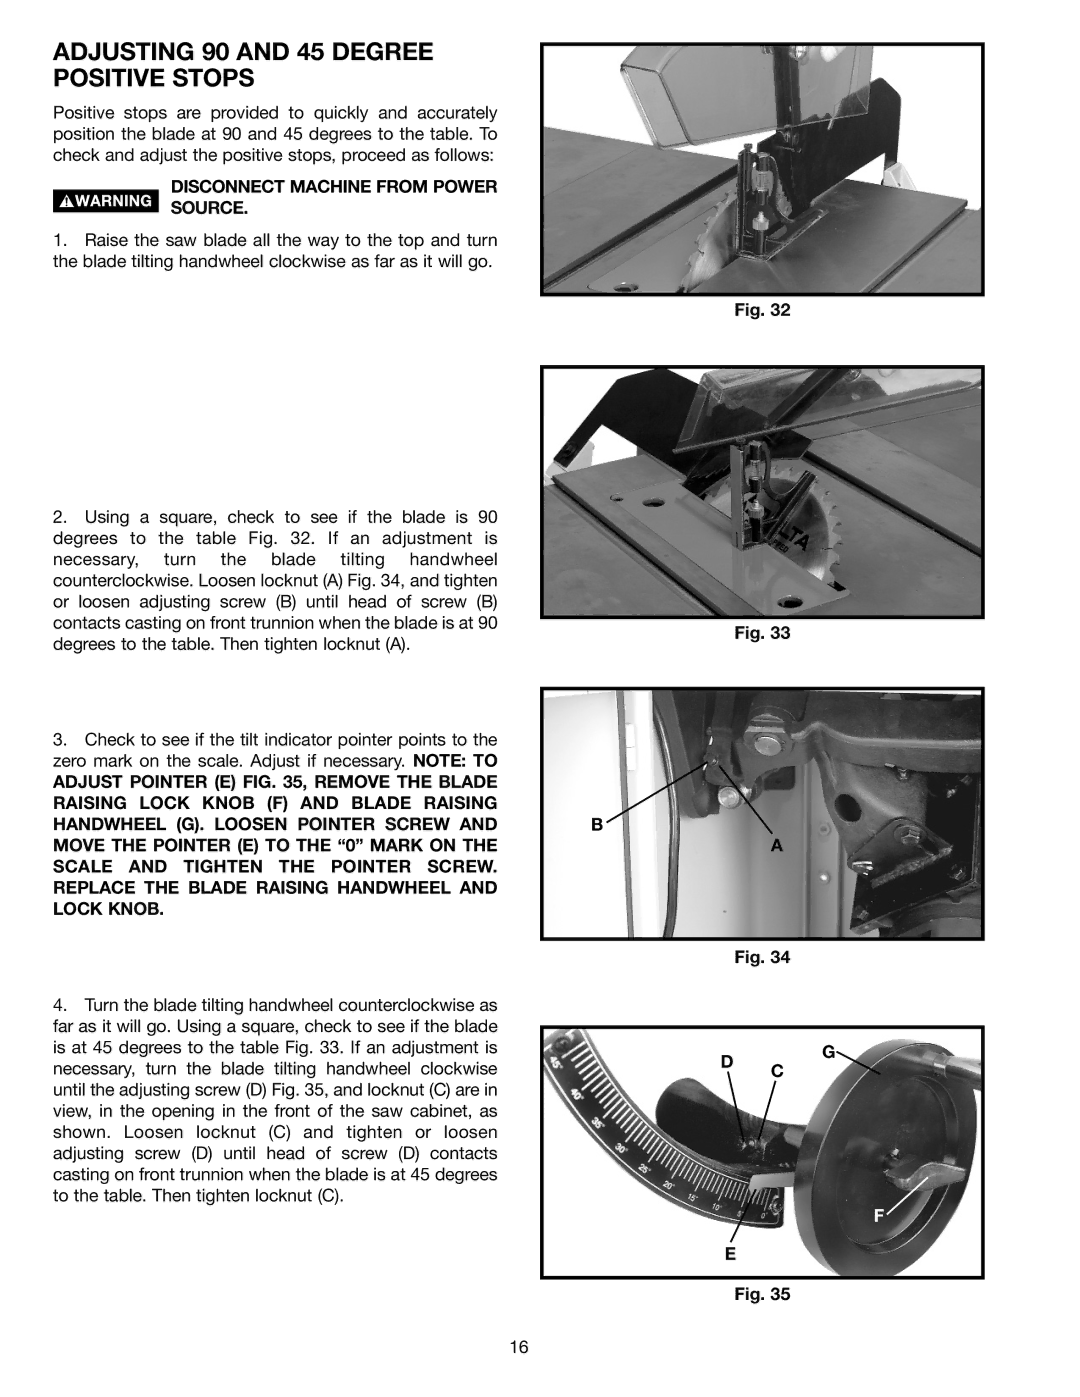
3. Check to see if the tilt indicator pointer points to the |
zero mark on the scale. Adjust if necessary. NOTE: TO |
ADJUST POINTER (E) FIG. 35, REMOVE THE BLADE |
RAISING LOCK KNOB (F) AND BLADE RAISING |
HANDWHEEL (G). LOOSEN POINTER SCREW AND |
MOVE THE POINTER (E) TO THE “0” MARK ON THE |
SCALE AND TIGHTEN THE POINTER SCREW. |
REPLACE THE BLADE RAISING HANDWHEEL AND |
LOCK KNOB. |
4. Turn the blade tilting handwheel counterclockwise as |
far as it will go. Using a square, check to see if the blade |
Fig. 32
Fig. 33
B
A
Fig. 34
is at 45 degrees to the table Fig. 33. If an adjustment is |
necessary, turn the blade tilting handwheel clockwise |
until the adjusting screw (D) Fig. 35, and locknut (C) are in |
view, in the opening in the front of the saw cabinet, as |
shown. Loosen locknut (C) and tighten or loosen |
adjusting screw (D) until head of screw (D) contacts |
casting on front trunnion when the blade is at 45 degrees |
to the table. Then tighten locknut (C). |
D C
E
G
F
Fig. 35
16