14.Verify that the knife is still in adjustment (steps 4 and 5).
15.Tighten the gib lock screws.
16.Repeat this entire procedure for the remaining two knives
Replacing Knives (Model 54A only)
![]() Jointer knives are dangerously sharp. Use extreme caution when inspecting, removing, sharpening, or replacing knives. Failure to comply may cause serious injury.
Jointer knives are dangerously sharp. Use extreme caution when inspecting, removing, sharpening, or replacing knives. Failure to comply may cause serious injury.
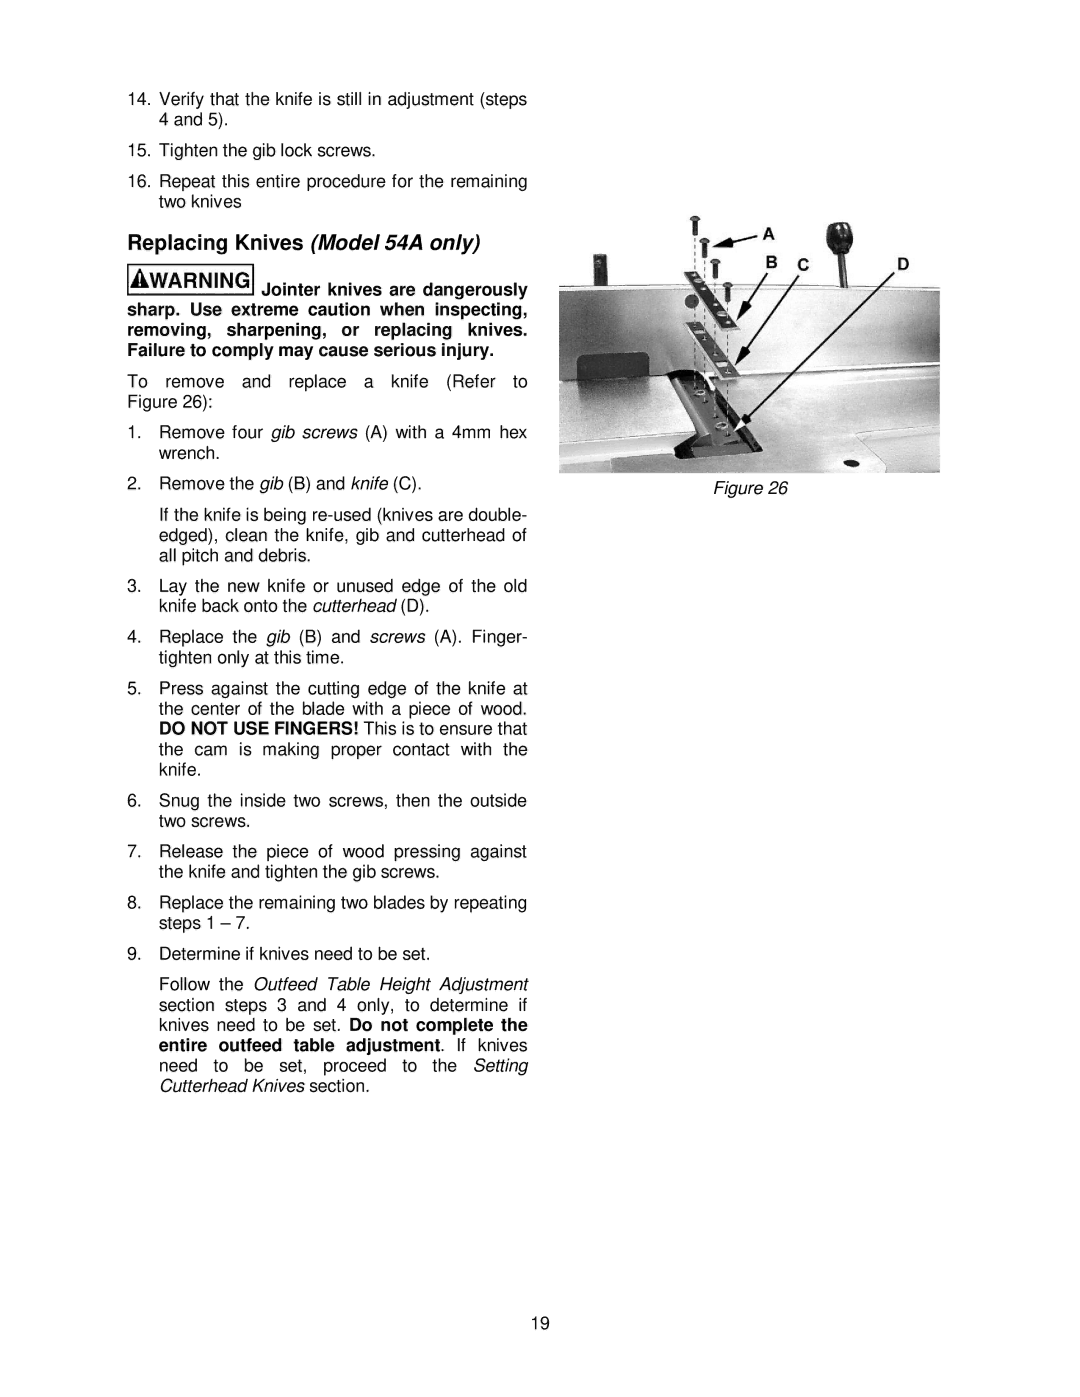
To remove and replace a knife (Refer to
Figure 26):
1.Remove four gib screws (A) with a 4mm hex wrench.
2. Remove the gib (B) and knife (C). | Figure 26 |
If the knife is being |
|
edged), clean the knife, gib and cutterhead of |
|
all pitch and debris. |
|
3.Lay the new knife or unused edge of the old knife back onto the cutterhead (D).
4.Replace the gib (B) and screws (A). Finger- tighten only at this time.
5.Press against the cutting edge of the knife at the center of the blade with a piece of wood. DO NOT USE FINGERS! This is to ensure that the cam is making proper contact with the knife.
6.Snug the inside two screws, then the outside two screws.
7.Release the piece of wood pressing against the knife and tighten the gib screws.
8.Replace the remaining two blades by repeating steps 1 – 7.
9.Determine if knives need to be set.
Follow the Outfeed Table Height Adjustment section steps 3 and 4 only, to determine if knives need to be set. Do not complete the entire outfeed table adjustment. If knives need to be set, proceed to the Setting Cutterhead Knives section.
19