Figure 27
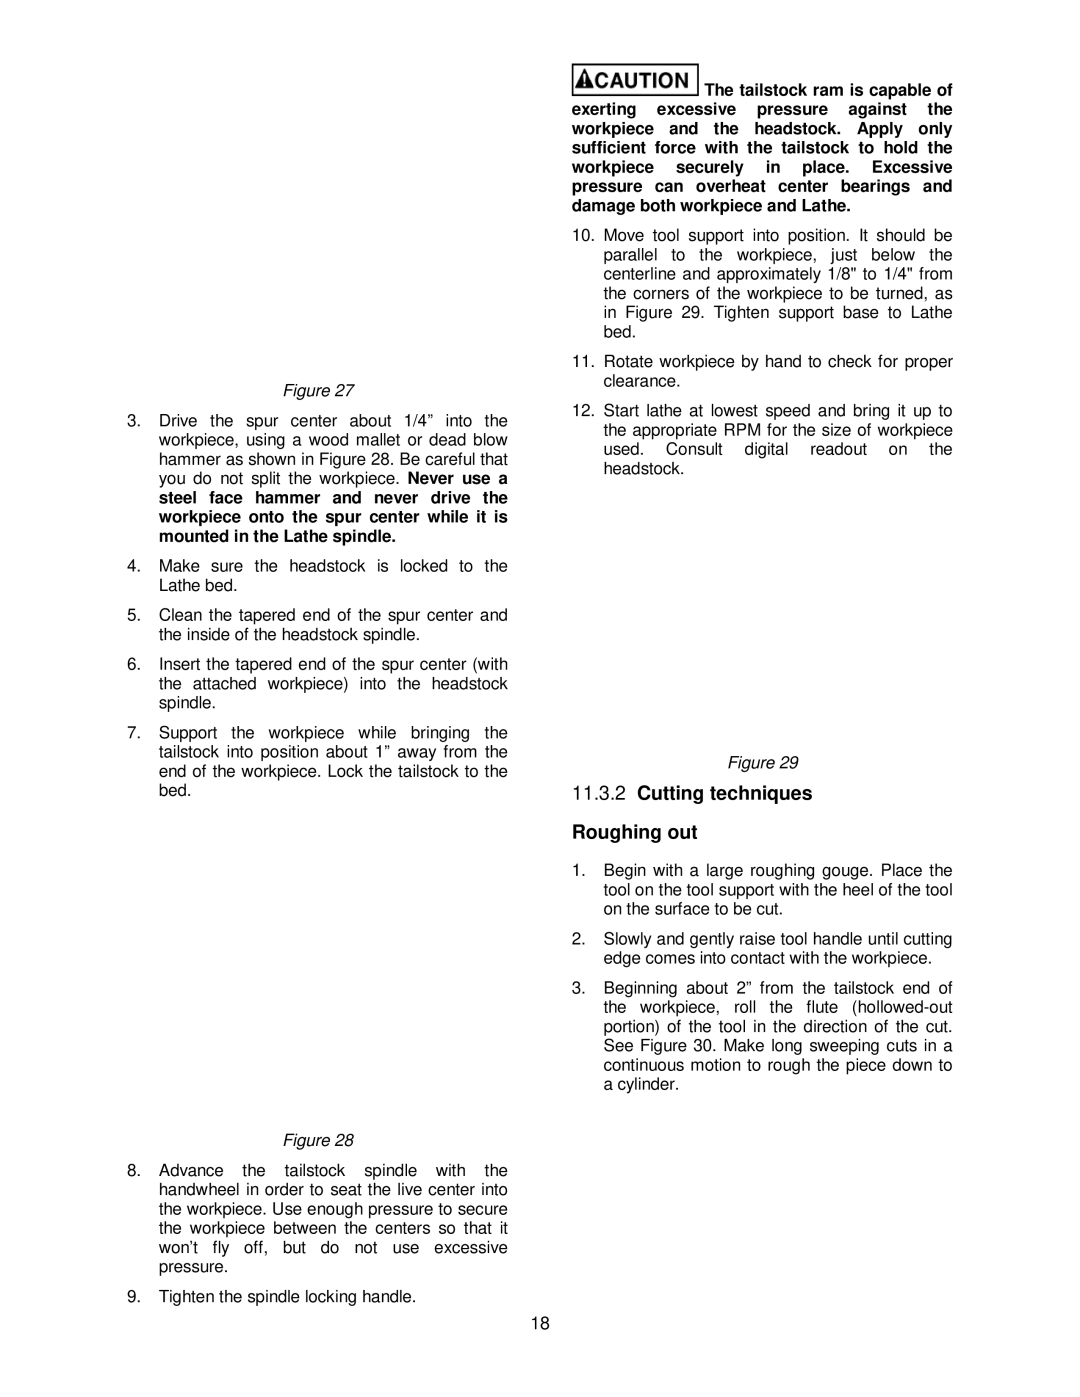
3.Drive the spur center about 1/4” into the workpiece, using a wood mallet or dead blow hammer as shown in Figure 28. Be careful that you do not split the workpiece. Never use a steel face hammer and never drive the workpiece onto the spur center while it is mounted in the Lathe spindle.
4.Make sure the headstock is locked to the Lathe bed.
5.Clean the tapered end of the spur center and the inside of the headstock spindle.
6.Insert the tapered end of the spur center (with the attached workpiece) into the headstock spindle.
7.Support the workpiece while bringing the tailstock into position about 1” away from the end of the workpiece. Lock the tailstock to the bed.
Figure 28
8.Advance the tailstock spindle with the handwheel in order to seat the live center into the workpiece. Use enough pressure to secure the workpiece between the centers so that it won’t fly off, but do not use excessive pressure.
9.Tighten the spindle locking handle.
![]() The tailstock ram is capable of exerting excessive pressure against the workpiece and the headstock. Apply only sufficient force with the tailstock to hold the workpiece securely in place. Excessive pressure can overheat center bearings and damage both workpiece and Lathe.
The tailstock ram is capable of exerting excessive pressure against the workpiece and the headstock. Apply only sufficient force with the tailstock to hold the workpiece securely in place. Excessive pressure can overheat center bearings and damage both workpiece and Lathe.
10.Move tool support into position. It should be parallel to the workpiece, just below the centerline and approximately 1/8" to 1/4" from the corners of the workpiece to be turned, as in Figure 29. Tighten support base to Lathe bed.
11.Rotate workpiece by hand to check for proper clearance.
12.Start lathe at lowest speed and bring it up to the appropriate RPM for the size of workpiece used. Consult digital readout on the headstock.
Figure 29
11.3.2Cutting techniques Roughing out
1.Begin with a large roughing gouge. Place the tool on the tool support with the heel of the tool on the surface to be cut.
2.Slowly and gently raise tool handle until cutting edge comes into contact with the workpiece.
3.Beginning about 2” from the tailstock end of the workpiece, roll the flute
18