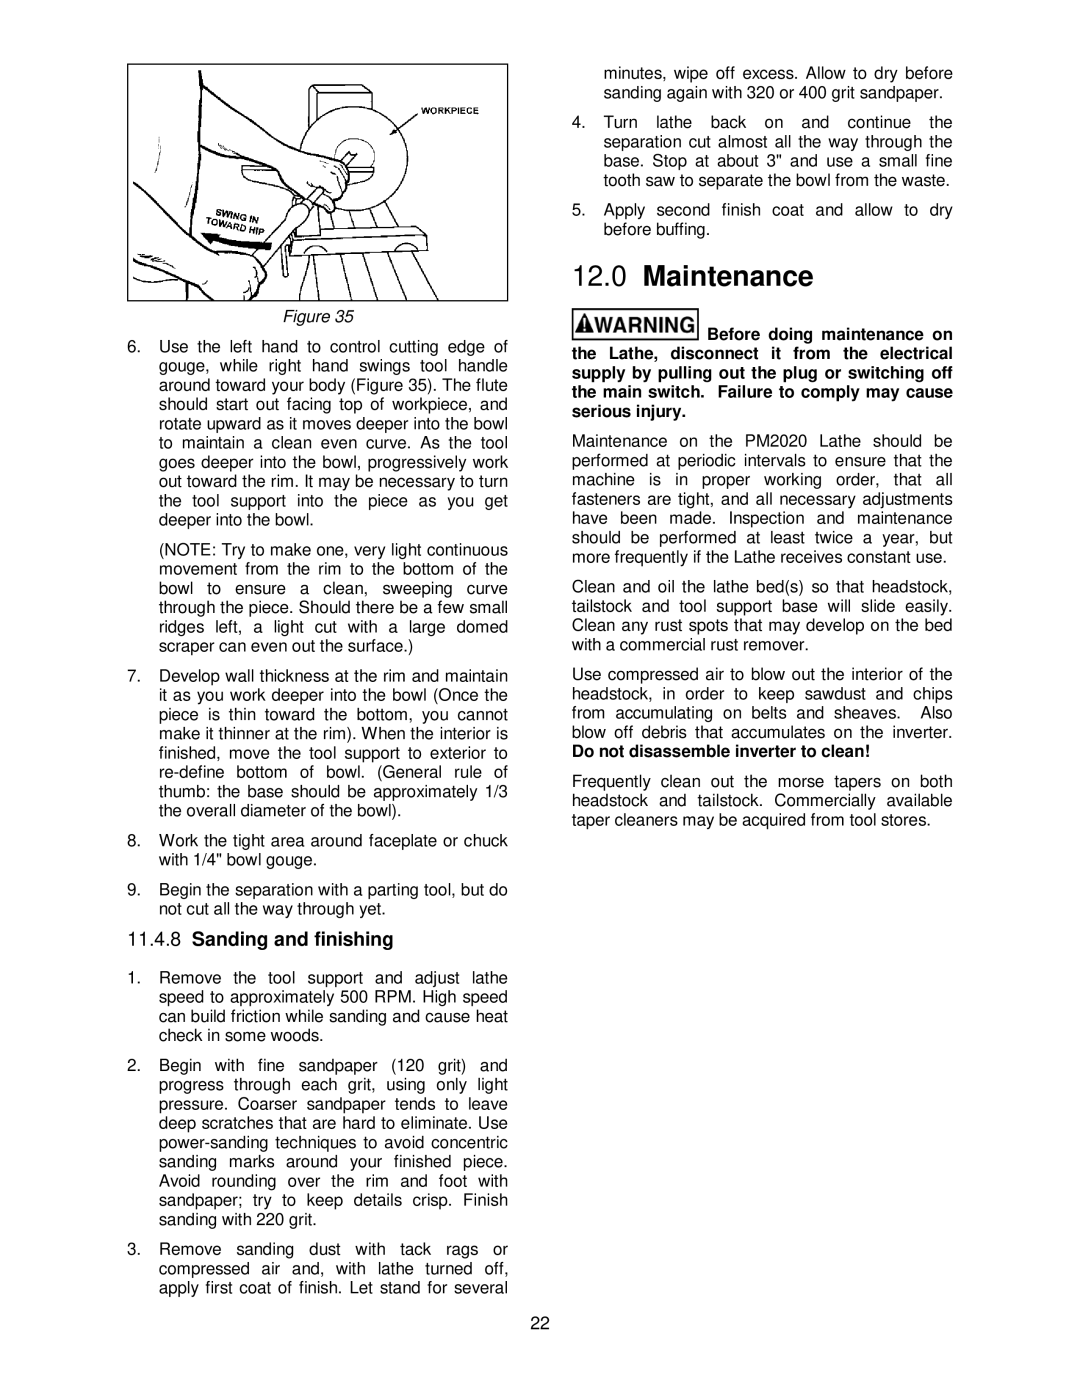
Figure 35
6.Use the left hand to control cutting edge of gouge, while right hand swings tool handle around toward your body (Figure 35). The flute should start out facing top of workpiece, and rotate upward as it moves deeper into the bowl to maintain a clean even curve. As the tool goes deeper into the bowl, progressively work out toward the rim. It may be necessary to turn the tool support into the piece as you get deeper into the bowl.
(NOTE: Try to make one, very light continuous movement from the rim to the bottom of the bowl to ensure a clean, sweeping curve through the piece. Should there be a few small ridges left, a light cut with a large domed scraper can even out the surface.)
7.Develop wall thickness at the rim and maintain it as you work deeper into the bowl (Once the piece is thin toward the bottom, you cannot make it thinner at the rim). When the interior is finished, move the tool support to exterior to
8.Work the tight area around faceplate or chuck with 1/4" bowl gouge.
9.Begin the separation with a parting tool, but do not cut all the way through yet.
11.4.8Sanding and finishing
1.Remove the tool support and adjust lathe speed to approximately 500 RPM. High speed can build friction while sanding and cause heat check in some woods.
2.Begin with fine sandpaper (120 grit) and progress through each grit, using only light pressure. Coarser sandpaper tends to leave deep scratches that are hard to eliminate. Use
3.Remove sanding dust with tack rags or compressed air and, with lathe turned off, apply first coat of finish. Let stand for several
minutes, wipe off excess. Allow to dry before sanding again with 320 or 400 grit sandpaper.
4.Turn lathe back on and continue the separation cut almost all the way through the base. Stop at about 3" and use a small fine tooth saw to separate the bowl from the waste.
5.Apply second finish coat and allow to dry before buffing.
12.0Maintenance
![]() Before doing maintenance on the Lathe, disconnect it from the electrical supply by pulling out the plug or switching off the main switch. Failure to comply may cause serious injury.
Before doing maintenance on the Lathe, disconnect it from the electrical supply by pulling out the plug or switching off the main switch. Failure to comply may cause serious injury.
Maintenance on the PM2020 Lathe should be performed at periodic intervals to ensure that the machine is in proper working order, that all fasteners are tight, and all necessary adjustments have been made. Inspection and maintenance should be performed at least twice a year, but more frequently if the Lathe receives constant use.
Clean and oil the lathe bed(s) so that headstock, tailstock and tool support base will slide easily. Clean any rust spots that may develop on the bed with a commercial rust remover.
Use compressed air to blow out the interior of the headstock, in order to keep sawdust and chips from accumulating on belts and sheaves. Also blow off debris that accumulates on the inverter.
Do not disassemble inverter to clean!
Frequently clean out the morse tapers on both headstock and tailstock. Commercially available taper cleaners may be acquired from tool stores.
22