7.0Assembly
Tools required for assembly
14mm wrench
4mm and 8mm hex wrenches
 The Lathe should be disconnected from power during assembly.
1.Remove any screws or straps that hold the Lathe parts to the pallet, and remove protective wrapping. Set all the boxes containing legs and accessories to the side.
2.Before assembling the legs, decrease the weight on the Lathe bed: Remove the stop bolt at each end of the bed, and slide off the headstock, tailstock and tool support base (Refer to sect. 9.1, Headstock and Tailstock Movement, for any clarification on removing these).
![]() The headstock is heavy; use caution when removing it from the lathe bed.
The headstock is heavy; use caution when removing it from the lathe bed.
3.Turn the lathe bed upside down on the shipping pallet (make sure there is nothing beneath that would scratch the bed ways).
4.Install the legs to the bed using eight socket head cap screws with eight lock washers and eight flat washers (Figure 1). Tighten the screws firmly with an 8mm hex wrench.
Figure 1
5.Screw the levelers into the threaded holes of the legs (Figure 1). Tighten the hex nuts against the bottom of the legs with a 14mm wrench. The levelers can be adjusted at any time to ensure the Lathe is stable and level.
6.Use an assistant to help stand the Lathe right side up on its legs.
7.The Lathe should be located in a dry area, on a sturdy floor, and with sufficient lighting. Leave plenty of space around the machine for operations and routine maintenance work.
8.Exposed metal areas of the Lathe, such as the bed and spindles, have been factory coated with a protectant. This should be removed with a soft cloth and a
9.
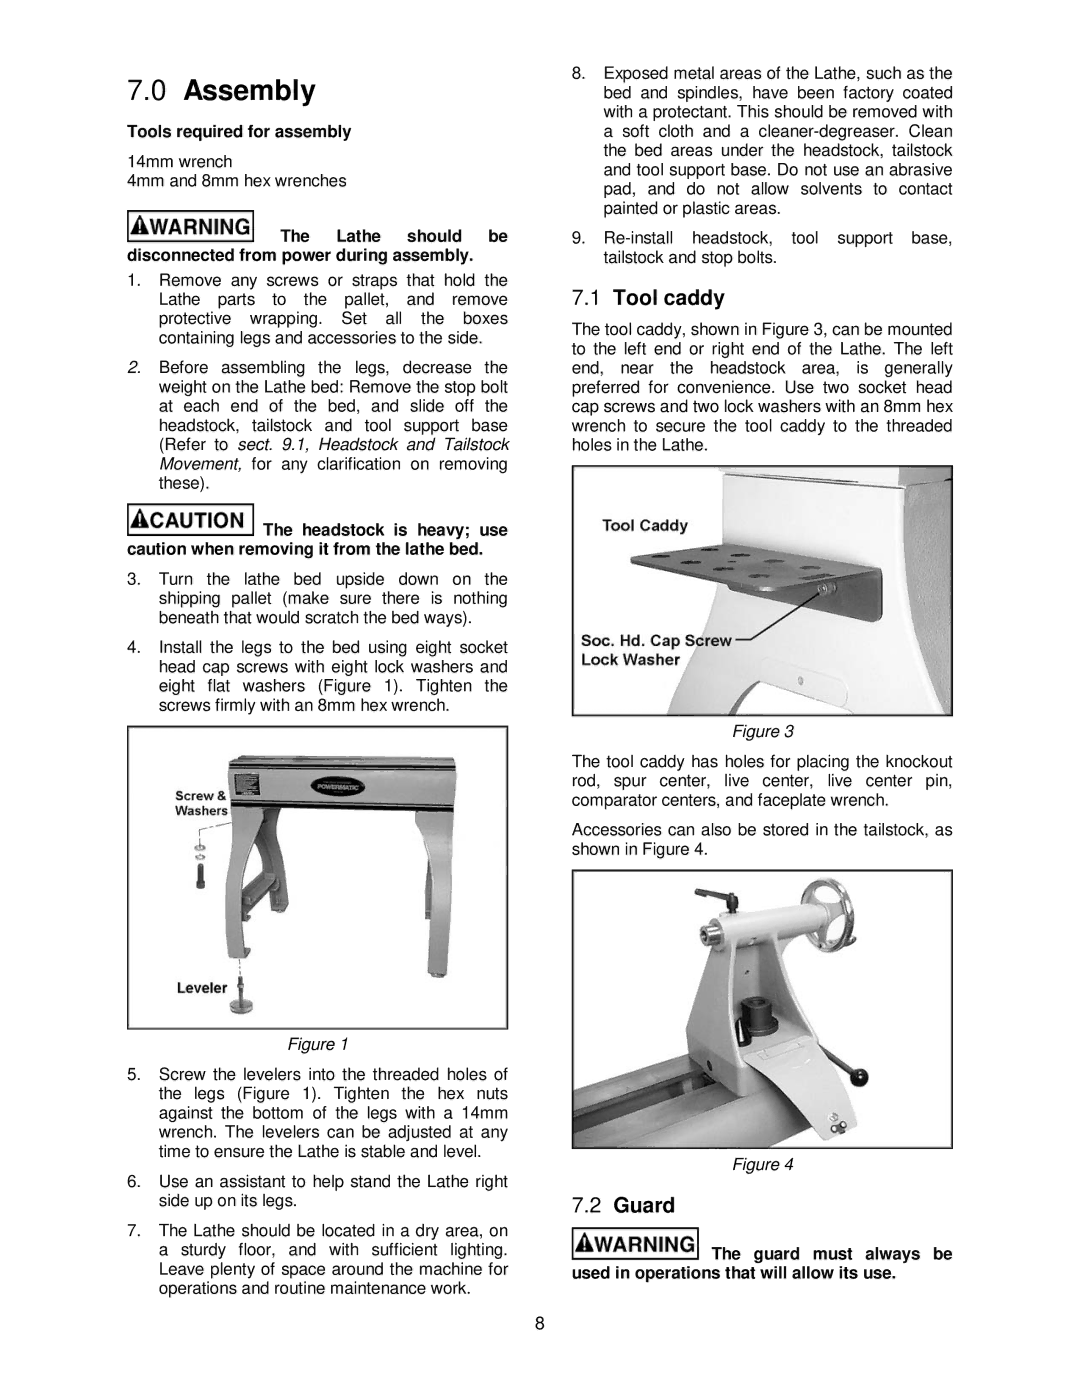
7.1Tool caddy
The tool caddy, shown in Figure 3, can be mounted to the left end or right end of the Lathe. The left end, near the headstock area, is generally preferred for convenience. Use two socket head cap screws and two lock washers with an 8mm hex wrench to secure the tool caddy to the threaded holes in the Lathe.
Figure 3
The tool caddy has holes for placing the knockout rod, spur center, live center, live center pin, comparator centers, and faceplate wrench.
Accessories can also be stored in the tailstock, as shown in Figure 4.
Figure 4
7.2Guard
![]() The guard must always be used in operations that will allow its use.
The guard must always be used in operations that will allow its use.
8