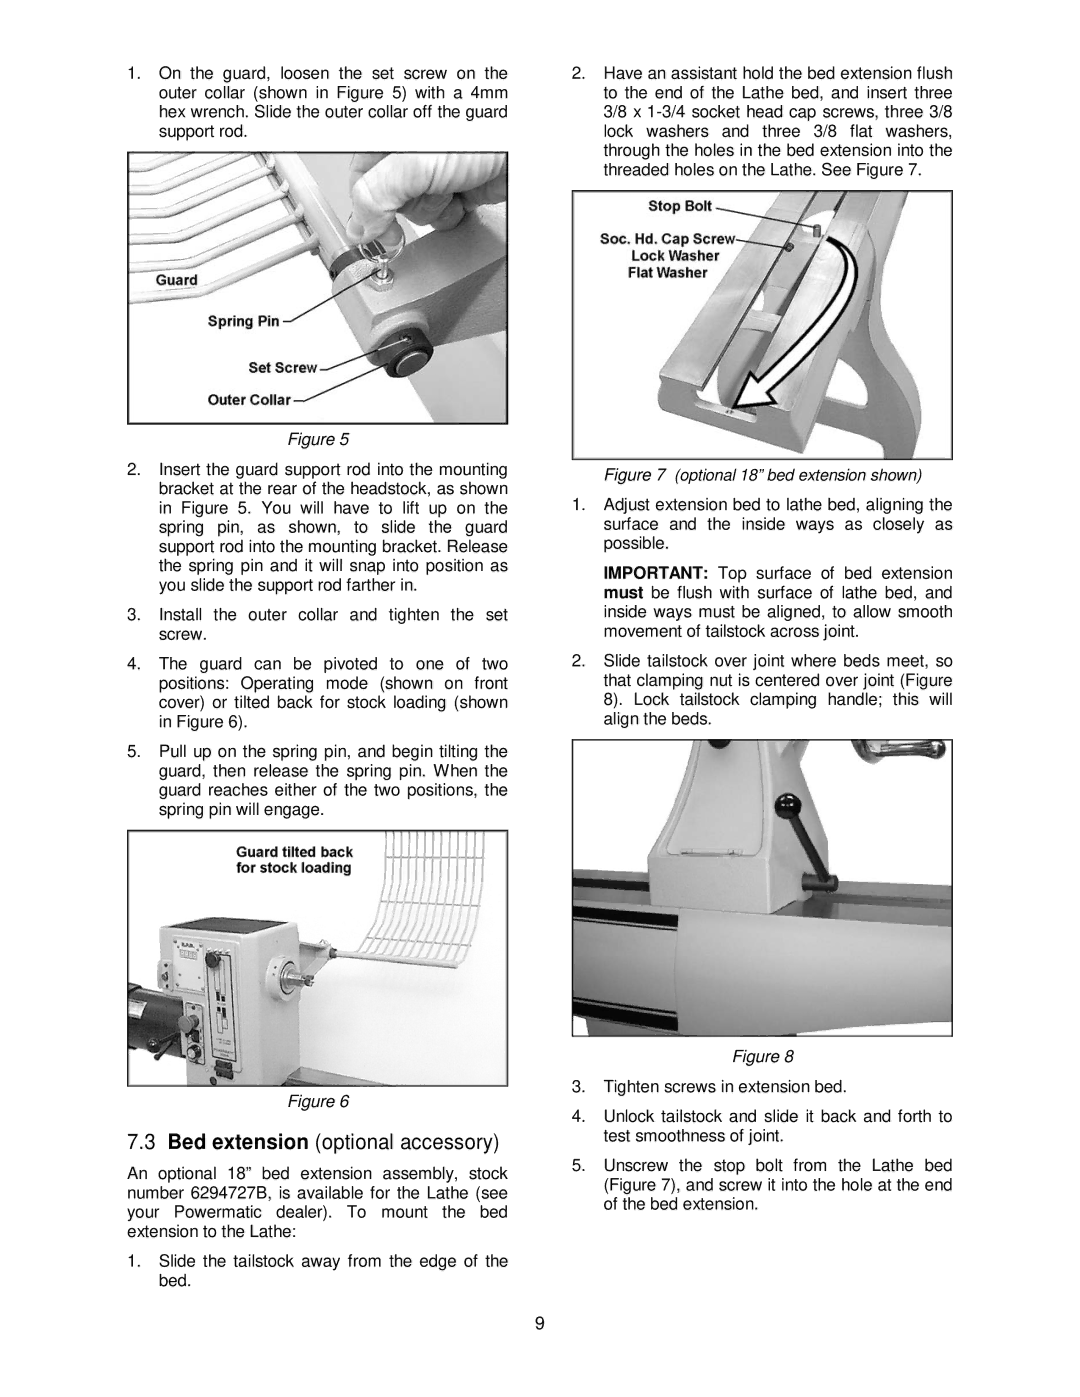
1.On the guard, loosen the set screw on the outer collar (shown in Figure 5) with a 4mm hex wrench. Slide the outer collar off the guard support rod.
2.Have an assistant hold the bed extension flush to the end of the Lathe bed, and insert three 3/8 x
Figure 5
2.Insert the guard support rod into the mounting bracket at the rear of the headstock, as shown in Figure 5. You will have to lift up on the spring pin, as shown, to slide the guard support rod into the mounting bracket. Release the spring pin and it will snap into position as you slide the support rod farther in.
3.Install the outer collar and tighten the set screw.
4.The guard can be pivoted to one of two positions: Operating mode (shown on front cover) or tilted back for stock loading (shown in Figure 6).
5.Pull up on the spring pin, and begin tilting the guard, then release the spring pin. When the guard reaches either of the two positions, the spring pin will engage.
Figure 6
7.3 Bed extension (optional accessory)
An optional 18” bed extension assembly, stock number 6294727B, is available for the Lathe (see your Powermatic dealer). To mount the bed extension to the Lathe:
1.Slide the tailstock away from the edge of the bed.
Figure 7 (optional 18” bed extension shown)
1.Adjust extension bed to lathe bed, aligning the surface and the inside ways as closely as possible.
IMPORTANT: Top surface of bed extension must be flush with surface of lathe bed, and inside ways must be aligned, to allow smooth movement of tailstock across joint.
2.Slide tailstock over joint where beds meet, so that clamping nut is centered over joint (Figure 8). Lock tailstock clamping handle; this will align the beds.
Figure 8
3.Tighten screws in extension bed.
4.Unlock tailstock and slide it back and forth to test smoothness of joint.
5.Unscrew the stop bolt from the Lathe bed (Figure 7), and screw it into the hole at the end of the bed extension.
9