C O M M E R C I A L | P R O D U C T S | D I V I S I O N |
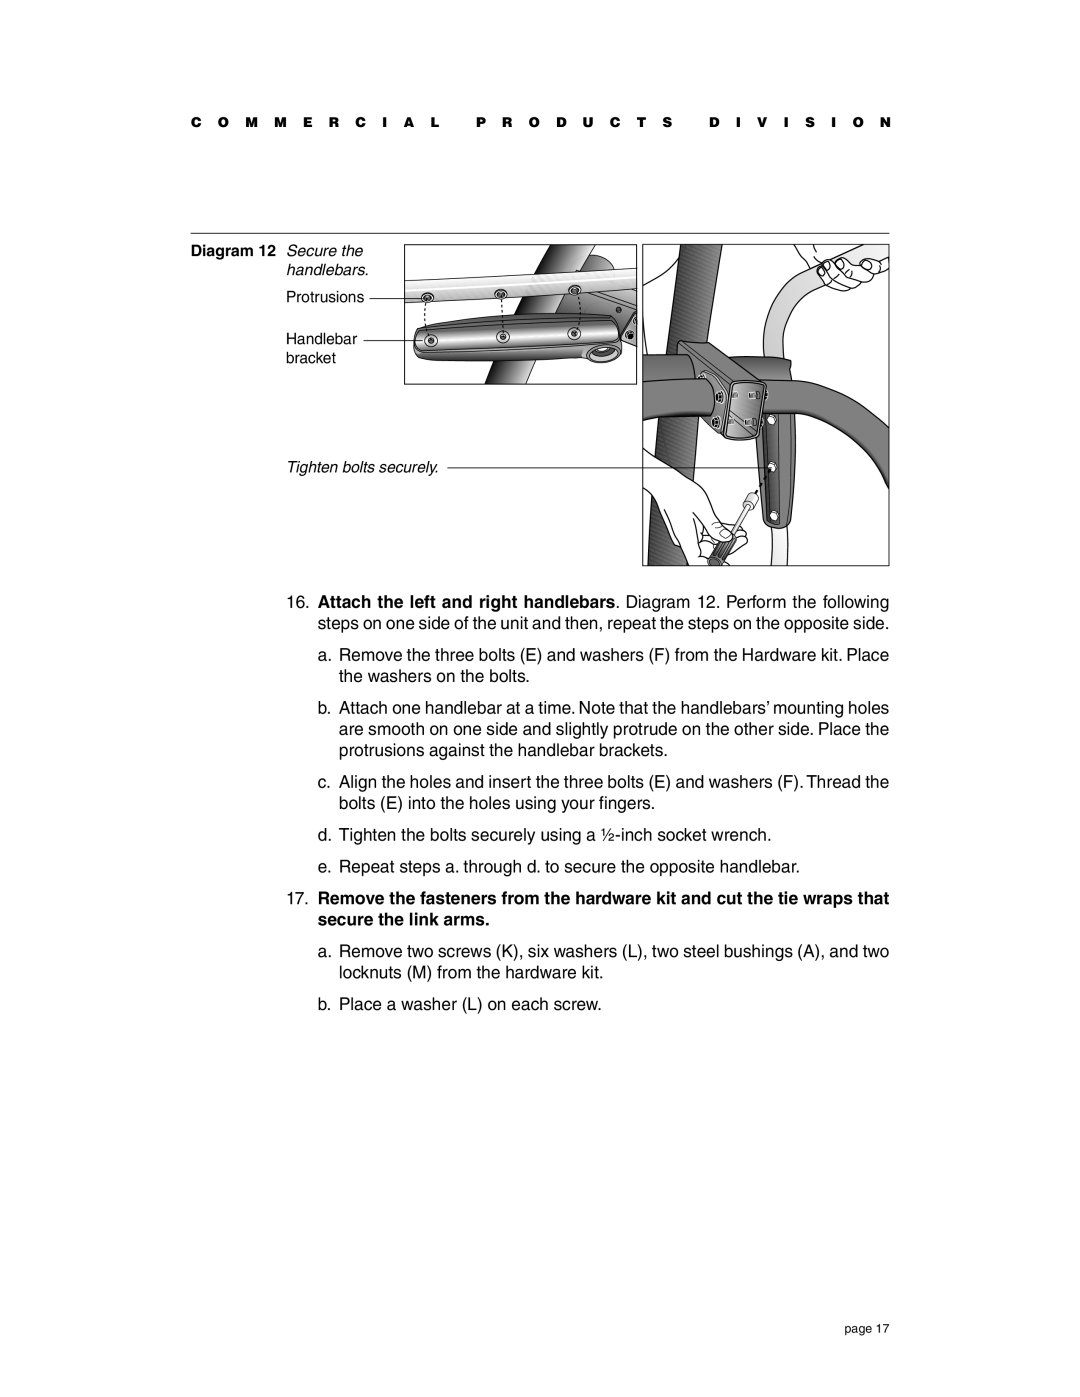
Diagram 12 Secure the |
|
|
handlebars. |
|
|
Protrusions |
|
|
Handlebar |
|
|
bracket |
|
|
Tighten bolts securely. |
|
|
16.Attach the left and right handlebars. Diagram 12. Perform the following steps on one side of the unit and then, repeat the steps on the opposite side.
a.Remove the three bolts (E) and washers (F) from the Hardware kit. Place the washers on the bolts.
b.Attach one handlebar at a time. Note that the handlebars’ mounting holes are smooth on one side and slightly protrude on the other side. Place the protrusions against the handlebar brackets.
c.Align the holes and insert the three bolts (E) and washers (F). Thread the bolts (E) into the holes using your fingers.
d.Tighten the bolts securely using a
e.Repeat steps a. through d. to secure the opposite handlebar.
17.Remove the fasteners from the hardware kit and cut the tie wraps that secure the link arms.
a.Remove two screws (K), six washers (L), two steel bushings (A), and two locknuts (M) from the hardware kit.
b.Place a washer (L) on each screw.
page 17