I X . C A R E A N D M A I N T E N A N C E
Storage
Your power chair should be stored in a dry place, free from temperature extremes. When storing, disconnect the batteries from the power chair. See VII. “Batteries and Charging.”
WARNING! If you fail to store the unit properly, the frame can rust and the electronics can be damaged.
Cleaning Instructions
WARNING! Never hose off your power chair or place it in direct contact with water. Your power chair has a painted, ABS plastic body shroud that allows it to be easily wiped clean with a damp cloth.
WARNING! Never use any chemicals to clean a vinyl seat, as they may cause the seat to become slippery or dry out and crack. Use soapy water and dry the seat thoroughly.
Tire/Wheel Replacement
If you have pneumatic tires and you have a flat tire, you can replace the tube. If your chair is equipped with a solid tire insert, then you must replace the whole wheel assembly. Replacement tires, tubes, and wheel assemblies are readily available through your authorized Pride Provider.
WARNING! To avoid possible injury, be sure that the controller’s power is turned off and the power chair is not in freewheel mode before performing this procedure.
WARNING! Completely deflate the tire before attempting repair.
Follow these easy steps for a quick and safe repair for both pneumatic and solid tires:
1.Turnoffthepowertothecontroller.
2.Setthepowerchairuponblocks.
3.If you are changing a pneumatic tire, completely deflate it beforeremovingthewheel.
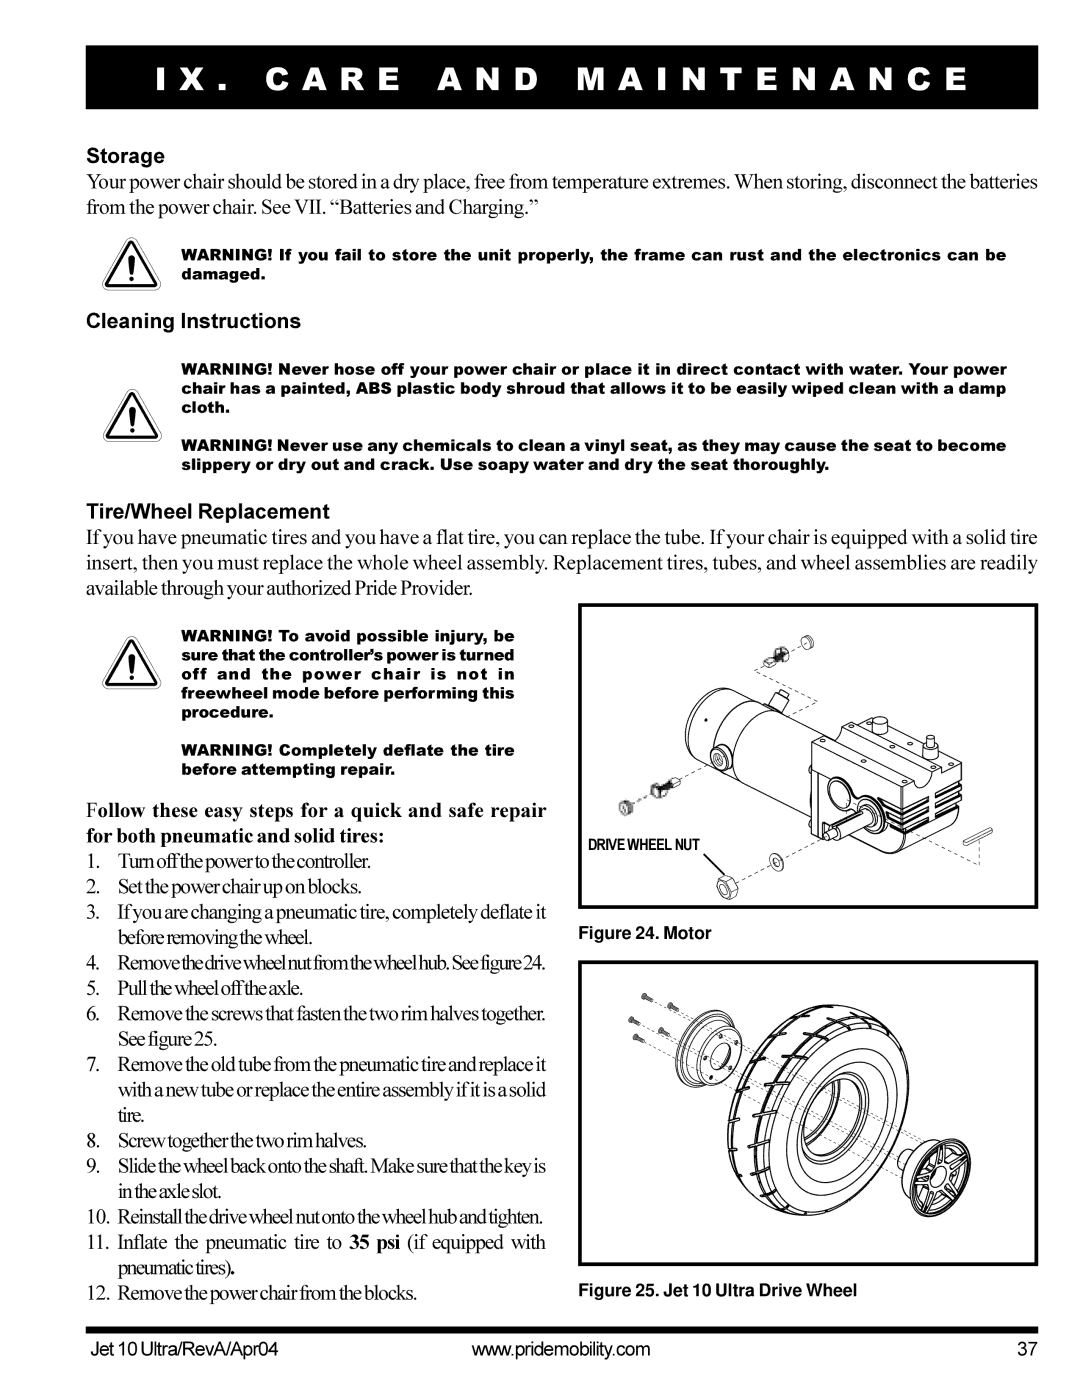
4.Removethedrivewheelnutfromthewheelhub.Seefigure24.
5.Pullthewheelofftheaxle.
6.Removethescrewsthatfastenthetworimhalvestogether. Seefigure25.
7.Removetheoldtubefromthepneumatictireandreplaceit withanewtubeorreplacetheentireassemblyifitisasolid tire.
8.Screwtogetherthetworimhalves.
9.Slidethewheelbackontotheshaft.Makesurethatthekeyis intheaxleslot.
10.Reinstallthedrivewheelnutontothewheelhubandtighten.
11.Inflate the pneumatic tire to 35 psi (if equipped with pneumatictires).
12.Removethepowerchairfromtheblocks.
DRIVE WHEEL NUT |
Figure 24. Motor
Figure 25. Jet 10 Ultra Drive Wheel
Jet 10 Ultra/RevA/Apr04 | www.pridemobility.com | 37 |
