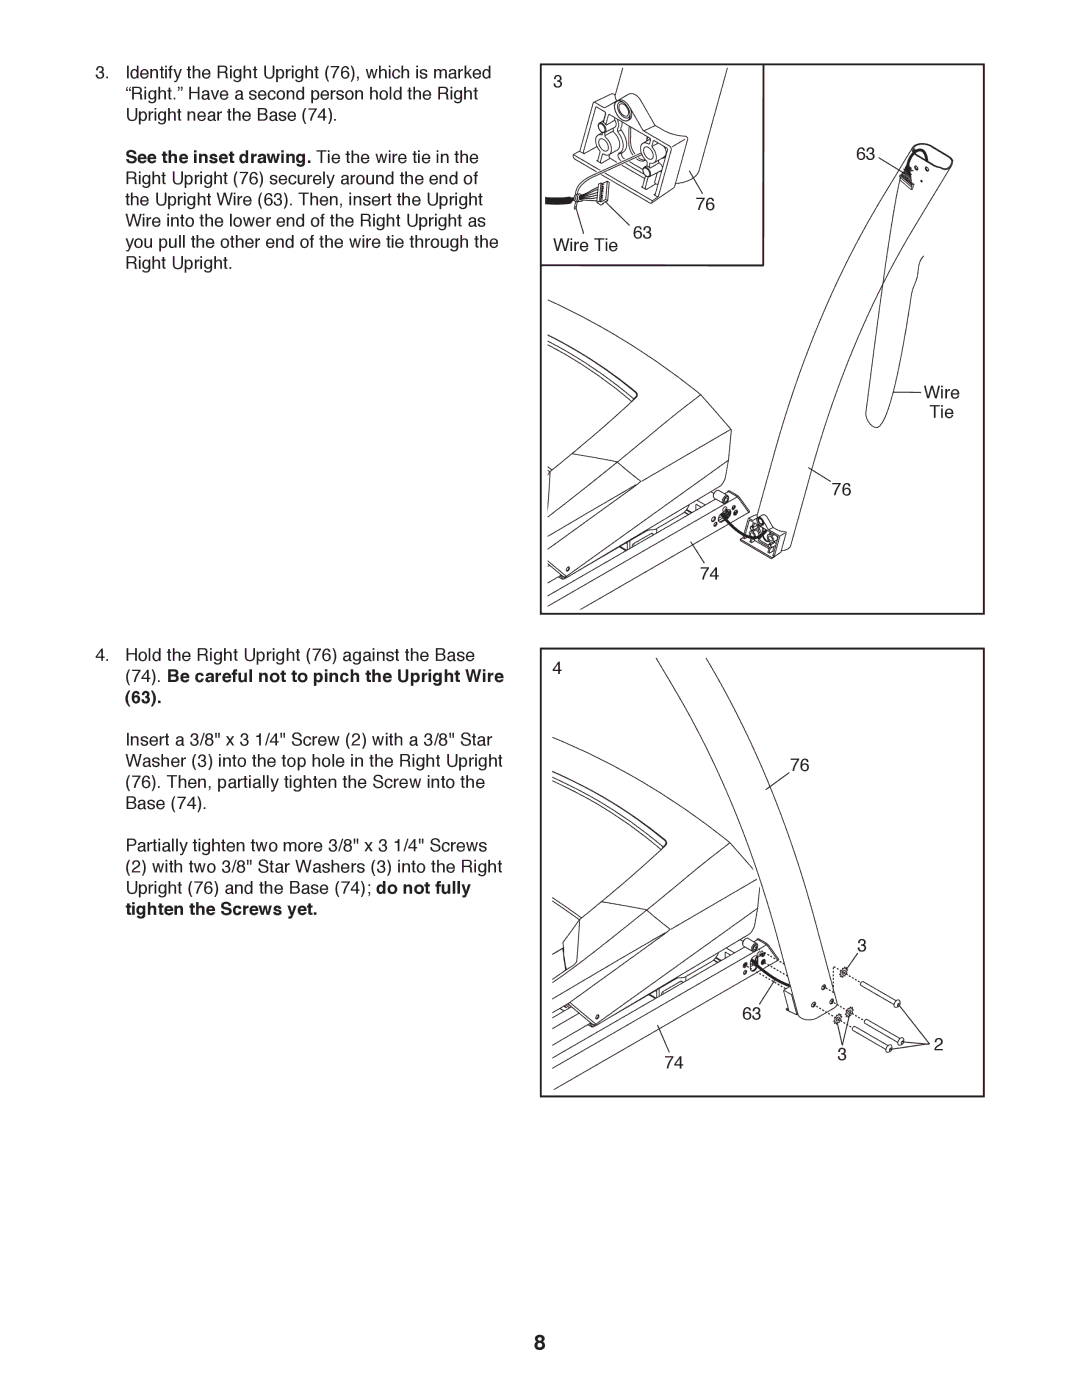
3. Identify the Right Upright (76), which is marked | 3 |
|
|
|
“Right.” Have a second person hold the Right |
|
|
| |
|
|
|
| |
Upright near the Base (74). |
|
|
|
|
See the inset drawing. Tie the wire tie in the |
|
|
| 63 |
Right Upright (76) securely around the end of |
|
| 76 |
|
the Upright Wire (63). Then, insert the Upright |
|
|
| |
Wire into the lower end of the Right Upright as |
| 63 |
|
|
you pull the other end of the wire tie through the | Wire Tie |
|
| |
Right Upright. |
|
|
|
|
|
|
|
| Wire |
|
|
|
| Tie |
|
|
| 76 |
|
|
|
| 74 |
|
4. Hold the Right Upright (76) against the Base | 4 |
|
|
|
(74). Be careful not to pinch the Upright Wire |
|
|
| |
(63). |
|
|
|
|
Insert a 3/8" x 3 1/4" Screw (2) with a 3/8" Star |
|
| 76 |
|
Washer (3) into the top hole in the Right Upright |
|
|
| |
(76). Then, partially tighten the Screw into the |
|
|
|
|
Base (74). |
|
|
|
|
Partially tighten two more 3/8" x 3 1/4" Screws |
|
|
|
|
(2) with two 3/8" Star Washers (3) into the Right |
|
|
|
|
Upright (76) and the Base (74); do not fully |
|
|
|
|
tighten the Screws yet. |
|
|
|
|
|
|
|
| 3 |
|
|
| 63 |
|
|
| 74 | 3 | 2 |
|
|
| ||
|
|
|
| |
| 8 |
|
|
|