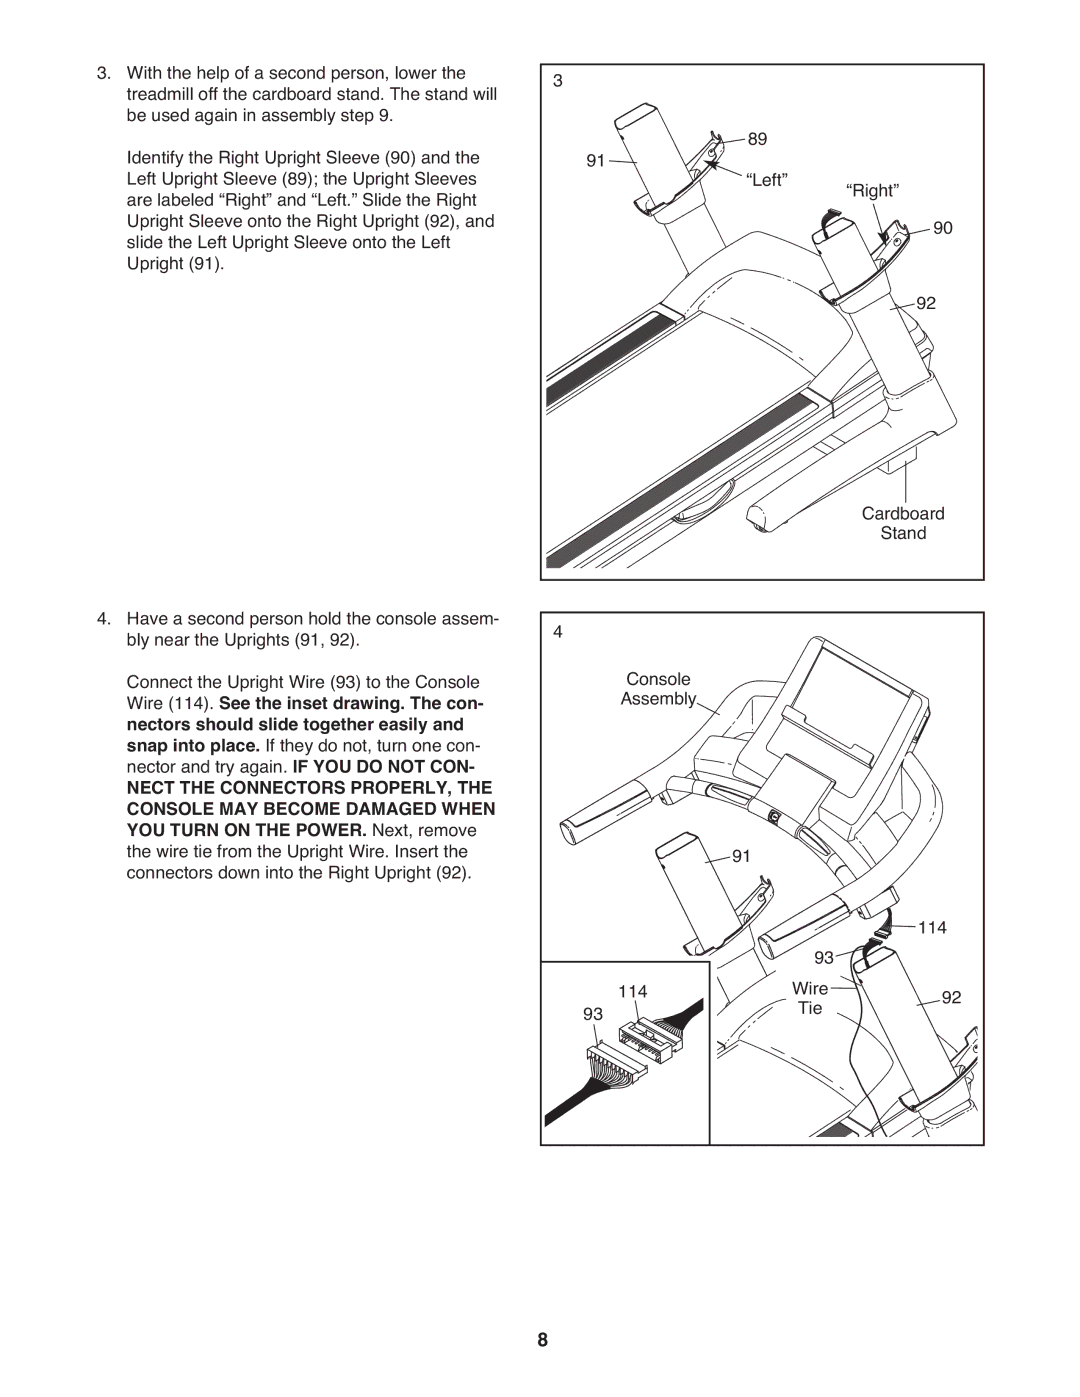
3. With the help of a second person, lower the | 3 |
|
|
|
treadmill off the cardboard stand. The stand will |
|
|
| |
be used again in assembly step 9. |
|
| 89 |
|
Identify the Right Upright Sleeve (90) and the | 91 |
|
| |
| “Left” |
| ||
Left Upright Sleeve (89); the Upright Sleeves |
|
| “Right” | |
are labeled “Right” and “Left.” Slide the Right |
|
|
| |
Upright Sleeve onto the Right Upright (92), and |
|
|
| 90 |
slide the Left Upright Sleeve onto the Left |
|
|
| |
Upright (91). |
|
|
| 92 |
|
|
|
| |
|
|
|
| Cardboard |
|
|
|
| Stand |
4. Have a second person hold the console assem- | 4 |
|
|
|
bly near the Uprights (91, 92). | Console |
|
| |
Connect the Upright Wire (93) to the Console |
|
|
| |
Wire (114). See the inset drawing. The con- |
| Assembly |
|
|
nectors should slide together easily and |
|
|
|
|
snap into place. If they do not, turn one con- |
|
|
|
|
nector and try again. IF YOU DO NOT CON- |
|
|
|
|
NECT THE CONNECTORS PROPERLY, THE |
|
|
|
|
CONSOLE MAY BECOME DAMAGED WHEN |
|
|
|
|
YOU TURN ON THE POWER. Next, remove |
|
| 91 |
|
the wire tie from the Upright Wire. Insert the |
|
|
| |
connectors down into the Right Upright (92). |
|
|
| 114 |
|
|
| 93 | |
|
|
|
| |
| 93 | 114 | Wire | 92 |
| Tie | |||
| 8 |
|
|
|
