R | 3100 Wood Stove Series (ACC) |
7Appliance Set Up
A.Pedestal Assembly and Ash Removal System (ARS) Installation for Step Top
NOTE: The Ash Removal System, must be installed first before installing the pedestal.
Included in Kit: Door assembly, door handle & magnet, ash grate, ash grate channel, ash drawer, fastener package. A cover plate that is required for a floor outside air instal- lation on a pedestal model is also included, If not needed, discard.
Tools Required: Phillips head screw driver, 7/16 socket wrench, 3/32 and 5/36 Allen wrench.
Begin installing the ARS System.
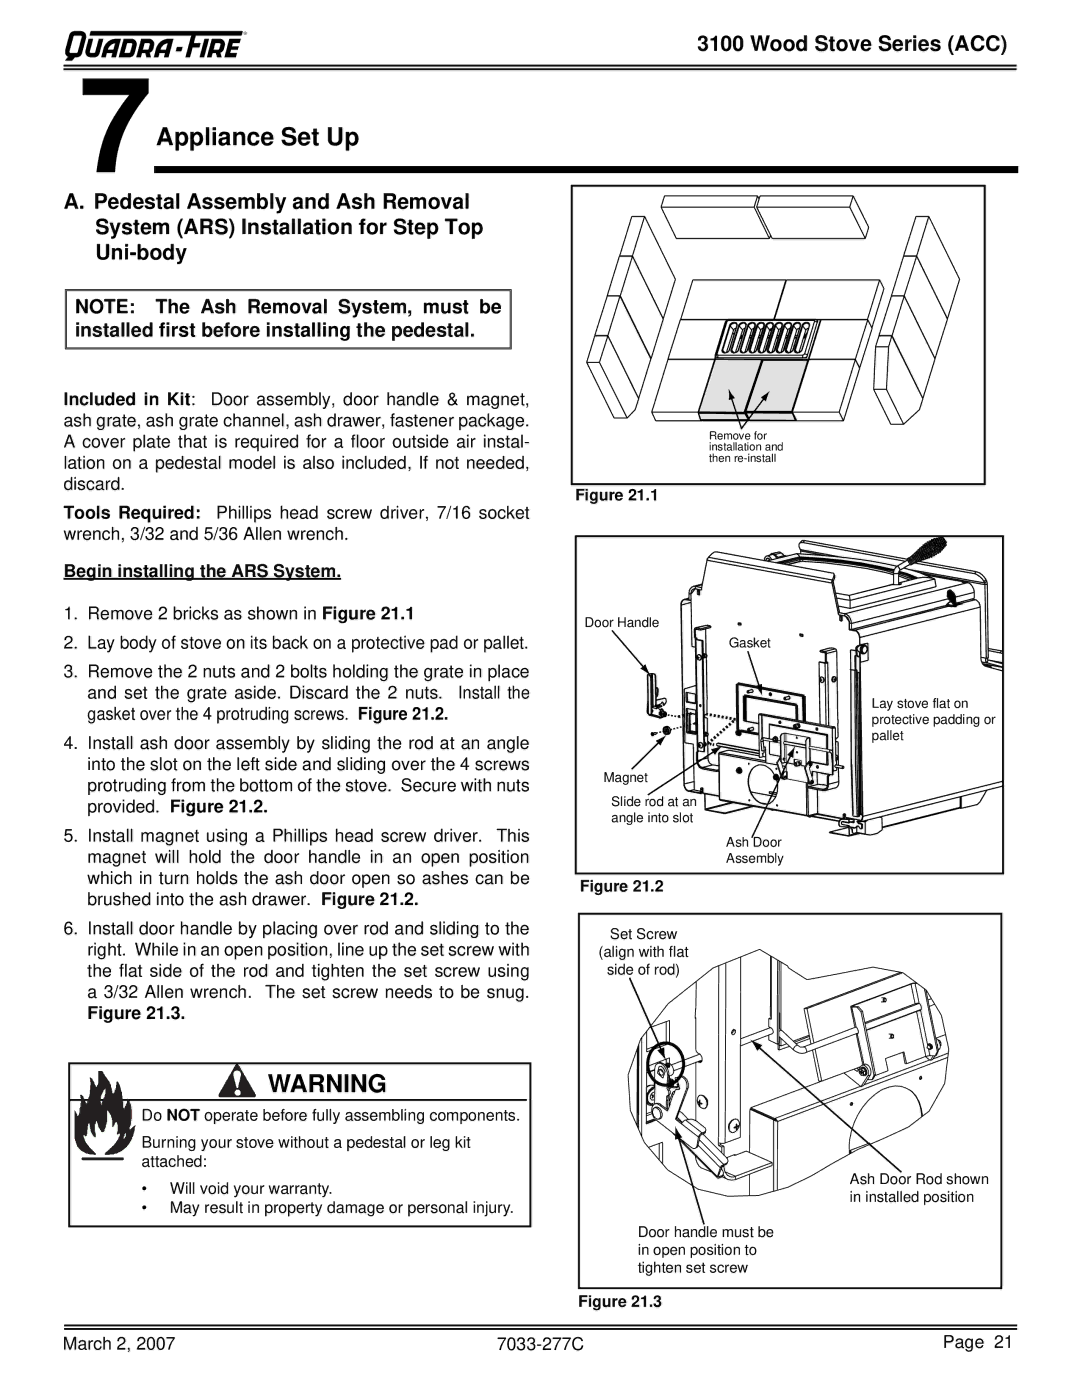
1.Remove 2 bricks as shown in Figure 21.1
2.Lay body of stove on its back on a protective pad or pallet.
3.Remove the 2 nuts and 2 bolts holding the grate in place and set the grate aside. Discard the 2 nuts. Install the gasket over the 4 protruding screws. Figure 21.2.
4.Install ash door assembly by sliding the rod at an angle into the slot on the left side and sliding over the 4 screws protruding from the bottom of the stove. Secure with nuts provided. Figure 21.2.
5.Install magnet using a Phillips head screw driver. This magnet will hold the door handle in an open position which in turn holds the ash door open so ashes can be brushed into the ash drawer. Figure 21.2.
6.Install door handle by placing over rod and sliding to the right. While in an open position, line up the set screw with the flat side of the rod and tighten the set screw using a 3/32 Allen wrench. The set screw needs to be snug.
Figure 21.3.
![]() WARNING
WARNING
![]() Do NOT operate before fully assembling components.
Do NOT operate before fully assembling components.
Burning your stove without a pedestal or leg kit attached:
•Will void your warranty.
•May result in property damage or personal injury.
Remove for installation and then
Figure 21.1
Door Handle |
Gasket |
Lay stove flat on |
protective padding or |
pallet |
Magnet |
Slide rod at an |
angle into slot |
Ash Door |
Assembly |
Figure 21.2
Set Screw
(align with flat
side of rod)
Ash Door Rod shown in installed position
Door handle must be in open position to tighten set screw
Figure 21.3
March 2, 2007 | Page 21 |