WARNING – SERVICING TO BE CARRIED OUT ONLY BY AN AUTHORISED PERSON
Disconnect from electricity before servicing. Check appliance is safe when you have finished.
� | � |
| |
|
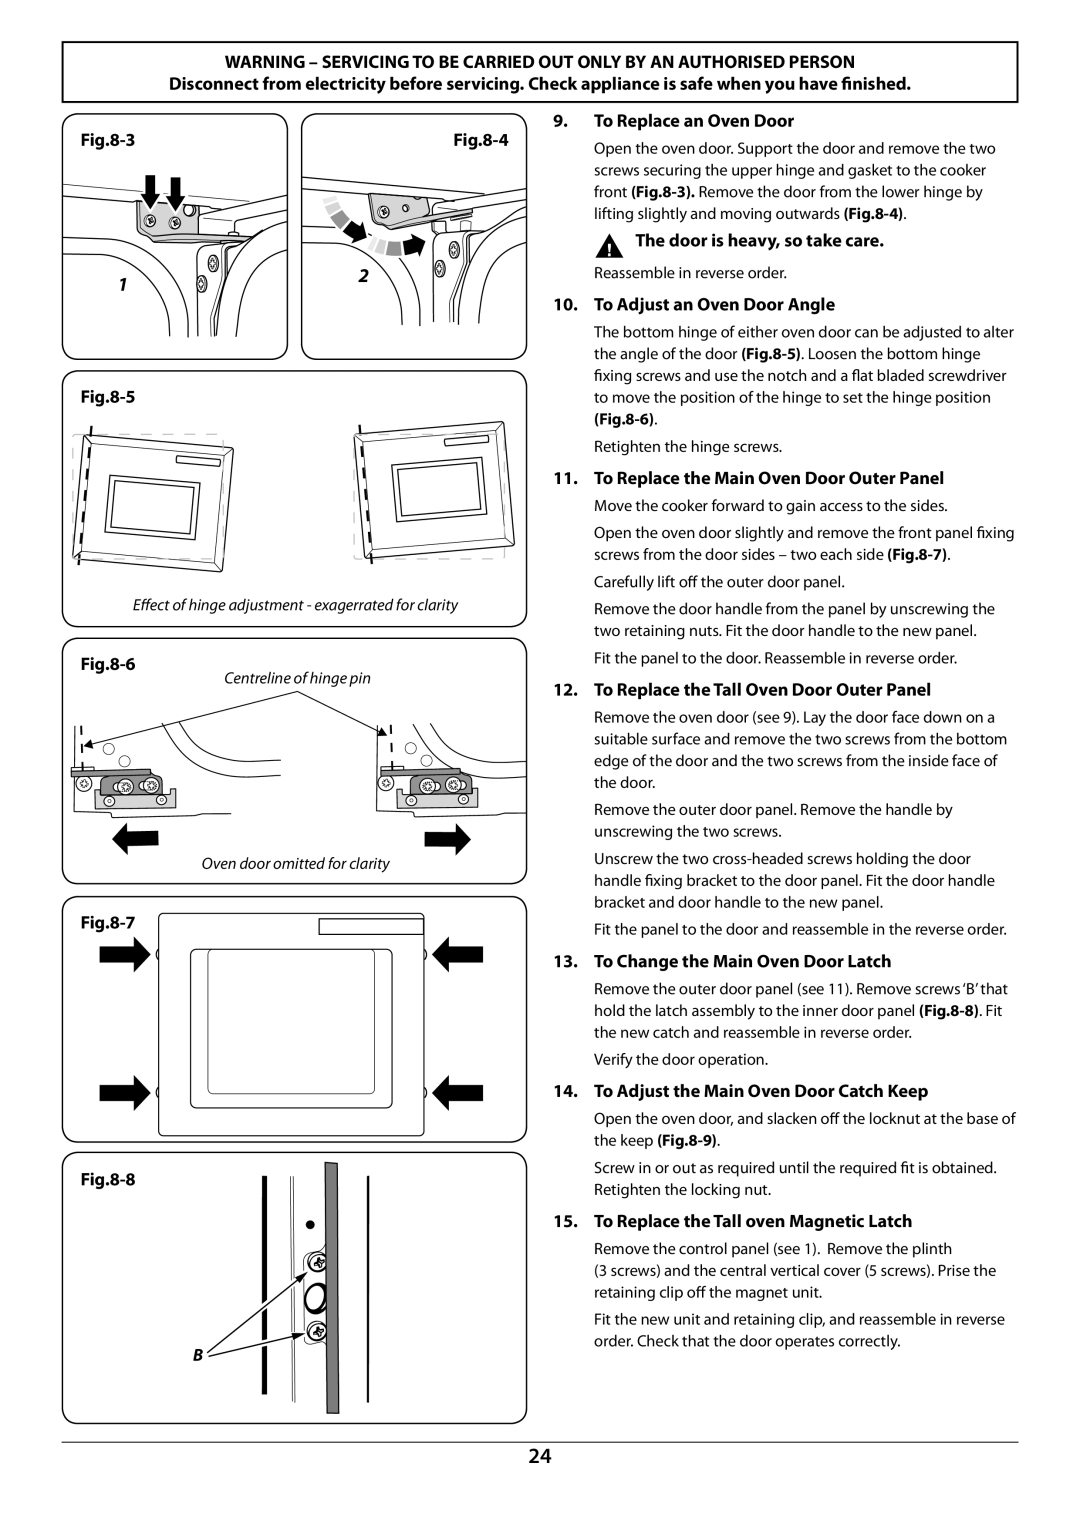
Effect of hinge adjustment - exagerrated for clarity
9.To Replace an Oven Door
Open the oven door. Support the door and remove the two screws securing the upper hinge and gasket to the cooker front
The door is heavy, so take care.
Reassemble in reverse order.
10.To Adjust an Oven Door Angle
The bottom hinge of either oven door can be adjusted to alter the angle of the door
Retighten the hinge screws.
11.To Replace the Main Oven Door Outer Panel
Move the cooker forward to gain access to the sides.
Open the oven door slightly and remove the front panel fixing screws from the door sides – two each side
Carefully lift off the outer door panel.
Remove the door handle from the panel by unscrewing the two retaining nuts. Fit the door handle to the new panel.
Centreline of hinge pin
Oven door omitted for clarity
Fit the panel to the door. Reassemble in reverse order.
12.To Replace the Tall Oven Door Outer Panel
Remove the oven door (see 9). Lay the door face down on a suitable surface and remove the two screws from the bottom edge of the door and the two screws from the inside face of the door.
Remove the outer door panel. Remove the handle by unscrewing the two screws.
Unscrew the two
� ![]()
Fit the panel to the door and reassemble in the reverse order.
13.To Change the Main Oven Door Latch
Remove the outer door panel (see 11). Remove screws ‘B’ that hold the latch assembly to the inner door panel
Verify the door operation.
14.To Adjust the Main Oven Door Catch Keep
Open the oven door, and slacken off the locknut at the base of the keep
Screw in or out as required until the required fit is obtained. Retighten the locking nut.
15.To Replace the Tall oven Magnetic Latch
Remove the control panel (see 1). Remove the plinth
(3 screws) and the central vertical cover (5 screws). Prise the retaining clip off the magnet unit.
Fit the new unit and retaining clip, and reassemble in reverse order. Check that the door operates correctly.
24