Digital Still Camera
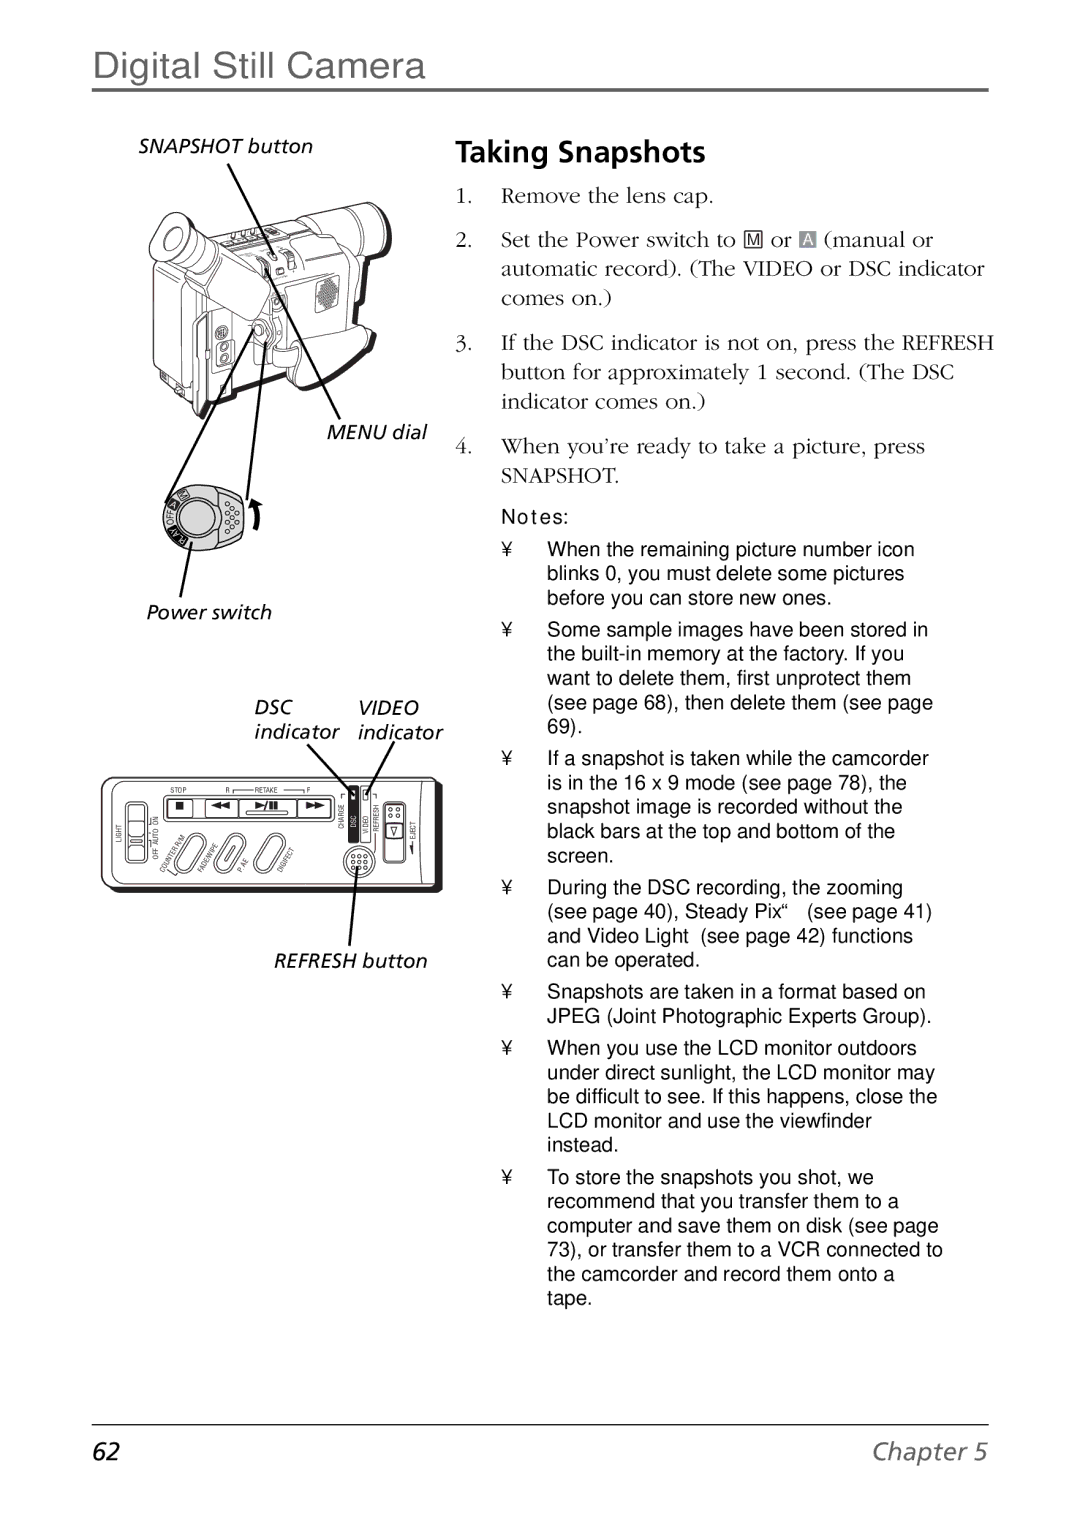
SNAPSHOT button
+
+
O
Y
A
L
P
Taking Snapshots
1.Remove the lens cap.
2.Set the Power switch to M or A (manual or automatic record). (The VIDEO or DSC indicator comes on.)
3.If the DSC indicator is not on, press the REFRESH button for approximately 1 second. (The DSC indicator comes on.)
MENU dial
4. When you’re ready to take a picture, press
SNAPSHOT.
M
A
F
O
Y
A
LP
Power switch
| DSC | VIDEO |
| indicator | indicator |
STOP | R RETAKEF |
|
LIGHT | AUTO ON |
|
| / | M |
|
|
|
|
|
|
|
| CHARGE | DSC | VIDEO REFRESH | EJECT |
|
|
|
| R |
|
|
| I P | E |
|
|
|
| T |
|
|
|
| OFF |
| E | R |
|
|
|
|
|
|
|
|
|
|
| ||
| T |
|
| E | / W |
|
| E |
| I F | E | C |
|
|
| ||
|
| N |
|
|
|
|
|
|
|
|
|
|
|
| |||
|
| U |
|
| F | D |
|
| P . | A | D I | G |
|
|
|
|
|
|
| C O |
|
| A |
|
|
|
|
|
|
|
|
|
REFRESH button
Notes:
•When the remaining picture number icon blinks 0, you must delete some pictures before you can store new ones.
•Some sample images have been stored in the
•If a snapshot is taken while the camcorder is in the 16 x 9 mode (see page 78), the snapshot image is recorded without the black bars at the top and bottom of the screen.
•During the DSC recording, the zooming (see page 40), Steady Pix™ (see page 41) and Video Light (see page 42) functions can be operated.
•Snapshots are taken in a format based on JPEG (Joint Photographic Experts Group).
•When you use the LCD monitor outdoors under direct sunlight, the LCD monitor may be difficult to see. If this happens, close the LCD monitor and use the viewfinder instead.
•To store the snapshots you shot, we recommend that you transfer them to a computer and save them on disk (see page 73), or transfer them to a VCR connected to the camcorder and record them onto a tape.
62 | Chapter 5 |
