Connections & Setup
LIGHT | AUTO ON |
| OFF |
STOP |
|
|
|
| R |
| RETAKE |
|
| F |
|
|
| |
| / M |
|
|
|
|
|
|
|
|
| CHARGE | DSC | VIDEO REFRESH | EJECT |
|
|
|
|
| E |
|
|
|
|
|
|
|
| |
| R |
|
|
| I P |
|
|
|
| T |
|
|
| |
T E | R |
|
| / W |
|
|
|
|
|
|
|
| ||
|
| E |
|
|
| E |
| I F | E C |
|
|
| ||
N |
|
|
|
|
|
|
|
|
|
|
| |||
U |
| F A | D |
|
|
| P . | A | D I | G |
|
|
|
|
C O |
|
|
|
|
|
|
|
|
|
|
| |||
Insert a cassette tape
1.Make sure the camcorder is connected to a power supply.
2.Open the LCD monitor fully or adjust the viewfinder.
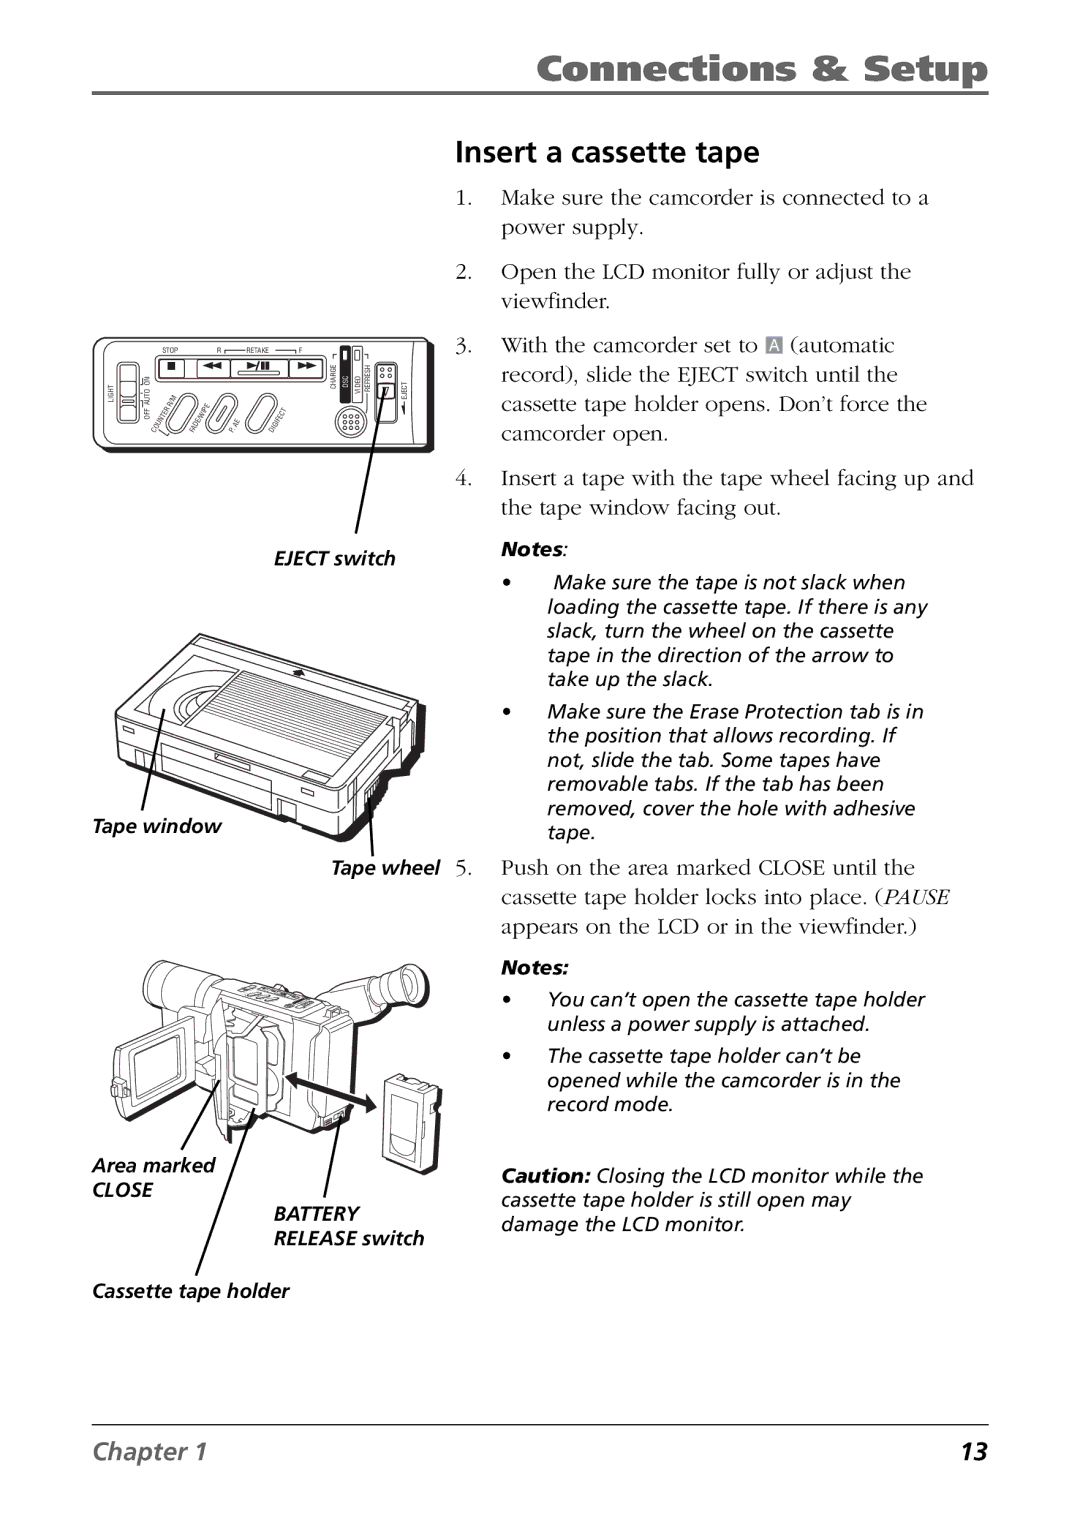
3.With the camcorder set to A (automatic record), slide the EJECT switch until the cassette tape holder opens. Don’t force the camcorder open.
4.Insert a tape with the tape wheel facing up and the tape window facing out.
EJECT switch | Notes: | ||
• | Make sure the tape is not slack when | ||
| |||
loading the cassette tape. If there is any slack, turn the wheel on the cassette tape in the direction of the arrow to take up the slack.
•Make sure the Erase Protection tab is in
| the position that allows recording. If | |
| not, slide the tab. Some tapes have | |
| removable tabs. If the tab has been | |
Tape window | removed, cover the hole with adhesive | |
tape. | ||
|
Tape wheel 5. Push on the area marked CLOSE until the cassette tape holder locks into place. (PAUSE appears on the LCD or in the viewfinder.)
Area marked
CLOSE
BATTERY RELEASE switch
Notes:
•You can’t open the cassette tape holder unless a power supply is attached.
•The cassette tape holder can’t be opened while the camcorder is in the record mode.
Caution: Closing the LCD monitor while the cassette tape holder is still open may damage the LCD monitor.
Cassette tape holder
Chapter 1 | 13 |