Advanced Features
+
+
O
Y
A
L
P
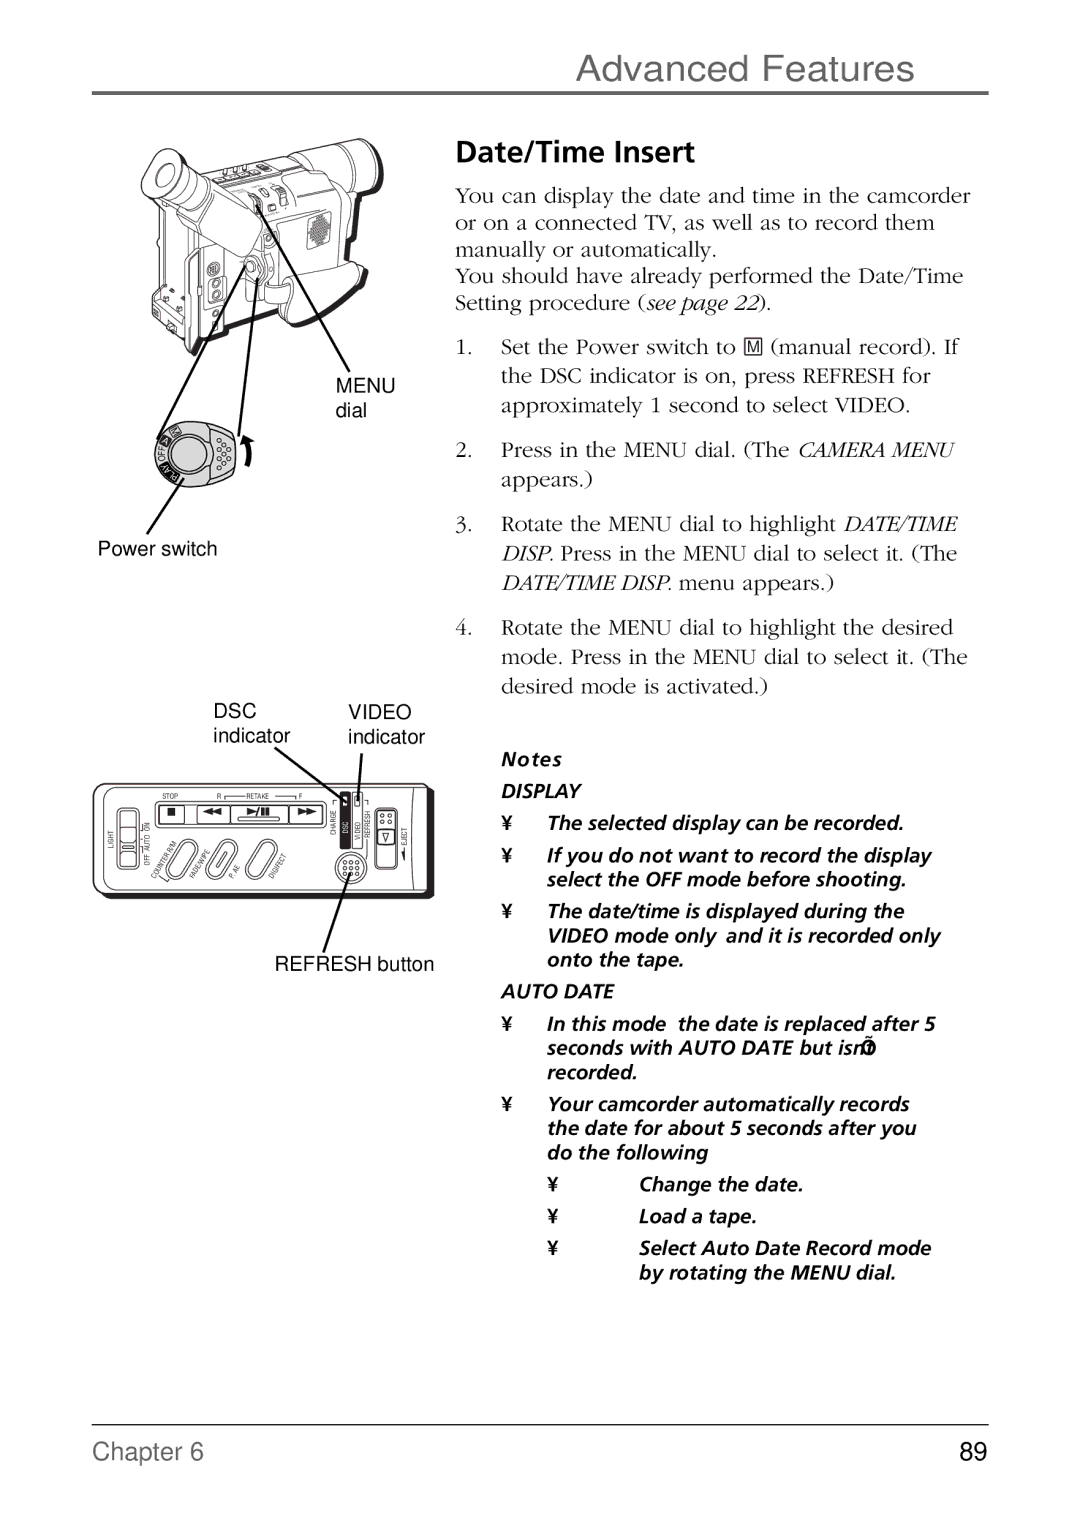
MENU dial
M
A
F
F
O
Y
A
LP
Power switch
|
|
|
|
|
|
|
|
| DSC |
|
|
|
| VIDEO | |||
|
|
|
|
|
|
|
|
| indicator | indicator | |||||||
|
| STOP |
|
|
|
| R |
| RETAKE |
|
|
|
| F |
| ||
LIGHT | AUTO ON |
|
| / M |
|
|
|
|
|
|
|
|
|
|
| CHARGE DSC VIDEO REFRESH | EJECT |
|
|
|
| R |
|
|
| I P | E |
|
|
|
|
| T |
|
|
| OFF |
| E | R |
|
|
|
|
|
|
|
|
|
|
| ||
| T |
|
| E | / W |
|
|
| E |
| I F | E | C |
|
| ||
|
| N |
|
|
|
|
|
|
|
|
|
|
|
| |||
|
| U |
|
| F A | D |
|
|
| P . | A | D I | G |
|
|
|
|
|
| C O |
|
|
|
|
|
|
|
|
|
|
|
| |||
REFRESH button
Date/Time Insert
You can display the date and time in the camcorder or on a connected TV, as well as to record them manually or automatically.
You should have already performed the Date/Time Setting procedure (see page 22).
1.Set the Power switch to M (manual record). If the DSC indicator is on, press REFRESH for approximately 1 second to select VIDEO.
2.Press in the MENU dial. (The CAMERA MENU appears.)
3.Rotate the MENU dial to highlight DATE/TIME DISP. Press in the MENU dial to select it. (The DATE/TIME DISP. menu appears.)
4.Rotate the MENU dial to highlight the desired mode. Press in the MENU dial to select it. (The desired mode is activated.)
Notes:
DISPLAY
•The selected display can be recorded.
•If you do not want to record the display, select the OFF mode before shooting.
•The date/time is displayed during the VIDEO mode only, and it is recorded only onto the tape.
AUTO DATE
•In this mode, the date is replaced after 5 seconds with AUTO DATE but isn’t recorded.
•Your camcorder automatically records the date for about 5 seconds after you do the following:
•Change the date.
•Load a tape.
•Select Auto Date Record mode by rotating the MENU dial.
Chapter 6 | 89 |
