Connections and Setup
Installation of the Monitor
Installation using a stand or wall mount bracket
•Please be sure to request installation or mounting of this unit or the installation bracket by the dealer where purchased.
•When installing, be sure to use the bolts provided with the stand or installation bracket.
•For details concerning installation, please refer to the instruction manual provided with the stand or installation bracket.
Installation using accessories other than the stand or installation bracket (sold separately)
•When possible, please install using parts and accessories manufactured by Thomson. Thomson will not be held responsible for accident or damage caused by the use of parts and accessories manufactured by other companies.
•For custom installation, please consult the dealer where the unit was purchased.
Note for U.S. customers: If you prefer, we can provide you with the name of an Authorized Service Representative who will visit your home for a fee to install your electronic entertainment system and to instruct you in its operation. For details about this service, call
For additional assistance while using your RCA product, please visit www.rca.com/customersupport.
CAUTIONS
To avoid malfunction, overheating of this unit, and possible fire hazard, make sure that the vents on the main unit are not blocked when installing. Also, as hot air is expelled from the air vents, be careful of dust build up on rear surface wall, etc.
This monitor unit is very heavy and has little
This unit incorporates a thin design. To ensure safety if vibrated or shaken, please be sure to take measures to prevent the unit from tipping over.
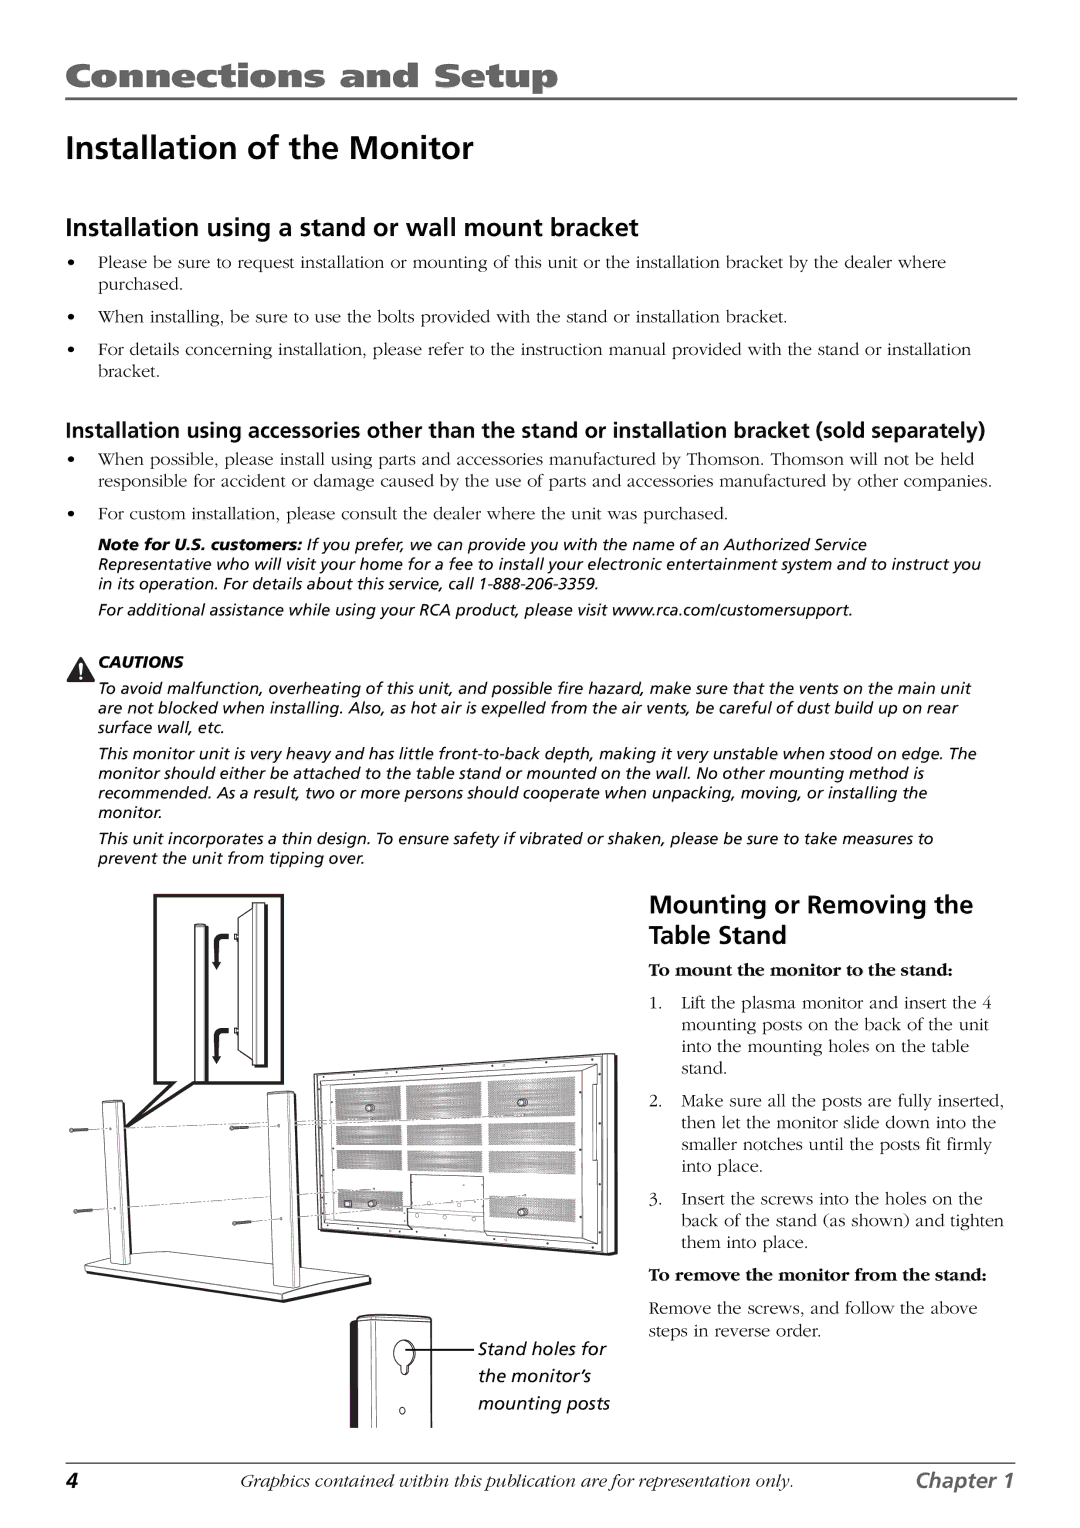
Mounting or Removing the
Table Stand
To mount the monitor to the stand:
1. Lift the plasma monitor and insert the 4 mounting posts on the back of the unit into the mounting holes on the table stand.
2. Make sure all the posts are fully inserted, then let the monitor slide down into the smaller notches until the posts fit firmly into place.
3. Insert the screws into the holes on the back of the stand (as shown) and tighten them into place.
To remove the monitor from the stand:
Remove the screws, and follow the above steps in reverse order.
Stand holes for the monitor’s mounting posts
4 | Graphics contained within this publication are for representation only. | Chapter 1 |