INSTALLATION
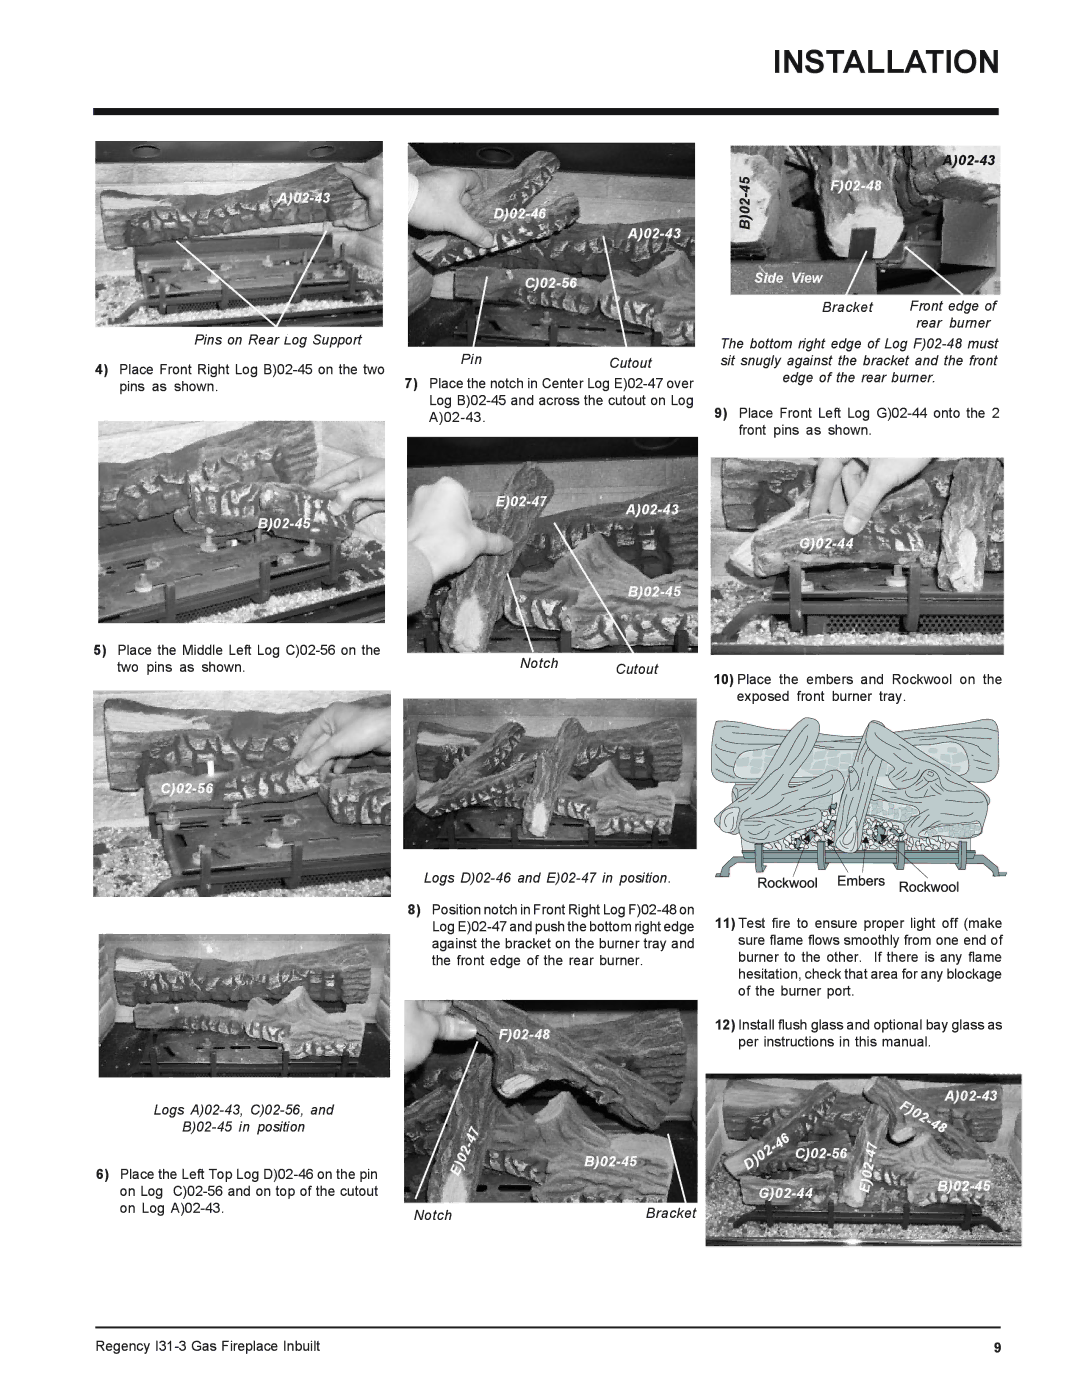
Pins on Rear Log Support
4)Place Front Right Log
D)02-46
A)02-43
C)02-56
PinCutout
7)Place the notch in Center Log
|
| |
45 |
| |
B)02- |
|
|
| Side View |
|
| Bracket | Front edge of |
|
| rear burner |
The bottom right edge of Log
9) Place Front Left Log
5)Place the Middle Left Log
Notch Cutout
G)02-44
10)Place the embers and Rockwool on the exposed front burner tray.
Logs |
|
|
| |
|
|
| ||
8) Position notch in Front Right Log | 11) Test fire to ensure proper light off (make | |||
Log | ||||
against the bracket on the burner tray and | sure flame flows smoothly from one end of | |||
the front edge of the rear burner. | burner to the other. If there is any flame | |||
| hesitation, check that area for any blockage | |||
| of the burner port. | |||
12) Install flush glass and optional bay glass as | ||||
per instructions in this manual. | ||||
| ||||
Logs A)02-43, C)02-56, and
B)02-45 in position
6)Place the Left Top Log
E)02 | - | 47 |
|
|
Notch
Bracket
D)02 | ||
|
47 - E)02
F)02 | |
| |
- | |
| 48 |
| |
Regency | 9 |