IG34-LPG, IG34-NG, IG34-ULPG specifications
The Regency IG34 series comprises three innovative models: IG34-ULPG, IG34-NG, and IG34-LPG, designed to efficiently meet the demands of modern heating solutions. These gas fireplaces are distinguished by their commitment to energy efficiency, stunning aesthetics, and robust technology.The IG34-ULPG model is tailored for users who prefer ultra-liquid propane gas options. This model stands out with its exceptional energy efficiency, capable of heating a significant area while minimizing environmental impact. Its sleek contemporary design features a large viewing window, allowing users to enjoy the beauty of the flames while providing warmth. With the advanced remote control technology, users can conveniently adjust settings from anywhere in the room.
On the other hand, the IG34-NG variant is optimized for natural gas users, offering similar efficiency and aesthetic advantages. It also boasts an impressive BTU output, ensuring that spaces remain cozy and inviting during cooler months. The user-friendly interface makes it easy to monitor and regulate the heat output, enhancing both comfort and convenience. One of the hallmark features of the IG34-NG is its state-of-the-art safety mechanisms, including an automatic shut-off system that ensures peace of mind when the unit is not in use.
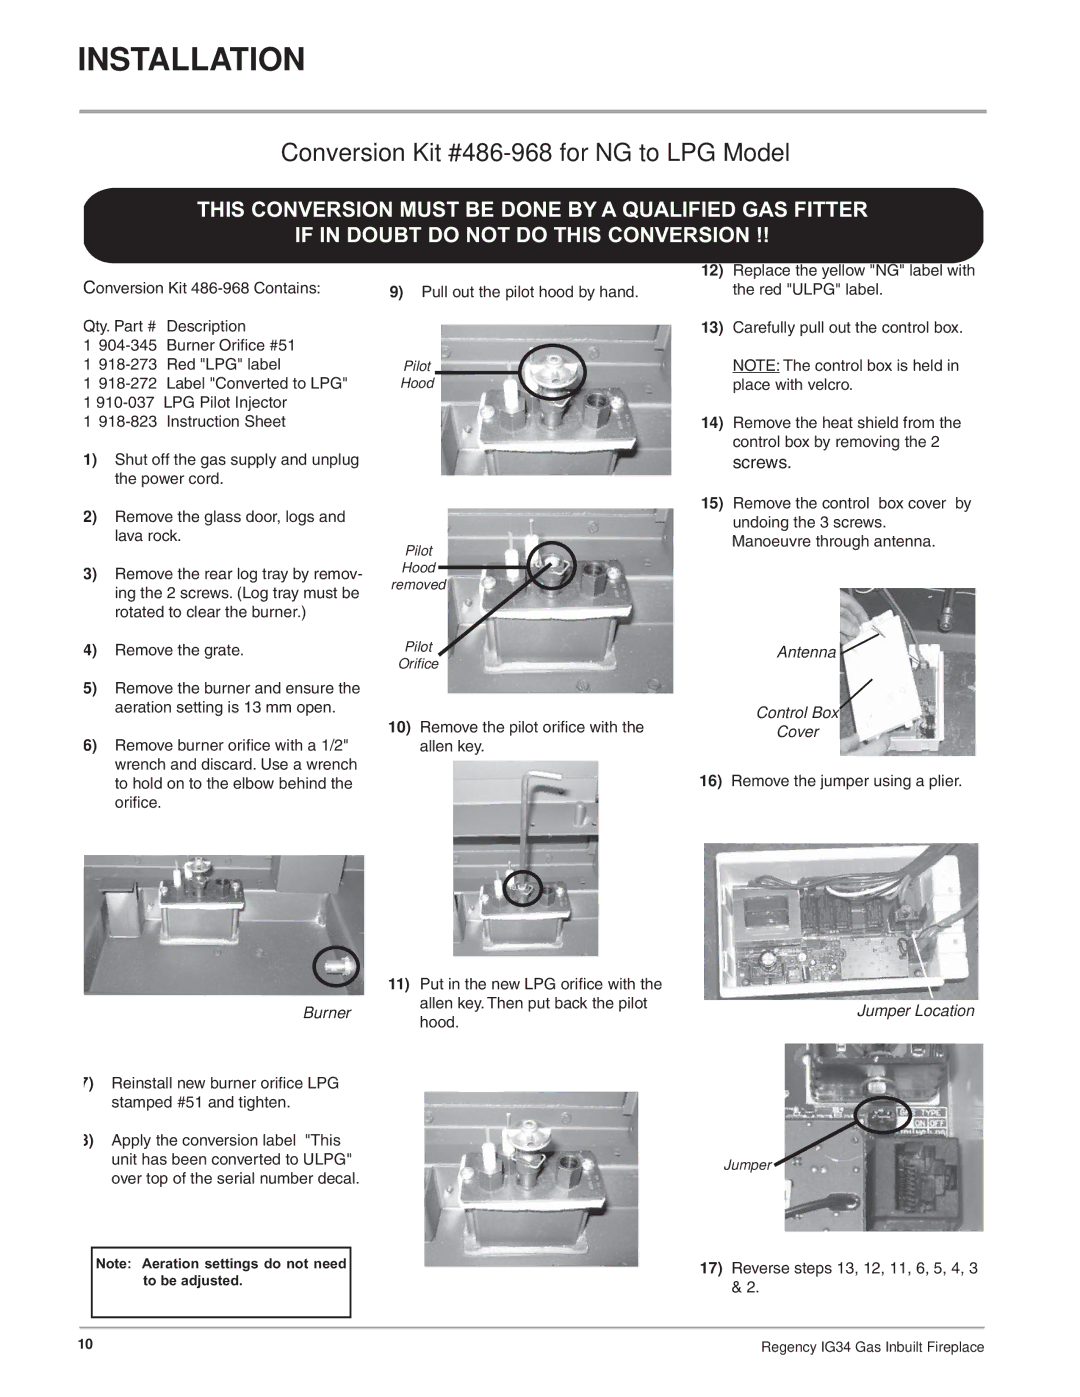
The IG34-LPG model further extends the versatility of the series by being adaptable to both liquid propane and natural gas. This model is particularly popular among users who desire flexibility, as it can easily be converted from one fuel type to another with minimal effort. Additionally, the IG34-LPG incorporates modern combustion technologies that significantly reduce emissions, making it an environmentally friendly option without compromising performance.
Across the entire IG34 series, the fireplaces are engineered with premium materials ensuring durability and reliability. The direct vent system is a standout feature, allowing for efficient ventilation that minimizes heat loss while maintaining indoor air quality. Each model is equipped with a ceramic glass door that provides excellent thermal efficiency, ensuring that users enjoy maximum warmth without excessive energy expenditure.
In summary, the Regency IG34 series—IG34-ULPG, IG34-NG, and IG34-LPG—offers a compelling blend of efficiency, safety, and modern design. These fireplaces are not just heating solutions; they are lifestyle enhancements that provide comfort and elegance to any living space, making them a smart choice for homeowners seeking stylish and effective heating options.

