Quick setup for Telephone Conference Calls
While all components delivered with the Revolabs FLX2 Conference Phone are partially charged, we recommend charging the Speaker, the Microphones, and the Dialer for at least 8 hours or overnight before starting to use the system.
Please note that the Revolabs FLX2 Conference Phone comes with two different power supplies. Please ensure that you are using the correct power supply when connecting the Base Station and the Charger Base.
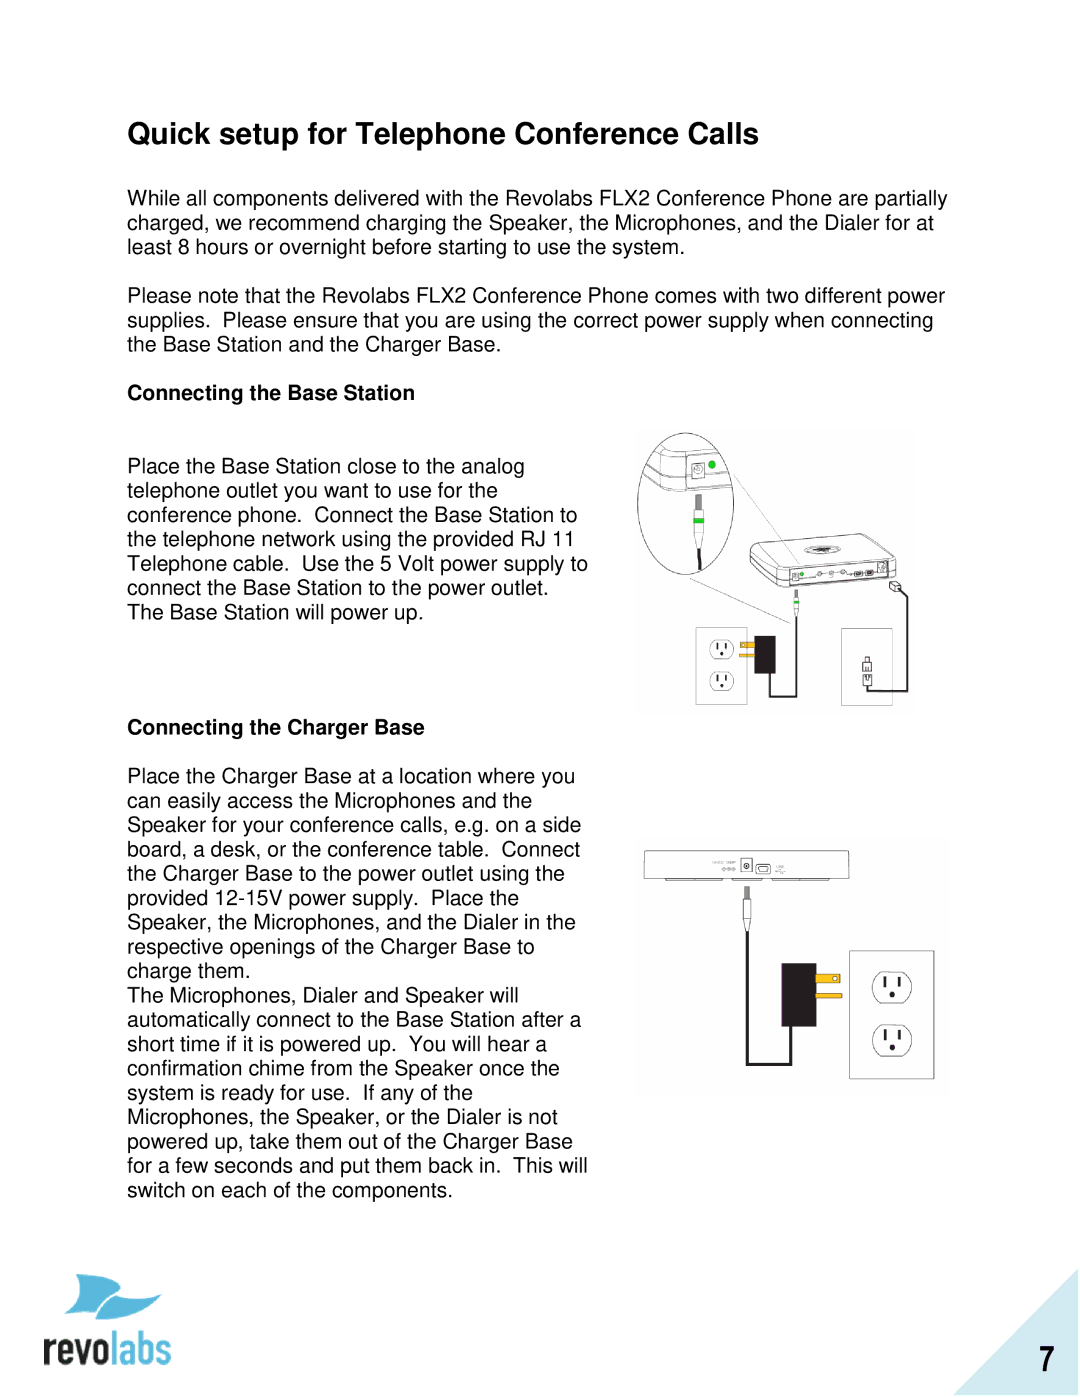
Connecting the Base Station
Place the Base Station close to the analog telephone outlet you want to use for the conference phone. Connect the Base Station to the telephone network using the provided RJ 11 Telephone cable. Use the 5 Volt power supply to connect the Base Station to the power outlet. The Base Station will power up.
Connecting the Charger Base
Place the Charger Base at a location where you can easily access the Microphones and the Speaker for your conference calls, e.g. on a side board, a desk, or the conference table. Connect the Charger Base to the power outlet using the provided
The Microphones, Dialer and Speaker will automatically connect to the Base Station after a short time if it is powered up. You will hear a confirmation chime from the Speaker once the system is ready for use. If any of the Microphones, the Speaker, or the Dialer is not powered up, take them out of the Charger Base for a few seconds and put them back in. This will switch on each of the components.
7