Runco VX-22D manual There may be some pincushion distortion even after the lens is

Models: VX-22D

1 84
Download 84 pages 11.08 Kb
Page 54
Image 54
Too Low

Installation

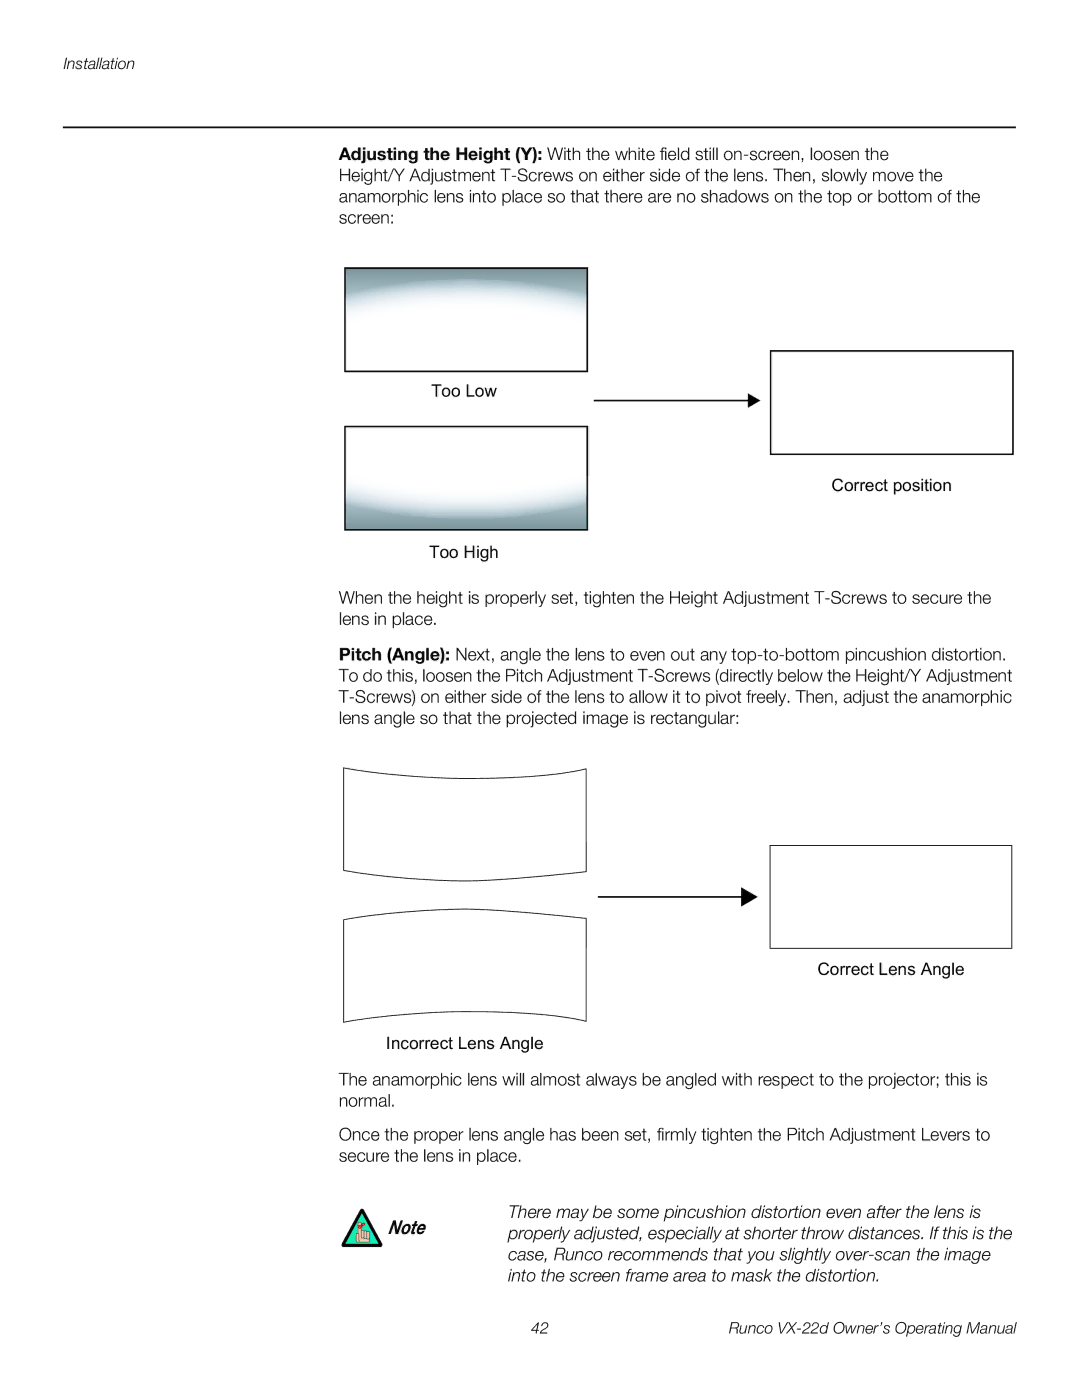
Adjusting the Height (Y): With the white field still on-screen, loosen the Height/Y Adjustment T-Screws on either side of the lens. Then, slowly move the anamorphic lens into place so that there are no shadows on the top or bottom of the screen:

Too Low

Correct position

Too High

When the height is properly set, tighten the Height Adjustment T-Screws to secure the lens in place.

Pitch (Angle): Next, angle the lens to even out any top-to-bottom pincushion distortion. To do this, loosen the Pitch Adjustment T-Screws (directly below the Height/Y Adjustment T-Screws) on either side of the lens to allow it to pivot freely. Then, adjust the anamorphic lens angle so that the projected image is rectangular:

Correct Lens Angle

Incorrect Lens Angle

The anamorphic lens will almost always be angled with respect to the projector; this is normal.

Once the proper lens angle has been set, firmly tighten the Pitch Adjustment Levers to secure the lens in place.

There may be some pincushion distortion even after the lens is

Note properly adjusted, especially at shorter throw distances. If this is the case, Runco recommends that you slightly over-scan the image into the screen frame area to mask the distortion.

42

Runco VX-22d Owner’s Operating Manual

Page 54
Image 54
Runco VX-22D manual There may be some pincushion distortion even after the lens is, Too Low Correct position Too High