ASSEMBLY
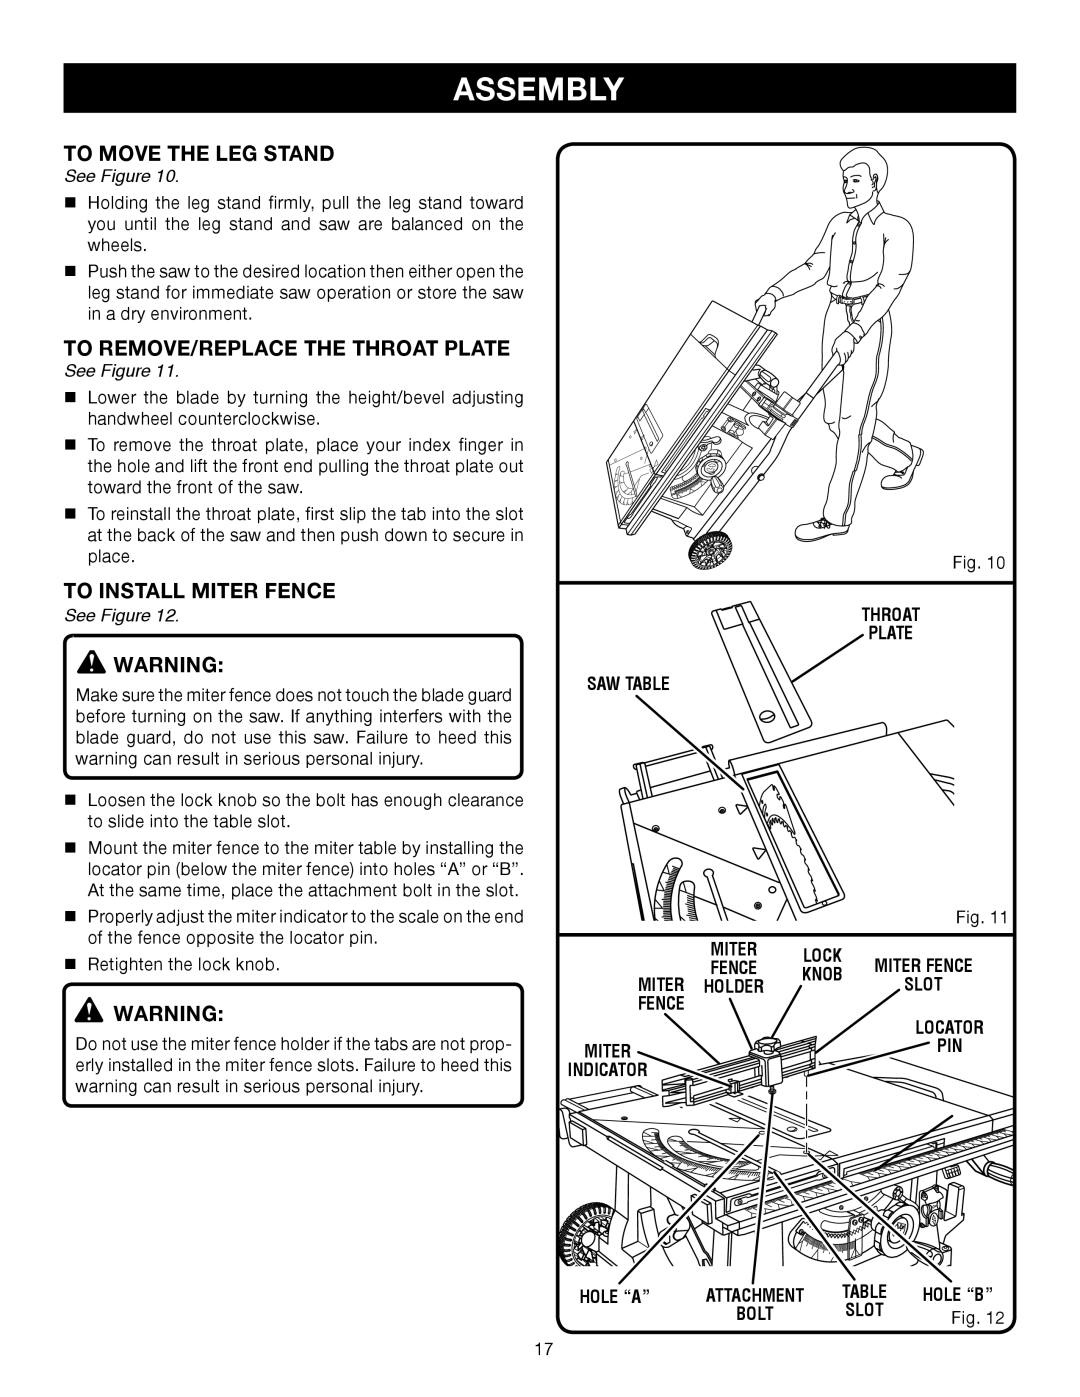
To move the LEG STAND
See Figure 10.
Holding the leg stand firmly, pull the leg stand toward you until the leg stand and saw are balanced on the wheels.
Push the saw to the desired location then either open the leg stand for immediate saw operation or store the saw in a dry environment.
to remove/replace the THROAT PLATE
See Figure 11.
Lower the blade by turning the height/bevel adjusting handwheel counterclockwise.
To remove the throat plate, place your index finger in the hole and lift the front end pulling the throat plate out toward the front of the saw.
To reinstall the throat plate, first slip the tab into the slot at the back of the saw and then push down to secure in place.
TO INSTALL miter FENCE
See Figure 12.
![]() WARNING:
WARNING:
Make sure the miter fence does not touch the blade guard before turning on the saw. If anything interfers with the blade guard, do not use this saw. Failure to heed this warning can result in serious personal injury.
Loosen the lock knob so the bolt has enough clearance to slide into the table slot.
Mount the miter fence to the miter table by installing the locator pin (below the miter fence) into holes “A” or “B”. At the same time, place the attachment bolt in the slot.
Properly adjust the miter indicator to the scale on the end of the fence opposite the locator pin.
Retighten the lock knob.
![]() WARNING:
WARNING:
Do not use the miter fence holder if the tabs are not prop- erly installed in the miter fence slots. Failure to heed this warning can result in serious personal injury.
Fig. 10
THROAT
PLATE
SAW table
|
|
| Fig. 11 | |
| miter | lock | miter fence | |
| fence | |||
| KNOB | |||
miter | holder | slot | ||
| ||||
fence |
|
|
| |
|
|
| locator | |
miter |
|
| pin | |
indicator |
|
|
|
hole “a” | attachment | table | hole “b” |
| bolt | slot | Fig. 12 |
17