Assembly
TO Check and Align the riving knife and
Saw Blade
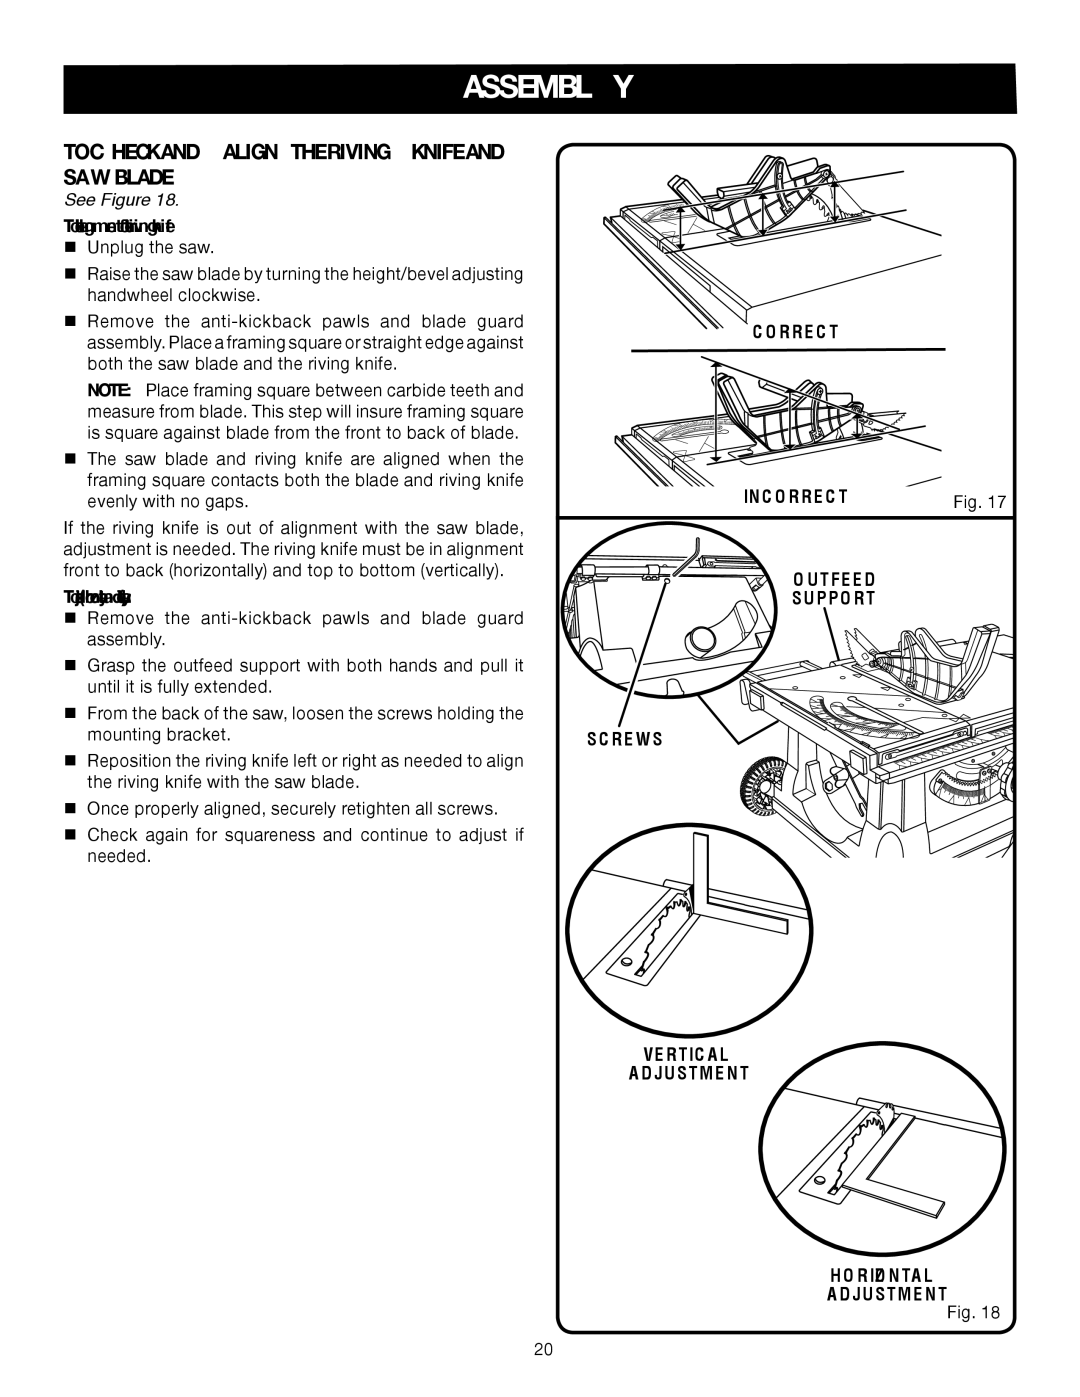
See Figure 18.
To check alignment of the riving knife: Unplug the saw.
Raise the saw blade by turning the height/bevel adjusting handwheel clockwise.
Remove the | correct |
|
assembly. Place a framing square or straight edge against |
| |
|
| |
both the saw blade and the riving knife. |
|
|
Note: Place framing square between carbide teeth and |
|
|
measure from blade. This step will insure framing square |
|
|
is square against blade from the front to back of blade. |
|
|
The saw blade and riving knife are aligned when the |
|
|
framing square contacts both the blade and riving knife | incorrect |
|
evenly with no gaps. | Fig. 17 | |
If the riving knife is out of alignment with the saw blade, |
|
|
adjustment is needed. The riving knife must be in alignment |
|
|
front to back (horizontally) and top to bottom (vertically). | outfeed |
|
To adjust (horizontally and vertically): |
| |
support |
| |
Remove the |
|
|
assembly. |
|
|
Grasp the outfeed support with both hands and pull it |
|
|
until it is fully extended. |
|
|
From the back of the saw, loosen the screws holding the |
|
|
mounting bracket. | screws |
|
Reposition the riving knife left or right as needed to align |
|
|
the riving knife with the saw blade. |
|
|
Once properly aligned, securely retighten all screws. |
|
|
Check again for squareness and continue to adjust if |
|
|
needed. |
|
|
VERTICAL
ADJUSTMENT
HORIZonTAL
ADJUSTMENT
Fig. 18
20
