operation
To Check Miter Fence Alignment
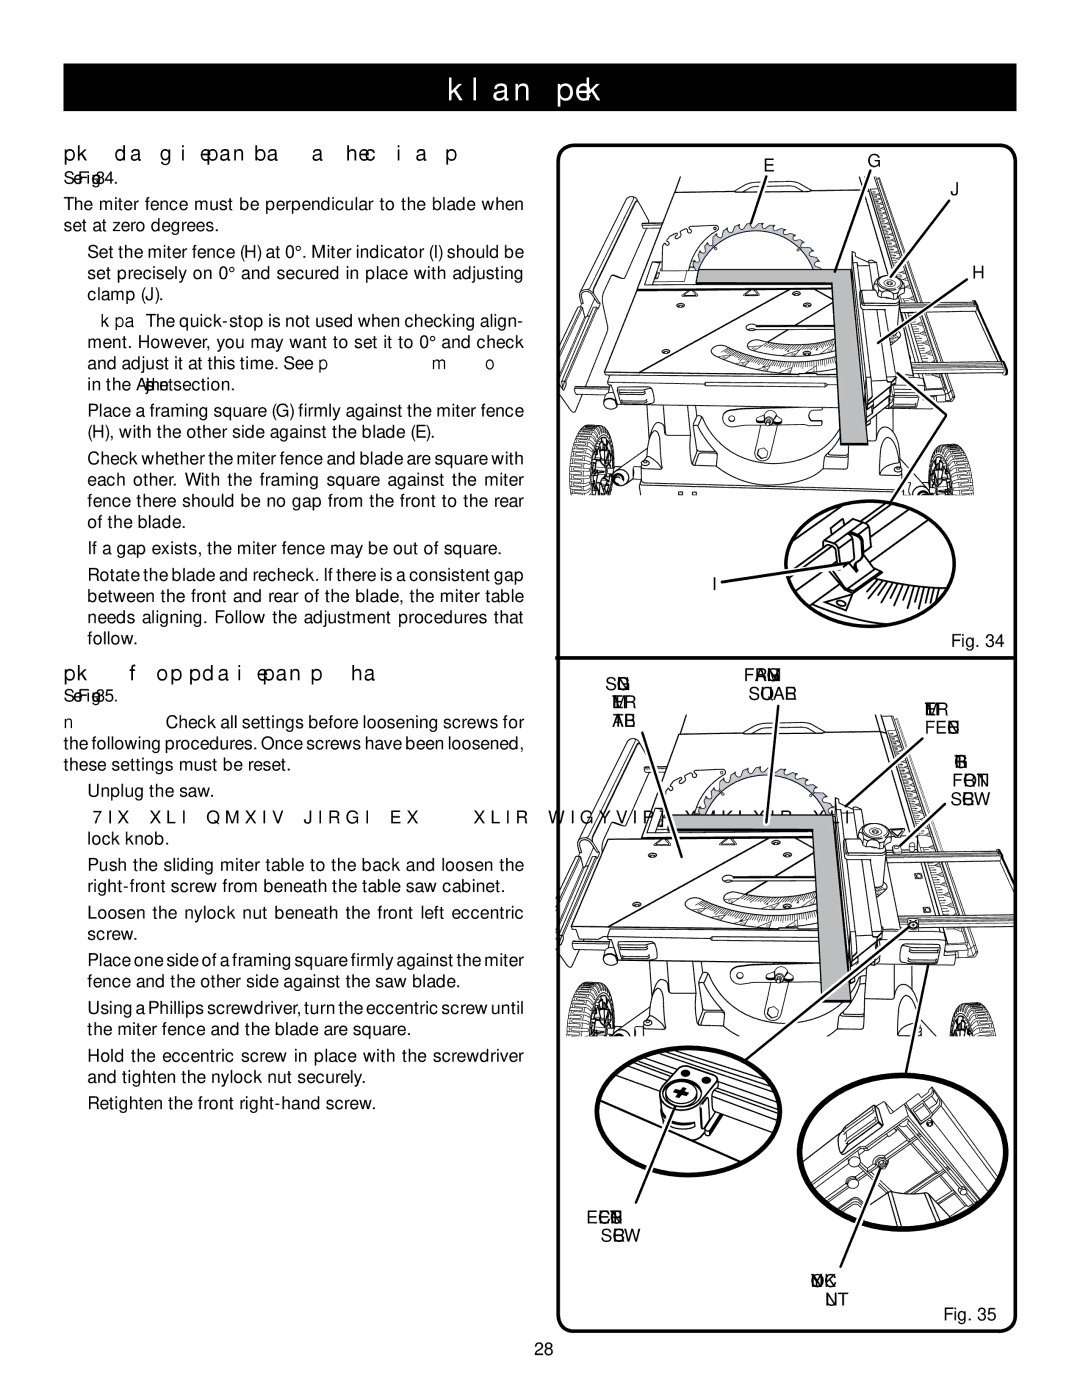
See Figure 34.
The miter fence must be perpendicular to the blade when set at zero degrees.
Set the miter fence (H) at 0°. Miter indicator (I) should be |
set precisely on 0° and secured in place with adjusting |
clamp (J). |
NOTE: The |
ment. However, you may want to set it to 0° and check |
and adjust it at this time. See To Adjust the Quick Stop |
in the Adjustment section. |
Place a framing square (G) firmly against the miter fence |
(H), with the other side against the blade (E). |
Check whether the miter fence and blade are square with |
each other. With the framing square against the miter |
fence there should be no gap from the front to the rear |
of the blade. |
If a gap exists, the miter fence may be out of square. |
e
| 45 | 45 |
40 | 40 | 30 |
| ||
| 30 | 30 |
2010 20
|
| 30 | 15 |
|
|
|
|
| |
0 | 10 |
| 10 | 0 |
|
| |||
|
|
|
|
15 ![]()
G
|
| J |
| 9 |
|
| 8 |
|
| 7 |
|
| 6 |
|
| 5 |
|
| 4 |
|
| 3 |
|
| 2 |
|
| 1 |
|
| 0 |
|
|
| 0 |
|
| 2 |
|
| 3 |
|
| 4 |
40 | 40 | 5 |
|
| 6 |
|
| 8 |
H
Rotate the blade and recheck. If there is a consistent gap |
between the front and rear of the blade, the miter table |
needs aligning. Follow the adjustment procedures that |
follow. |
To Adjust the Miter table
See Figure 35.
Remember: Check all settings before loosening screws for the following procedures. Once screws have been loosened,
i ![]()
Fig. 34
SLIDING | FRAMING |
| |
SQUARE |
| ||
MITER | MITER | ||
| |||
TABLE |
| ||
| FENCE | ||
|
|
these settings must be reset.
Unplug the saw.
Set the miter fence at 0˚ then securely tighten the lock knob.
Push the sliding miter table to the back and loosen the
Loosen the nylock nut beneath the front left eccentric screw.
Place one side of a framing square firmly against the miter fence and the other side against the saw blade.
Using a Phillips screwdriver, turn the eccentric screw until the miter fence and the blade are square.
Hold the eccentric screw in place with the screwdriver and tighten the nylock nut securely.
Retighten the front
40![]()
45 ![]()
30![]()
![]()
![]()
![]()
![]()
![]() 20
20
30![]()
![]()
10 ![]()
0![]()
15 ![]()
40
9 | RIGHT |
6 | FRONT |
8 |
|
7 | SCREW |
4 | |
5 |
|
3 |
|
2 |
|
1 |
|
0 |
|
| 0 |
| 2 |
| 3 |
| 4 |
| 5 |
| 6 |
| 8 |
ECCENTRIC
SCREW
NYLOCK
NUT
Fig. 35
28