ASSEMBLY
to attach the Leg
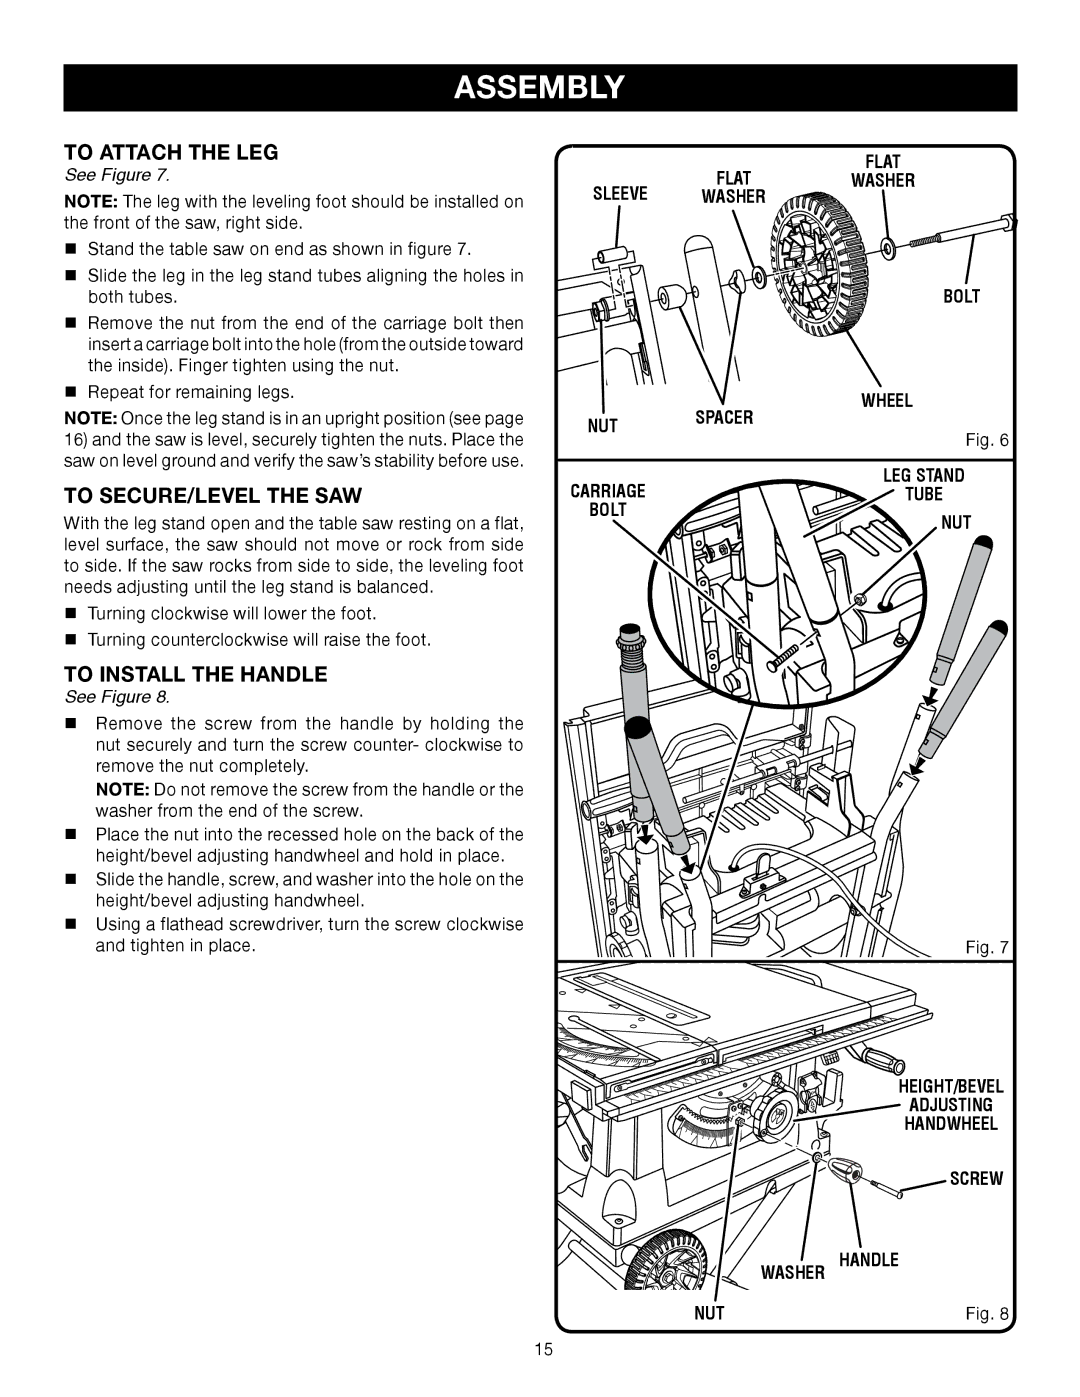
See Figure 7.
NOTE: The leg with the leveling foot should be installed on the front of the saw, right side.
nStand the table saw on end as shown in figure 7.
nSlide the leg in the leg stand tubes aligning the holes in both tubes.
nRemove the nut from the end of the carriage bolt then insert a carriage bolt into the hole (from the outside toward the inside). Finger tighten using the nut.
nRepeat for remaining legs.
NOTE: Once the leg stand is in an upright position (see page
16)and the saw is level, securely tighten the nuts. Place the saw on level ground and verify the saw’s stability before use.
to secure/level the saw
With the leg stand open and the table saw resting on a flat, level surface, the saw should not move or rock from side to side. If the saw rocks from side to side, the leveling foot needs adjusting until the leg stand is balanced.
nTurning clockwise will lower the foot.
nTurning counterclockwise will raise the foot.
to install the Handle
See Figure 8.
Remove the screw from the handle by holding the nut securely and turn the screw counter- clockwise to remove the nut completely.
NOTE: Do not remove the screw from the handle or the washer from the end of the screw.
Place the nut into the recessed hole on the back of the height/bevel adjusting handwheel and hold in place.
Slide the handle, screw, and washer into the hole on the height/bevel adjusting handwheel.
Using a flathead screwdriver, turn the screw clockwise and tighten in place.
FLAT
FLATwasher
sleeve washer
bolt
wheel
NUT spacer
Fig. 6
carriage | leg stand |
tube | |
bolt | NUT |
|
Fig. 7
HEIGHT/bevel
ADJUSTING
HANDWHEEL
SCREW
washer HANDLE
NUT | Fig. 8 |
15