ITALIANO

Configurare e utilizzare l’amplificatore per chitarra Hartke GT100

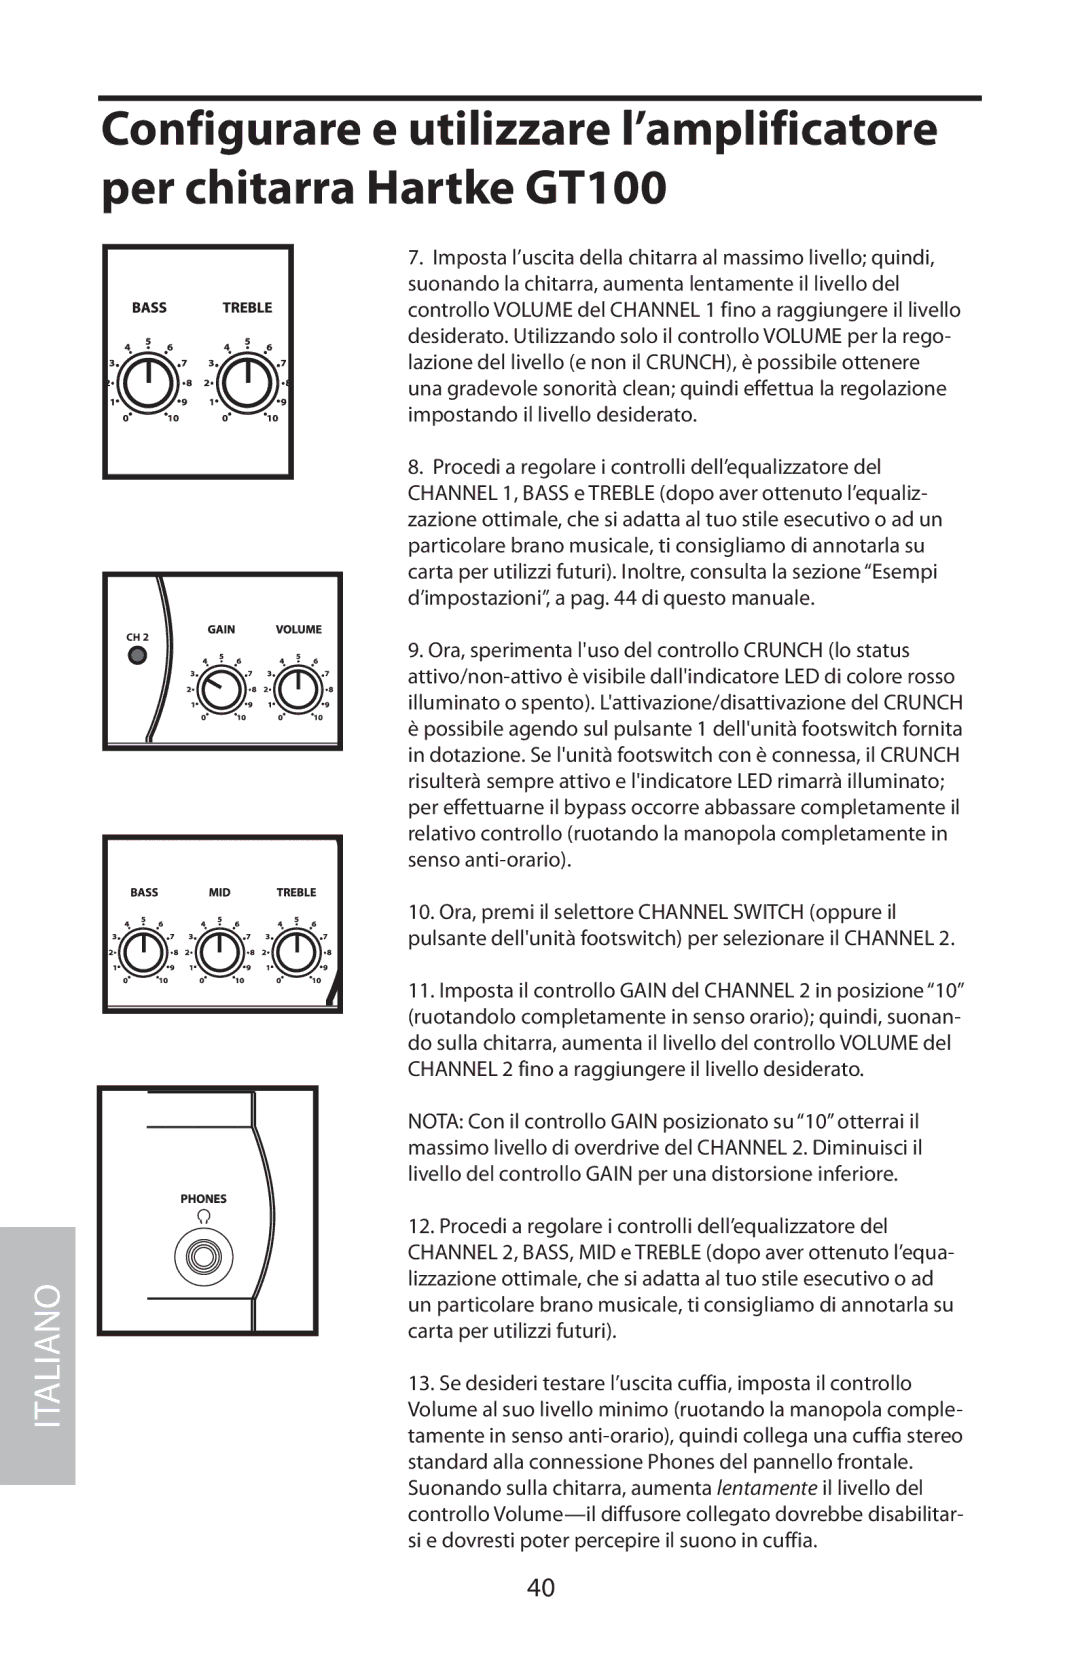
7.Imposta l’uscita della chitarra al massimo livello; quindi, suonando la chitarra, aumenta lentamente il livello del

controllo VOLUME del CHANNEL 1 fino a raggiungere il livello desiderato. Utilizzando solo il controllo VOLUME per la rego- lazione del livello (e non il CRUNCH), è possibile ottenere una gradevole sonorità clean; quindi effettua la regolazione impostando il livello desiderato.

8.Procedi a regolare i controlli dell’equalizzatore del CHANNEL 1, BASS e TREBLE (dopo aver ottenuto l’equaliz- zazione ottimale, che si adatta al tuo stile esecutivo o ad un particolare brano musicale, ti consigliamo di annotarla su carta per utilizzi futuri). Inoltre, consulta la sezione “Esempi d’impostazioni”, a pag. 44 di questo manuale.

#( 


9. Ora, sperimenta l'uso del controllo CRUNCH (lo status


attivo/non-attivo è visibile dall'indicatore LED di colore rosso


illuminato o spento). L'attivazione/disattivazione del CRUNCH


è possibile agendo sul pulsante 1 dell'unità footswitch fornita


in dotazione. Se l'unità footswitch con è connessa, il CRUNCH


risulterà sempre attivo e l'indicatore LED rimarrà illuminato;


per effettuarne il bypass occorre abbassare completamente il


relativo controllo (ruotando la manopola completamente in


senso anti-orario).


10. Ora, premi il selettore CHANNEL SWITCH (oppure il


pulsante dell'unità footswitch) per selezionare il CHANNEL 2.


11. Imposta il controllo GAIN del CHANNEL 2 in posizione “10”


(ruotandolo completamente in senso orario); quindi, suonan-


do sulla chitarra, aumenta il livello del controllo VOLUME del


CHANNEL 2 fino a raggiungere il livello desiderato.


NOTA: Con il controllo GAIN posizionato su “10” otterrai il


massimo livello di overdrive del CHANNEL 2. Diminuisci il


livello del controllo GAIN per una distorsione inferiore.


12. Procedi a regolare i controlli dell’equalizzatore del


CHANNEL 2, BASS, MID e TREBLE (dopo aver ottenuto l’equa-


lizzazione ottimale, che si adatta al tuo stile esecutivo o ad


un particolare brano musicale, ti consigliamo di annotarla su


carta per utilizzi futuri).


13.Se desideri testare l’uscita cuffia, imposta il controllo Volume al suo livello minimo (ruotando la manopola comple- tamente in senso anti-orario), quindi collega una cuffia stereo standard alla connessione Phones del pannello frontale. Suonando sulla chitarra, aumenta lentamente il livello del controllo Volume—il diffusore collegato dovrebbe disabilitar- si e dovresti poter percepire il suono in cuffia.

40

Page 44
Image 44
Samson GT100C manual Senso anti-orario

GT100, GT100C specifications

The Samson GT100C and GT100 are cutting-edge technologies that stand at the forefront of audio processing solutions, delivering unmatched performance for various audio applications. These models are specifically engineered for musicians, sound engineers, and audio enthusiasts who demand high-quality sound coupled with user-friendly features.

One of the standout features of the Samson GT100C and GT100 is their robust power output capabilities. Both models are equipped with a high-efficiency amp, which allows for a clear and dynamic audio experience. This power output is especially beneficial in live settings, ensuring that sound projection is not only loud but also maintains clarity, irrespective of the volume level.

In terms of connectivity, the GT100C and GT100 models are loaded with options for versatility. They feature multiple input channels that accommodate various instruments and microphones, allowing users to seamlessly switch between different audio sources. This is particularly advantageous for live performances as well as studio recordings where multiple inputs are essential.

The incorporation of advanced digital signal processing (DSP) technology is another highlight of the Samson GT100C and GT100 models. This technology enables a wide range of effects, including reverb, delay, and modulation, thereby providing users with the tools to enhance their sound creatively. Control over these effects is made easy with an intuitive interface, allowing quick adjustments during performances.

Moreover, the ergonomic design of both models ensures they are easy to transport and set up, making them ideal for on-the-go musicians. The lightweight yet sturdy construction provides durability, reducing the concerns associated with frequent travel.

In addition to their practical features, the Samson GT100C and GT100 also prioritize quality materials, resulting in reliable performance and longevity. Users can expect these models to withstand the rigors of professional use while consistently delivering exceptional sound quality.

In summary, the Samson GT100C and GT100 represent a sophisticated choice for anyone looking to enhance their audio experience. With their powerful output, versatile connectivity options, advanced DSP capabilities, and durable design, they cater to a wide range of performance scenarios, making them essential tools for modern audio professionals. Whether you're playing in a band, recording in a studio, or performing solo, these models offer everything needed for outstanding sound production.