Cutting or extending the pipe
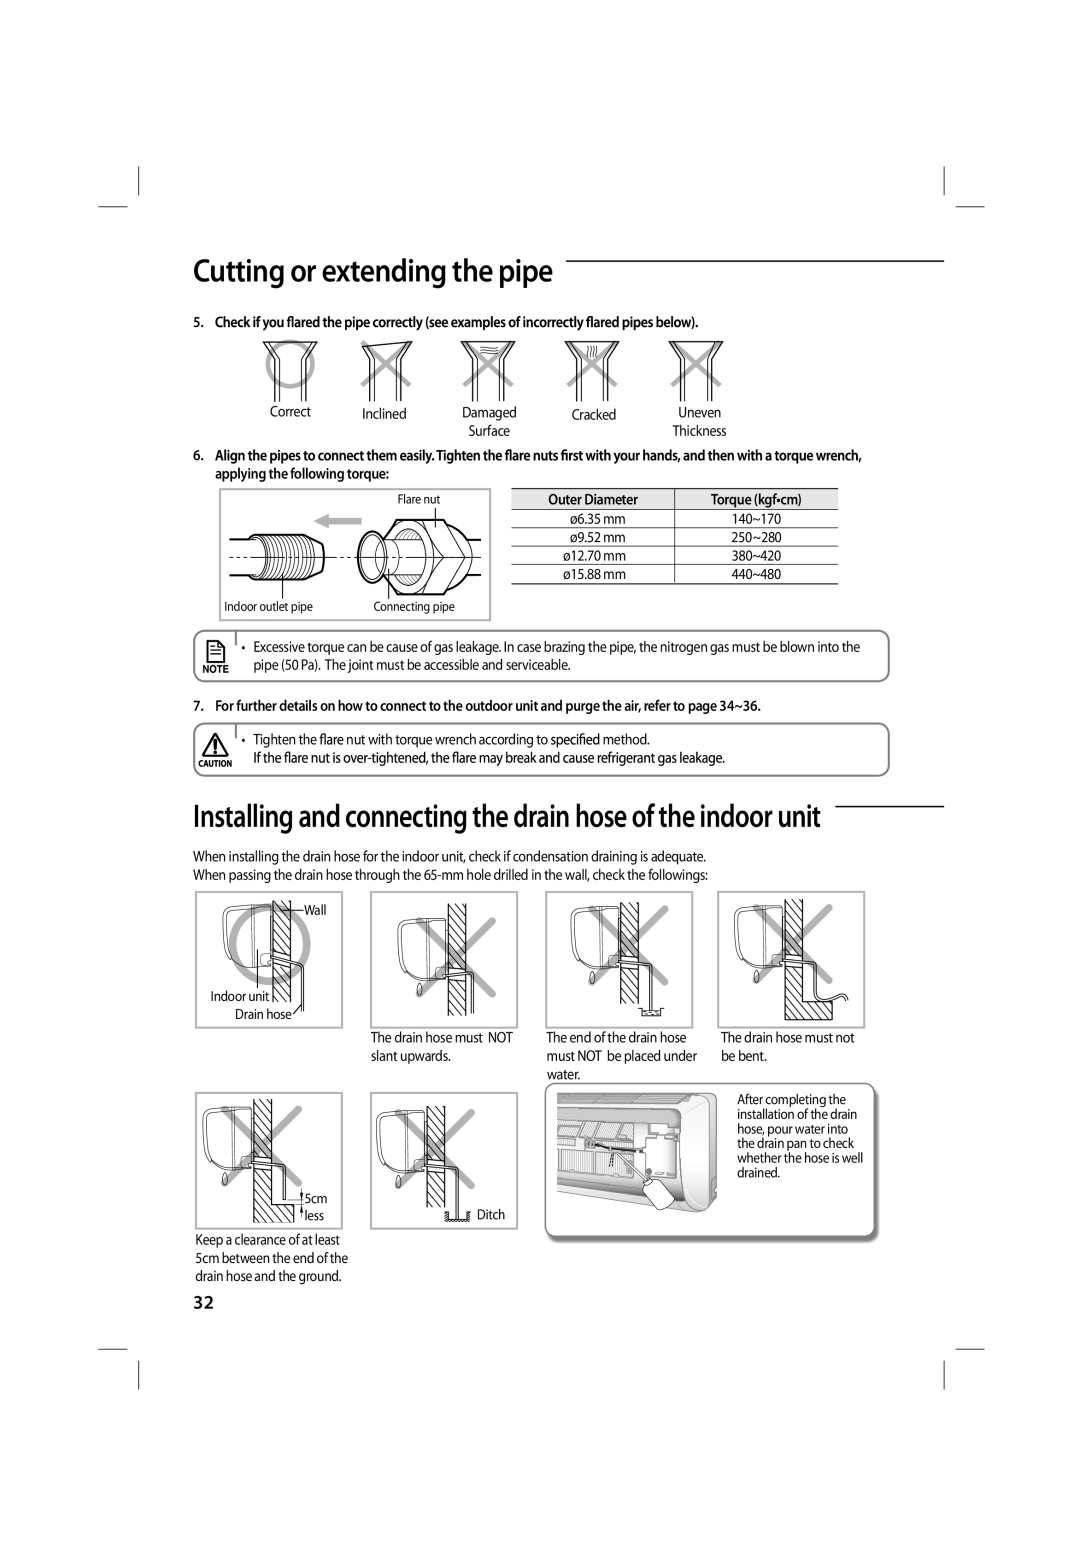
5.
Correct | Inclined | Damaged | Cracked | Uneven |
|
| Surface |
| Thickness |
6.
applying the following torque:
Flare nut
|
|
|
|
|
|
|
|
|
|
|
Indoor outlet |
| pipe |
|
|
|
| ||||
| Connecting pipe | |||||||||
Outer Diameter | Torque (kgf•cm) |
ø6.35 mm | 140~170 |
ø9.52 mm | 250~280 |
ø12.70 mm | 380~420 |
ø15.88 mm | 440~480 |
• Excessive torque can be cause of gas leakage. In case brazing the pipe, the nitrogen gas must be blown into the pipe (50 Pa). The joint must be accessible and serviceable.
7. For further details on how to connect to the outdoor unit and purge the air, refer to page 34~36.
![]()
![]() • Tighten the
• Tighten the ![]() nut with torque wrench according to
nut with torque wrench according to ![]() method.
method.
Installing and connecting the drain hose of the indoor unit
When installing the drain hose for the indoor unit, check if condensation draining is adequate. When passing the drain hose through the
![]() Wall
Wall
Indoor unit ![]()
![]()
Drain hose![]()
The drain hose must NOT slant upwards.
The end of the drain hose must NOT be placed under water.
The drain hose must not be bent.
5cm |
less |
Keep a clearance of at least 5cm between the end of the drain hose and the ground.
Ditch |
After completing the installation of the drain hose, pour water into the drain pan to check whether the hose is well drained.
32