English
Instructions
Contents
❾DPOF Standard
❾DPOF Cancel
❾FAQ
❾DPOF
About the icons
Getting to know your camera
Thank you for buying a Samsung Digital Camera
❾➓6❾
➃Do not insert the batteries with the reverse polarities
An FCC warning
CR-V3
System chart
Battery
Pouch Camera strap
Or the external devices may not recognise the camera
Computer
See p.94
System Requirements
USB
Identification of features
Front & Top
Back & Bottom
Menu
Mode dial
Side/ 5-function button
Flash
❾ AS mode ❾ M mode
Snow
Auto Program
Play
Scene
Important information about battery usage
Connecting to a Power Source
Ni-Cdover 1000mAh
❾➓15❾
Instructions on how to use the memory card
Fine
3072 2816 2592 2272 2048 1600 1024 640 320
Removing the memory card
Inserting the memory card
AEB
LCD monitor indicator
Press the shutter button to capture an image
Starting the recording mode
Select the Auto mode by rotating the mode dial
ISO
❾ How to use the AS mode
Starting the recording mode
Use the ASM, Up/Down/Left/Right buttons to select Aperture
Aperture and Shutter can be set manually in this mode
Steps from 1-4 are the same as those for Auto mode
Select the M mode by rotating the mode dial
Recording time will display on the LCD monitor
For as long as the available recording time
❾➓24❾
❾ Pressing the shutter button down half way
Things to Watch Out for When Taking Pictures
Zoom W/T button
Using the camera buttons to adjust the camera
Zoom bar
Zoom W/T button
Subject will appear nearer
Digital zoom Tele
Voice memo / UP button
Voice memo / UP button
Macro / Down buttonFocusing
Focus lock
Macro / Down buttonFocusing
~3.0 ~2.0 25~0.8
Flash / Left button
Unit m
Autofocus Macro Wide Tele
Eye reduction function
❾ Flash mode indicator Icon Description
❾ Available flash mode, by recording mode
Automatically
❾ The default is OFF
Self-timer / Right button
Seconds before the image is taken
❾ Menu button
MENU/ OK button
ISO sensitivity value
Sub menu Available camera mode
+/- button
ISO menu bar Will appear as shown
Custom
Daylight
Cloudy
Tungsten
Shown
Value, the exposure indicator
Negative exposure compensation value reduces the exposure
ASM buttonManual & Scene mode button
Shutter Speed
Slow Fast
LCD button
Size
Using the LCD monitor to adjust the camera settings
MYSET3
Metering Multi Spot Single
Effect Sepia
MYSET1 Myset MYSET2
Size
How to use the menu
Use the UP and Down buttons to select a sub menu
Quality
Size
Avi
Continuous shot
Metering
RGB
Continuous shot
Effect
Fine Normal
Vivid
Effect
Sharpness
Soft
Menu tap
Press the Left/Right buttons to select the Myset
Press the right button
Fireworks
Scene
Children
Text
Starting play mode
Voice file, the voice indicator Will be displayed on
Date
Flash OFF
Thumbnail / Enlargement button
Voice memo/ Up button
Cancel
Trim
Temporarily stops playback
Pause mode Resumes playback
Voice memo/ Up button
Play & Pause / Down button
Button
LEFT/ RIGHT/ MENU/ OK button
Pressing the LCD
Delete button
If Cancel is selected cancels Delete Image
Protect ONE PIC
Setting up the play back function using the LCD monitor
Slide Repeat
Resize
Print
Select
Index Dpof Print
Custom SET
Reset
Type
Photo
Press the LEFT/ Right button and select the Slide menu tab
Press the OK button to save the configuration
Starting the slide show
❾ Images can be displayed continuously at pre-set intervals
Horizontal
Rotating an image
Vertical
❾ Image Resize Types
Resize
Logo
Unlock
Protecting images
Lock
Dpof
Deleting all images
Button and press the Right button
Press the LEFT/ Right button and select the Dpof menu tab
If no is selected The image will not be printed
Select a desired sub menu by pressing the UP/ Down
❾ Setting the Print Size
Select the Cancel menu by pressing the UP/ Down
Cancels the standard print setting
LEFT/ Right button
Copy to Card
Dpof Auto Print
Printer Setup
PictBridge
Images
PictBridge Picture Selection
Standard
PictBridge Printing
Is printed on one piece of paper
AUTO, OFF, on
PictBridge Print Setting
❾ Auto SET
AUTO, DRAFT, NORMAL, Fine
If no is selected Settings will not be reset
PictBridge Reset
Setup menu
All pictures
File name
3SEC
Series
File name
Auto power off
Specified
Select the Language menu by pressing the UP
Language
Down button and press the Right button
No IMAGE! message will appear
Formatting a memory card
Date type
Setting up the Date/ Time
Time
Imprinting the recording date
Function lamp
Only the Date will be imprinted on the image file
Sound
Function lamp
LCD brightness
Selecting an External Device USB
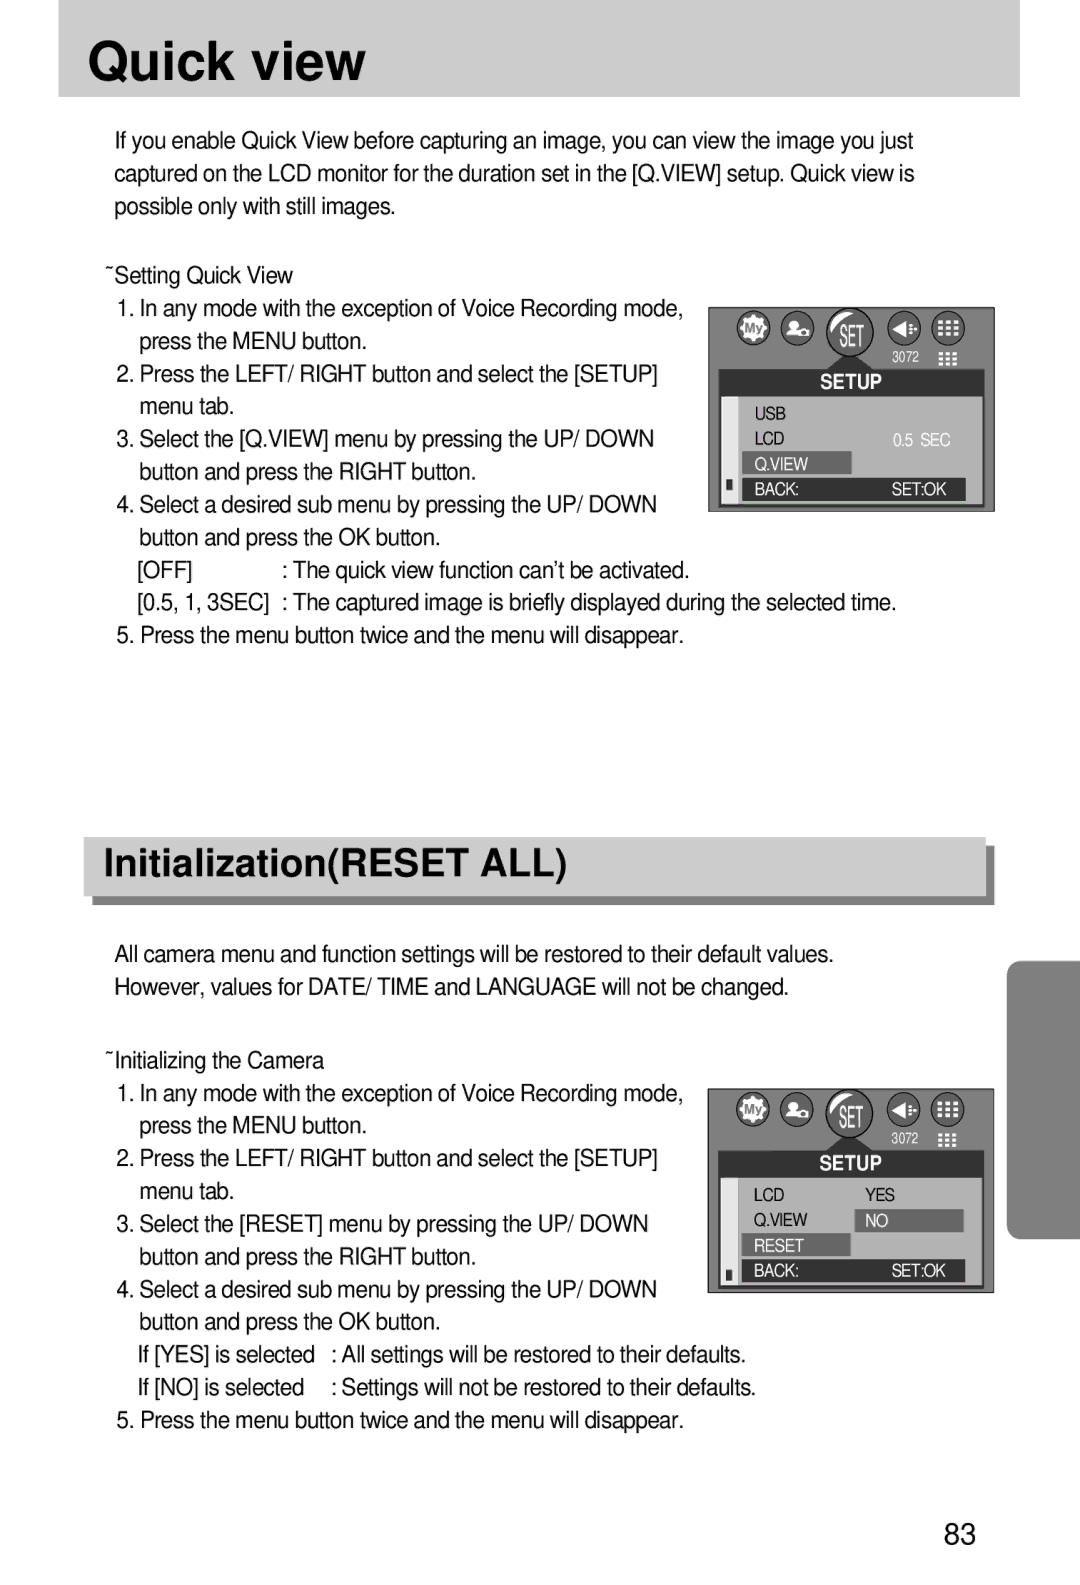
Quick view
InitializationRESET ALL
❾ Initializing the Camera
Start up image
Setting up the Mycam menu
Start up sound
Shutter sound
Important notes
❾➓87❾
Card Full
Card Error
File Error
LOW Battery
Before contacting a service center
Flash range
Symptom Causes Remedy
Clean the lens
Operate Card error has
Camera is off Turn the camera on
When using AC adapter is not Connected
Install Windows 98, 98SE, 2000, ME
Check the connection
Specifications
Special Features
Digital output connector USB
Interface Audio Mono DC power input connector
Dimensions WxHxD 109.8 x 56.8x 34.1 mm Weight
Setup menu
File name
File name
Language
Formatting a memory card
Setting up the Date/ Time
Imprinting the recording date
Function lamp
Selecting an External Device USB
Quick view
Setting up the Mycam menu
Shutter sound
Important notes
❾➓87❾
❾➓88❾
Before contacting a service center
❾➓90❾
❾➓91❾
Specifications
❾➓93❾
System Requirements
Software Notes
About the software
Setting up the application software
❾➓97❾
Frame 8 may not appear according to System requirements
Select Components window will appear. Click Next button
❾➓100❾
❾➓101❾
Starting PC mode
Cut
❾➓104❾
Removing the USB Driver for Windows 98SE
Removable Disk
Removing the removable disk
Using the USB Driver for MAC
Setting up the USB Driver for MAC
Web album etc
Digimax Viewer
Property
Print, Slide show, Export, Sending e-mail, On-line print
Using PhotoImpression
FAQ
→ Device Manager → Universal Serial Bus controllers
FAQ
❾➓113❾
Type regsvr32 /u m3jpgdec.ax and press the Enter key
Memo
6806-2530