Installing the Wall Mount Kit (LE26R53BD)
How to assemble the Wall Mount Bracket
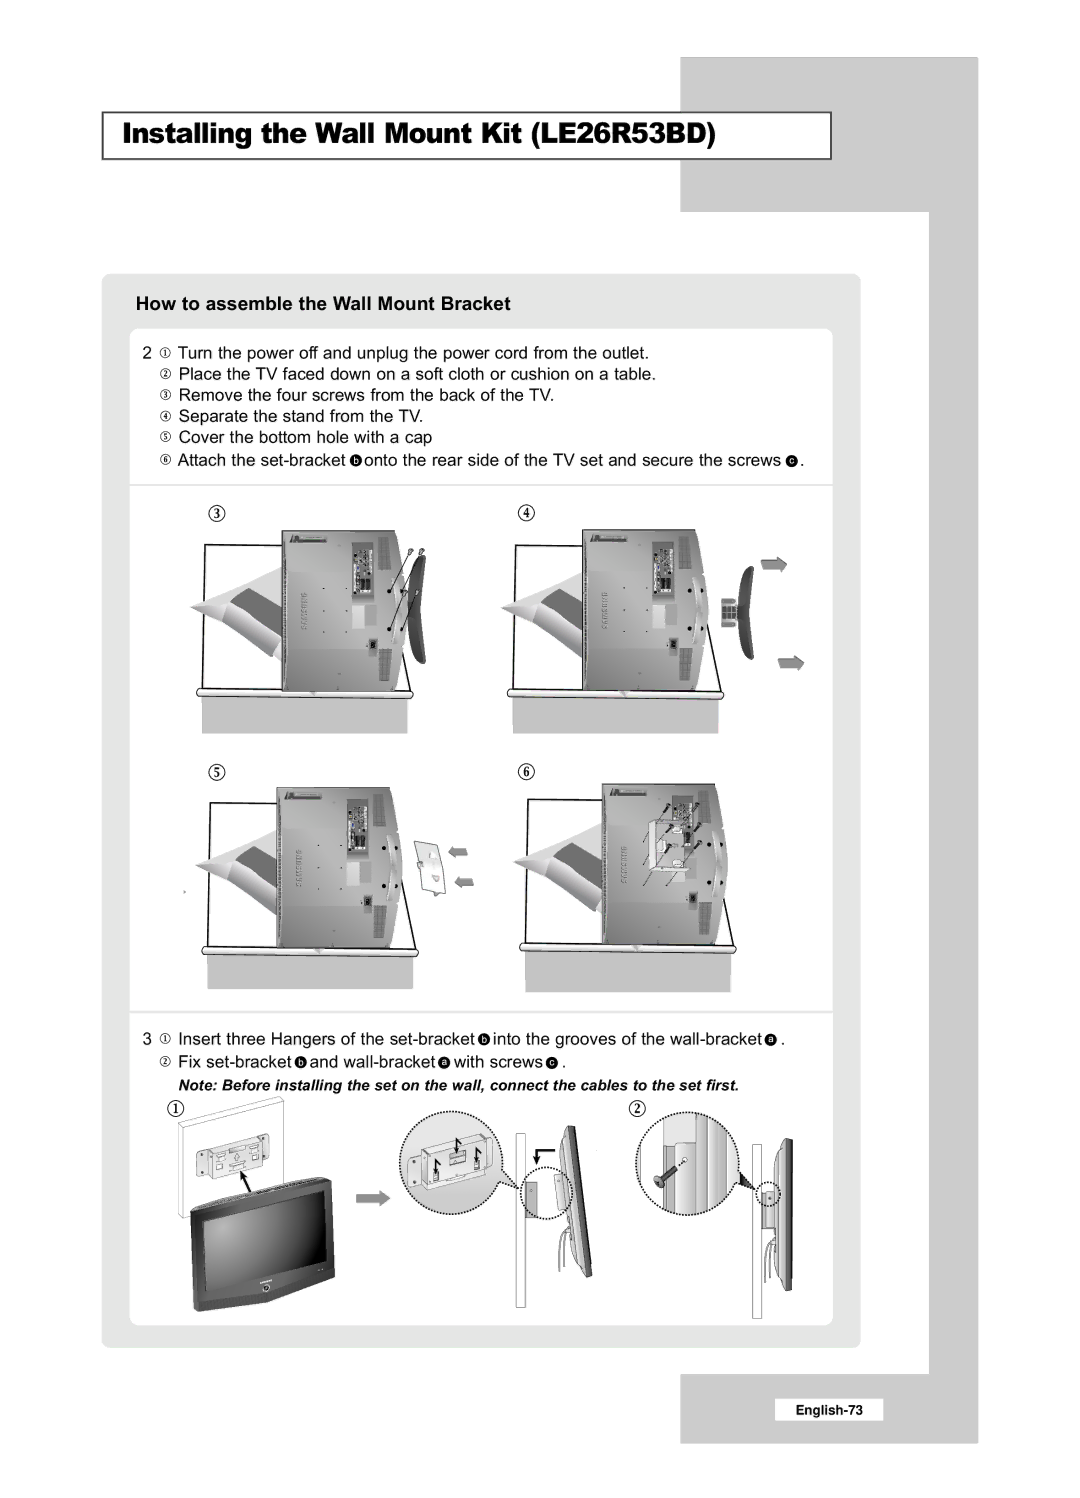
2![]() Turn the power off and unplug the power cord from the outlet.
Turn the power off and unplug the power cord from the outlet.
![]() Place the TV faced down on a soft cloth or cushion on a table.
Place the TV faced down on a soft cloth or cushion on a table.
![]() Remove the four screws from the back of the TV.
Remove the four screws from the back of the TV.
![]() Separate the stand from the TV.
Separate the stand from the TV.
![]() Cover the bottom hole with a cap
Cover the bottom hole with a cap
![]() Attach the
Attach the ![]() onto the rear side of the TV set and secure the screws
onto the rear side of the TV set and secure the screws ![]() .
.
3![]() Insert three Hangers of the
Insert three Hangers of the ![]() into the grooves of the
into the grooves of the ![]() .
.
![]() Fix
Fix ![]() and
and ![]() with screws
with screws ![]() .
.
Note: Before installing the set on the wall, connect the cables to the set first.