Chapter 2 Installation
xInstallation and Network configuration
Mounting
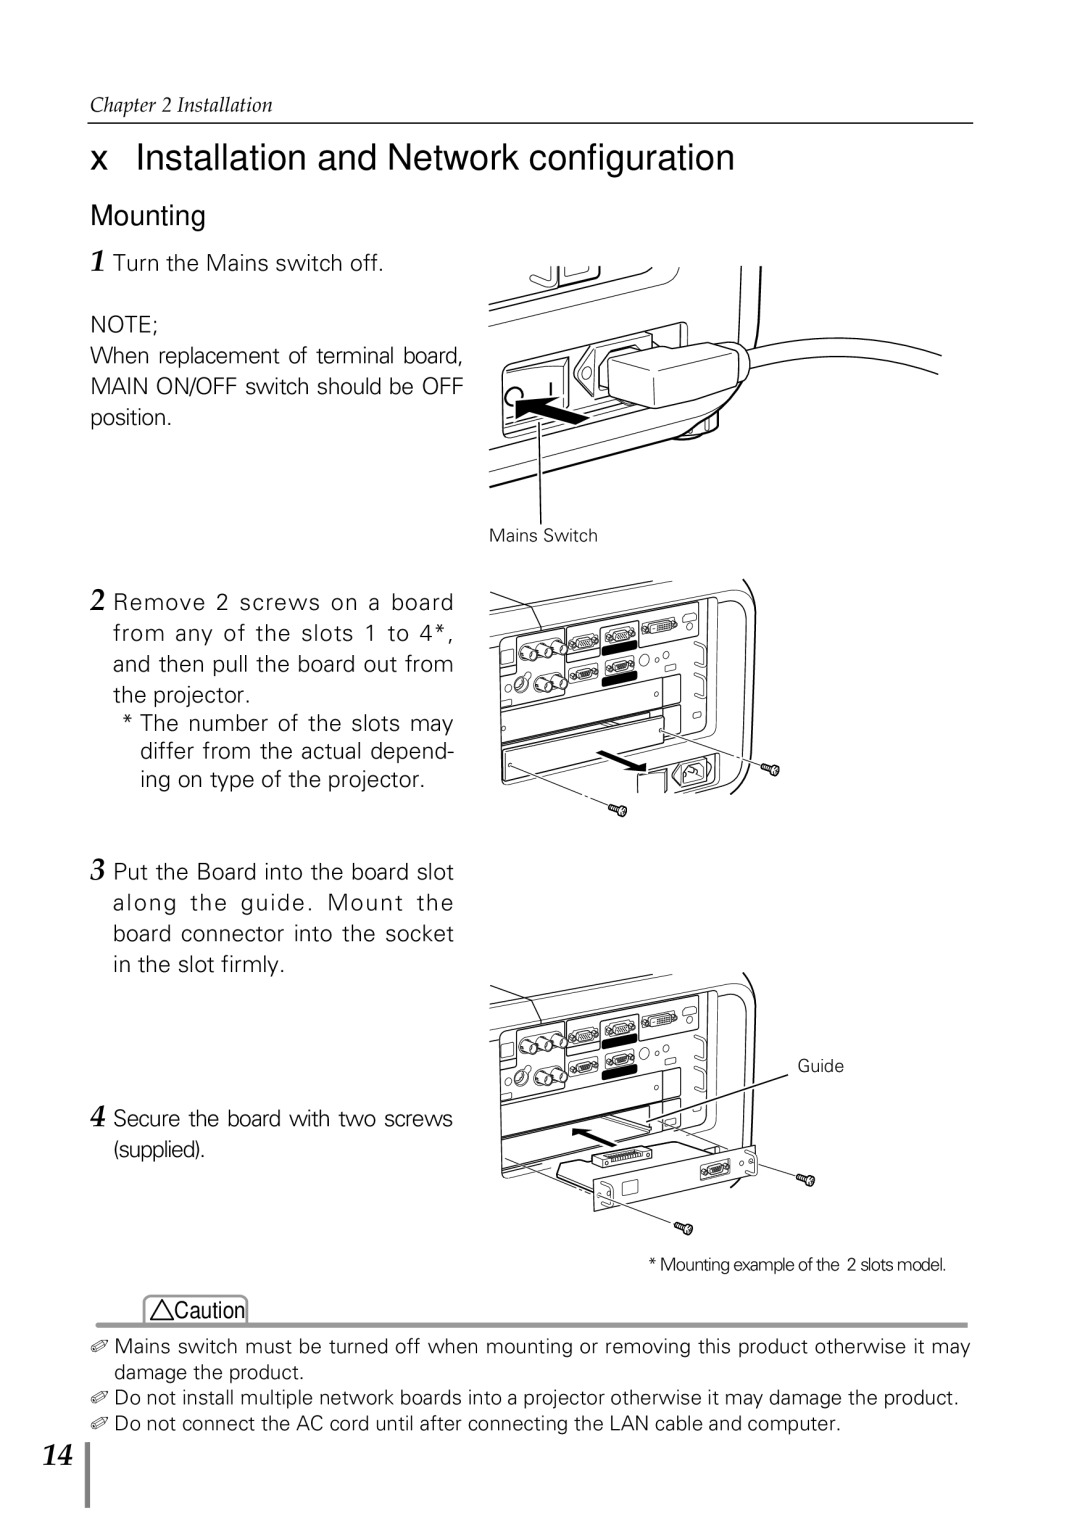
1 Turn the Mains switch off.
NOTE;
When replacement of terminal board, MAIN ON/OFF switch should be OFF position.
Mains Switch
2 Remove 2 screws on a board from any of the slots 1 to 4*, and then pull the board out from the projector.
*The number of the slots may differ from the actual depend- ing on type of the projector.
3 Put the Board into the board slot along the guide. Mount the board connector into the socket in the slot firmly.
4 Secure the board with two screws (supplied).
Guide
* Mounting example of the 2 slots model.
!Caution
✐Mains switch must be turned off when mounting or removing this product otherwise it may damage the product.
✐Do not install multiple network boards into a projector otherwise it may damage the product.
✐Do not connect the AC cord until after connecting the LAN cable and computer.
14