Network configuration
3.Select "Network setting" in the Network menu and press SELECT button, and then the LAN setting screen will appear and selected LAN settings will be displayed. Adjust each item to the setting environment. Consult your system administrator about the detailed settings.
Press SELECT button in a row where you want to adjust, and adjust the figures with the Point ed buttons and move among the items with the Point 7 8 buttons, and then press SELECT button to fix. Move to the next row with the Point ed buttons to adjust.
4.After completing all the settings, select “Set” and press SELECT button. Now, all procedures have been done. To cancel the adjusted settings, select "Cancel" and press SELECT button.
You can confirm the LAN settings you have made from “Network information” (p.14). In such cases that the LAN cannot be connected, see this screen.
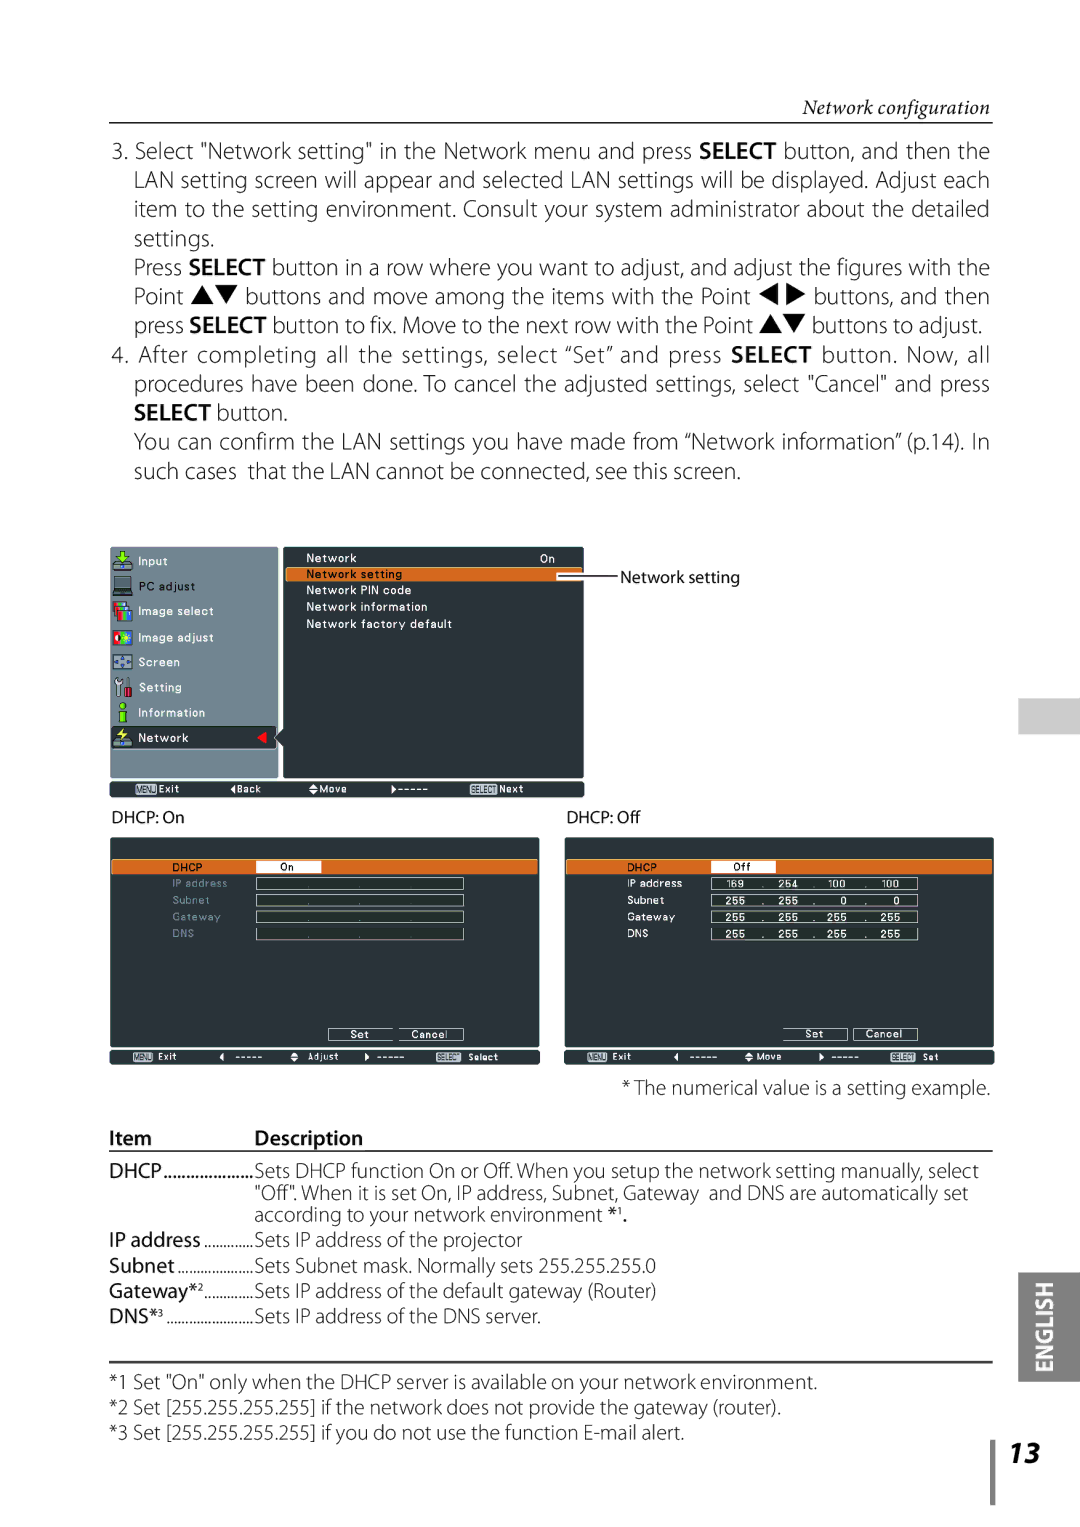
![]() Network setting
Network setting
DHCP: On | DHCP: Off |
| * The numerical value is a setting example. |
Item | Description |
DHCP | Sets DHCP function On or Off. When you setup the network setting manually, select |
| "Off". When it is set On, IP address, Subnet, Gateway and DNS are automatically set |
IP address | according to your network environment *1. |
Sets IP address of the projector | |
Subnet | Sets Subnet mask. Normally sets 255.255.255.0 |
Gateway*2 | Sets IP address of the default gateway (Router) |
DNS*3 | Sets IP address of the DNS server. |
*1 Set "On" only when the DHCP server is available on your network environment. *2 Set [255.255.255.255] if the network does not provide the gateway (router).
*3 Set [255.255.255.255] if you do not use the function
ENGLISH
13