Manuals
/
Sanyo
/
Computer Equipment
/
Projector
Sanyo
Projector
owner manual
Select an item by selecting a radio button
Models:
Projector
1
21
62
62
Download
62 pages
56.47 Kb
18
19
20
21
22
23
24
25
Install
Default, OFF
Login
Connecting to the LAN line
Network configuration
Setup Procedures
Command Function
Image adjustment
Display of main setting
Safety
Page 21
Image 21
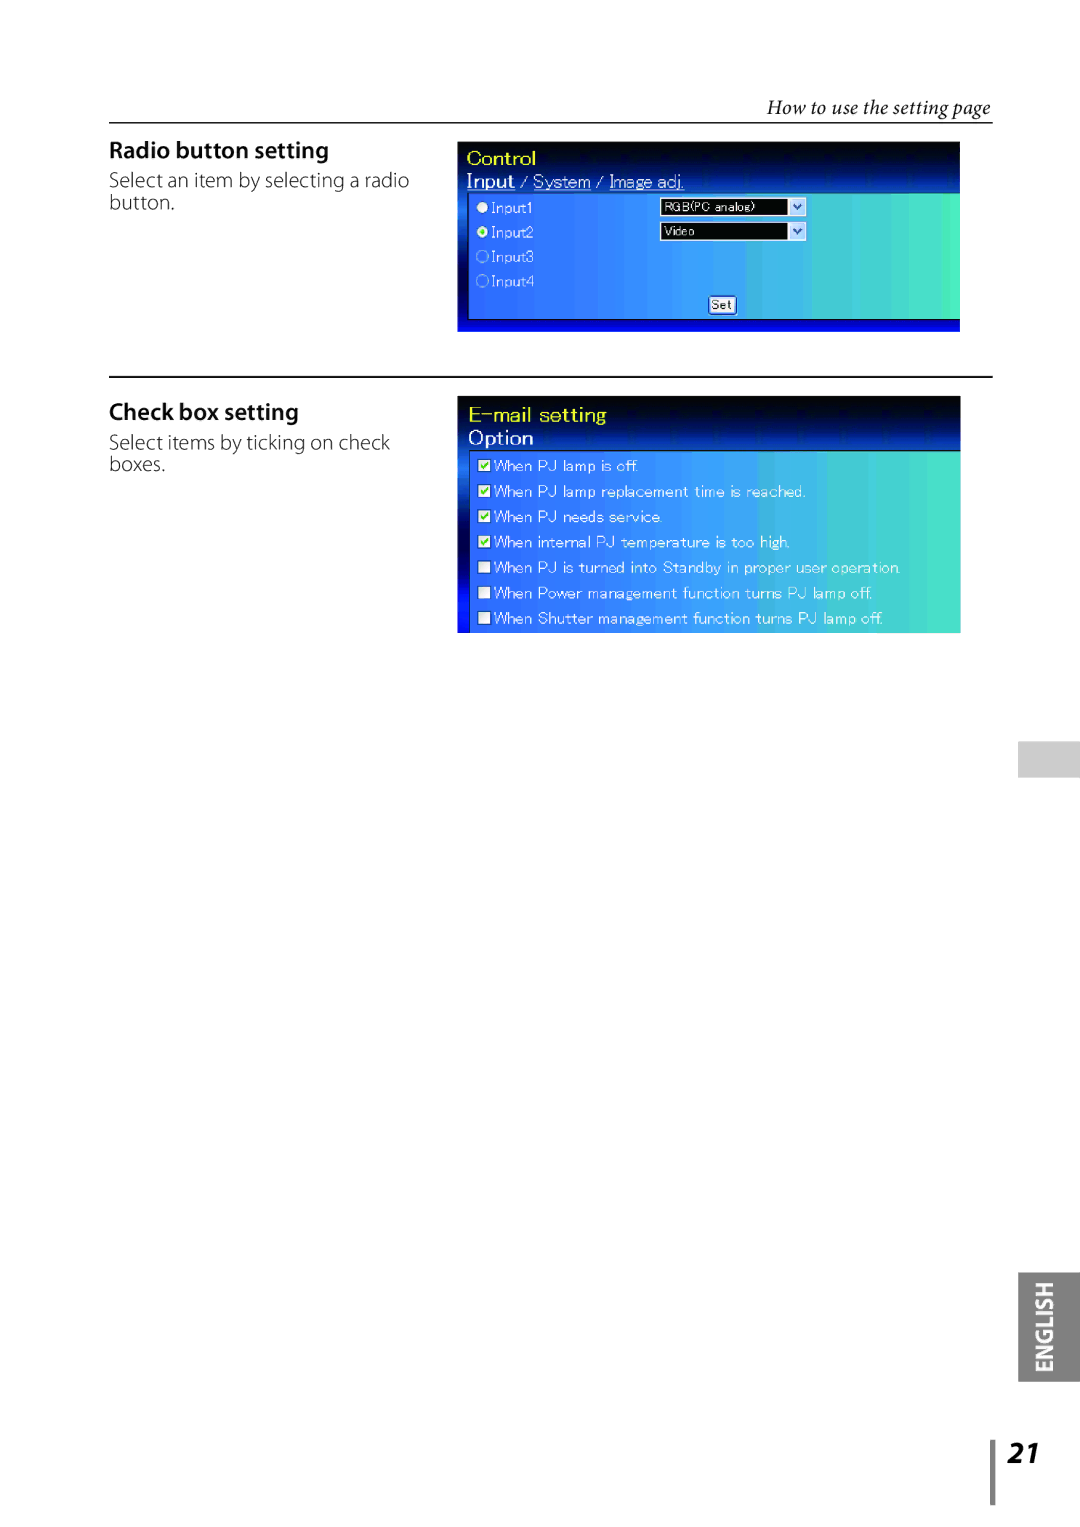
How to use the setting page
Radio button setting
Select an item by selecting a radio button.
Check box setting
Select items by ticking on check boxes.
ENGLISH
21
Page 20
Page 22
Page 21
Image 21
Page 20
Page 22
Contents
Network Set-up and Operation
Wired Setting Projector Set-up and Operation
Compliance Federal Communications Commission Notice
Safety instructions
Table of contents
Chapter
Internet Intranet
Features
Required operating environment for computers
Network specifications of the projector
Expression/Abbreviation
Use of this manual
Trademarks
Flow of installation
Connect the LAN and set the configuration
Network Configuration has completed
Preparation
Setup Procedures
Connecting to the LAN line
Description
Network PIN code
Numerical value is a setting example
169.254.100.100
255.255.0.0
255.255.255.255
Setup Procedures
Chapter Basic Setting and Operation
Login the setting page of the projector
Login
Enter the IP address
Main setting page in the display
Display of main setting
Sub menu tab Switches the sub menu tab Main menu
Setting
Example of the setting
How to use the setting
Select items by ticking on check boxes
Select an item by selecting a radio button
Initial setting
PJLink and password setting
Network PIN code setting
To 32 alphanumeric characters can be used for the password
Whats PJLink?
Sets Dhcp configuration ON/OFF
Network configuration
Mail setting
Setting Smtp authentication
Setting Smtp server and administrator address
Registering and deleting E-mail addresses
Check / Delete
Error message for sending alert mail
Setting POP server
Examples Type and contents of alert mail
Enter community name to send Trap. Default name is public
Snmp setting
PJ information
Enter user name of the projector etc. optional
Up to 99,999 hours can be set for the time setting
Trap check/delete
Click Set button if you tick or un-tick the check box on a
Chapter Controlling the Projector
Service in need
Power control and status check
Displays the status of the projectors power. Refer to next
PJ status
Status Description
About projector condition
Input
Control
Meet the input signal are listed
System
Item Description
Image mode Video Computer
Image adjustment
PC adjustment
Screen setting
Setting up the projector
Screen mode Video
Lens adjustment
Input source
Normal Full Wide169 Zoom True Natural wide Custom
Setting
Stores the adjustment values. Select a
Resets the settings of Picture in Picture
Mode no. User1 User5 from the pull
Clear the adjustment values. Select
Remote control
Default, OFF
Sets on or off the logo display on
Shutter management...Sets the shutter management operation
Time, Network PIN code, Network setting
Sets the color of the contents. Color
Settings, etc
Sets the digital processing
Information
Information
Items Description
Network
Indication of the lamp status
Indication of the filter status
Status
Chapter Appendix
Peer-To-Peer connection
Examples of connection
To another network
Gateway Router installed in the network
Use of telnet
Control
Use the IP address assigned to the projector
Command Function
Password 1234 is used for the example
C00 Power on C01 Power off C05 Input C06 C07 C08
Menu display on
Web browser setting
Active Script/JavaScript enable
Proxy setting
Examples OS/Browsers
Windows XP Professional
Internet Explorer
Proxy setting
Netscape Navigator
JavaScript Setting
Safari
MAC OS X v
How can I restrict access from the computer
Why doesn’t the setting page appear in my web browser?
How can I install several projectors?
Operation
Why am I not receiving E-mail alert messages?
What are the rules for IP address assignment?
What is the MAC address assigned to the projector?
Can I update the firmware of the projector
SO-KL8A
Top
Page
Image
Contents