Manuals
/
Schwinn
/
Personal Care
/
Mobility Scooter
Schwinn
250 schwinn
manual
Attach Console Bracket to Console Mast
Models:
250 schwinn
1
15
52
52
Download
52 pages
24.76 Kb
12
13
14
15
16
17
18
19
Troubleshooting
Specification
Warranty
Maintenance
Initial Setup
Assembly
Seat Adjustment
Safety
Features
Pausing or Stopping
Page 15
Image 15
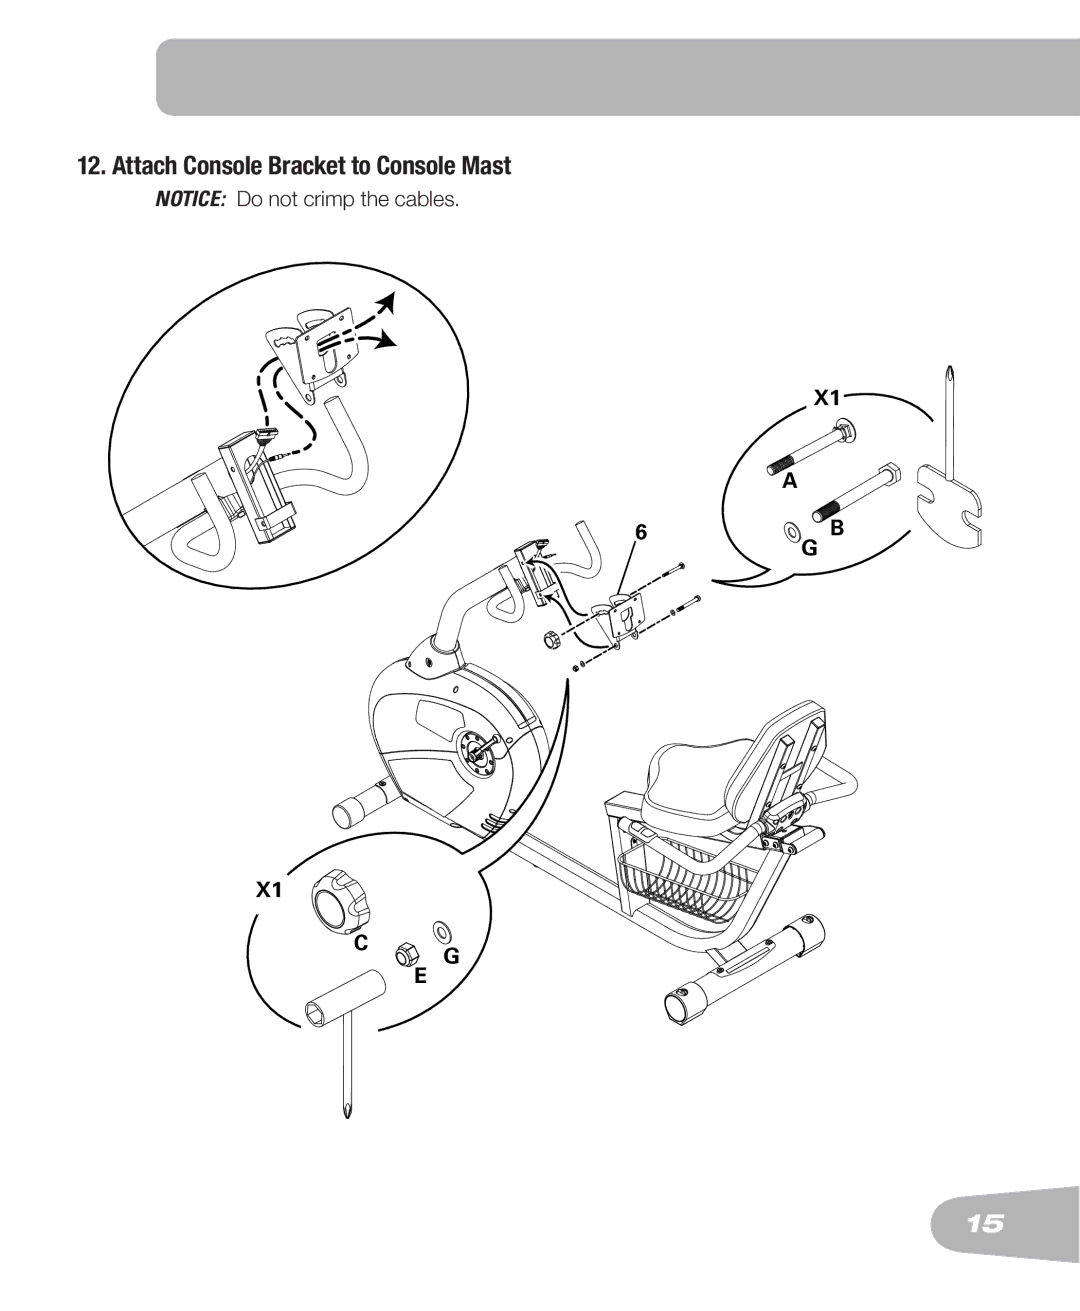
12. Attach Console Bracket to Console Mast
NOTICE:
Do not crimp the cables.
X1
A
6
B
G
X1
C
E
G
15
Page 14
Page 16
Page 15
Image 15
Page 14
Page 16
Contents
250
Table of Contents
Obey the following warnings
Important Safety Instructions -Assembly
FCC Compliance
Safety Warning Labels Serial Number
Specifications
Qty Description
Parts
Included Not Included Recommended
Hardware / TOOLs
Assembly
Page
Attach Seat Pads to Seat Frame Assembly
Hardware card
Attach Seat Rail Assembly to Frame Assembly
Attach Console Mast to Frame Assembly
Attach Upright Handlebar to Console Mast
Attach Console Bracket to Console Mast
Remove Hardware from Console
Connect Cables and Attach Console to Frame Assembly
Adjust and Tighten the Console Mast and Console
Attach Pedals to Frame Assembly
Connect AC Adapter to Frame Assembly Final Inspection
Leveling the Bike
Before YOU Start
Before using this equipment, obey the following warnings
Important Safety Instructions
Features
Keypad Functions
Console Features
LCD Display Data
Remote Heart Rate Monitor
Contact Heart Rate Sensors
Pulse Heart Rate
Heart Rate Calculations
Age
FAT-BURNING Target Heart Rate
What to Wear
Seat Adjustment
Foot Position / Pedal Strap Adjustment
Operations
Console Adjustment
Power-Up / Idle Mode
Auto Shut-Off Sleep Mode
Initial Setup
Guest User / Profile Program
Quick Start / Manual Program
Add User Profile
Schwinn Advantage User Setup Mode
User Profile Workout Program
Edit User Profile
Custom Workout
Delete a User Profile
Changing Resistance Levels
Profile Programs
Heart Rate Control HRC Workout
Fitness Test
Distance Goal Program
Results / Cool Down Mode
User Statistics
Pausing or Stopping
Page
Console Setup Mode
Page
Monthly
Maintenance
Maintenance Parts
Page
Condition/Problem Things to Check Solution
Troubleshooting
Page
Condition/Problem Things to Check Solution
Page
Page
Limited Warranty
Nautilus Bowflex Schwinn Fitness Universal
Top
Page
Image
Contents