Protecting one image/video clip
You can protect the image/video clip from being accidentally erased by using the protect function in the Playback menu. Follow the steps below to perform protect function:
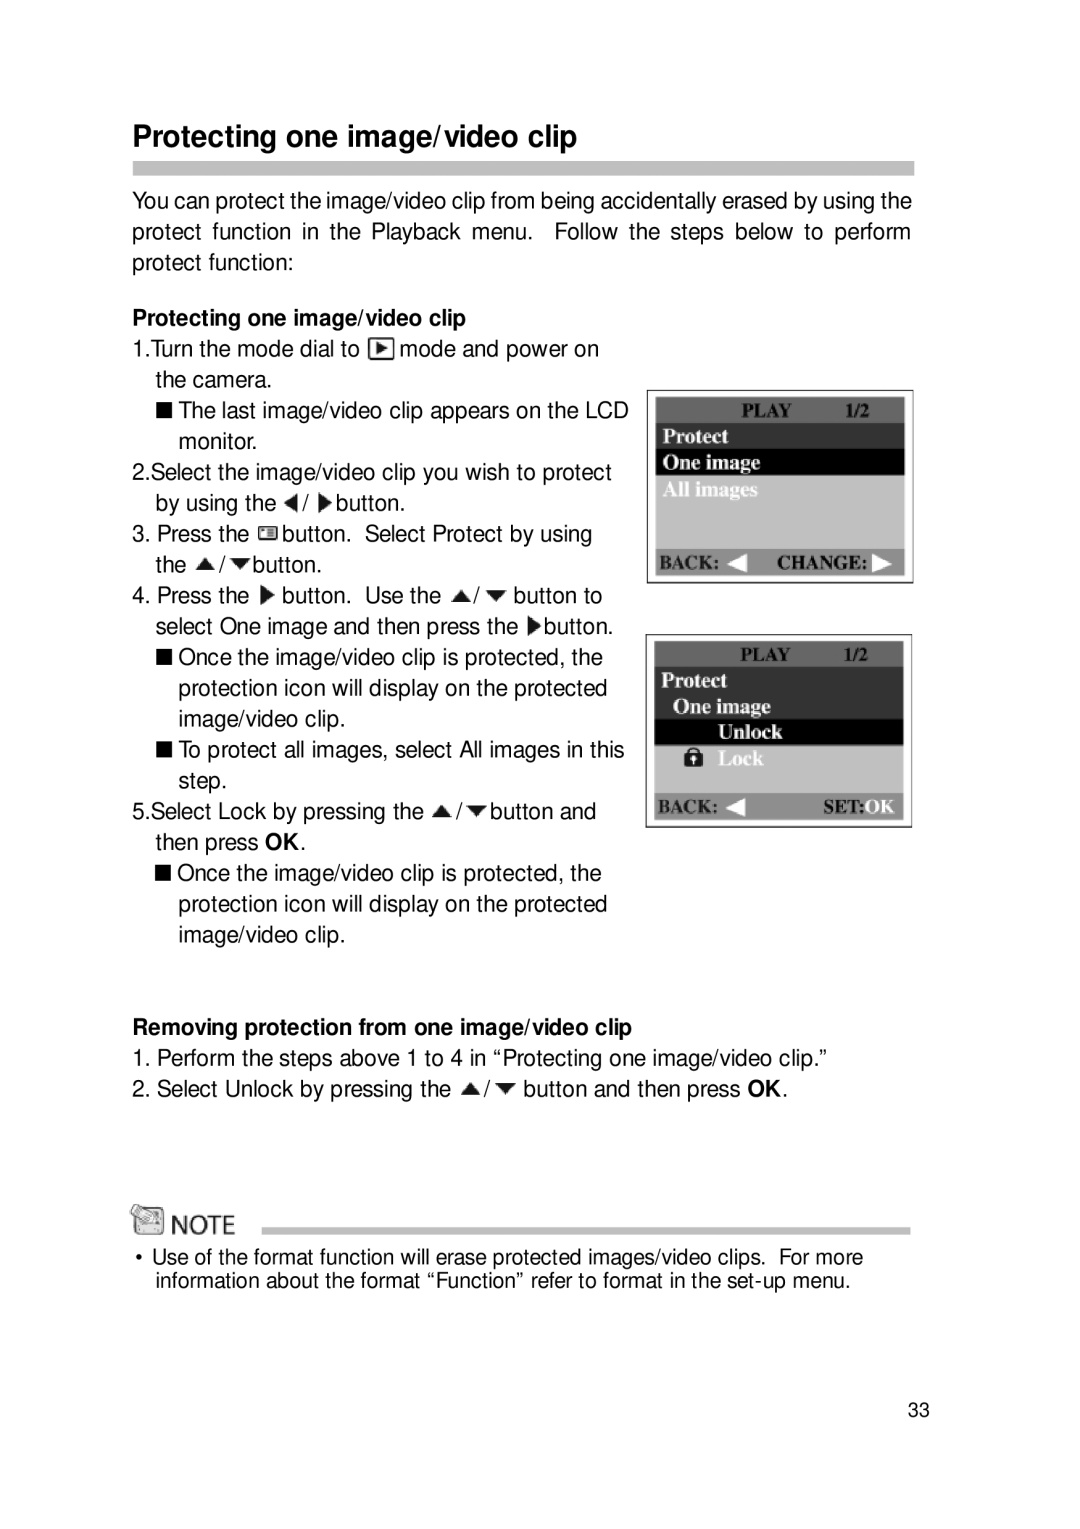
Protecting one image/video clip
1.Turn the mode dial to ![]() mode and power on the camera.
mode and power on the camera.
■The last image/video clip appears on the LCD monitor.
2.Select the image/video clip you wish to protect by using the ![]() /
/ ![]() button.
button.
3.Press the ![]() button. Select Protect by using the
button. Select Protect by using the ![]() /
/ ![]() button.
button.
4.Press the ![]() button. Use the
button. Use the ![]() /
/ ![]() button to select One image and then press the
button to select One image and then press the ![]() button.
button.
■Once the image/video clip is protected, the protection icon will display on the protected image/video clip.
■To protect all images, select All images in this
step.
5.Select Lock by pressing the ![]() /
/![]() button and then press OK.
button and then press OK.
■Once the image/video clip is protected, the protection icon will display on the protected image/video clip.
Removing protection from one image/video clip
1.Perform the steps above 1 to 4 in “Protecting one image/video clip.”
2.Select Unlock by pressing the ![]() /
/ ![]() button and then press OK.
button and then press OK.
•Use of the format function will erase protected images/video clips. For more information about the format “Function” refer to format in the
33