
139.53535SRT1 specifications
The Sears 139.53535SRT1 is an innovative garage door opener that stands out in the realm of home automation due to its robust features and advanced technologies. This model offers a blend of convenience, security, and performance, making it a popular choice for homeowners seeking efficiency and reliability.One of the standout features of the 139.53535SRT1 is its powerful motor, designed to lift heavy garage doors with ease. With a lifting capacity suitable for both standard and heavy-duty doors, it operates smoothly and quietly, ensuring minimal disruption in residential areas. The opener also includes safety features such as the automatic reverse function, which prevents accidents by reversing the door's direction if it detects an obstruction.
This model is equipped with the latest technology to enhance user experience and security. The security+ 2.0 technology generates a new code every time the remote is used. This feature provides an additional layer of protection against unauthorized access, ensuring homeowners feel safe and secure when using their garage door opener.
In terms of connectivity, the Sears 139.53535SRT1 comes with built-in Wi-Fi capability. This allows users to control the garage door remotely via a smartphone app. Through the app, users can check the status of their garage door, open or close it from anywhere, and receive notifications about its usage. This feature is particularly beneficial for those who may forget to close the door or need to grant access to someone while away from home.
Additionally, the model includes a convenient battery backup system. This ensures that the garage door opener operates even during power outages, providing peace of mind during inclement weather or disruptions in local power supply.
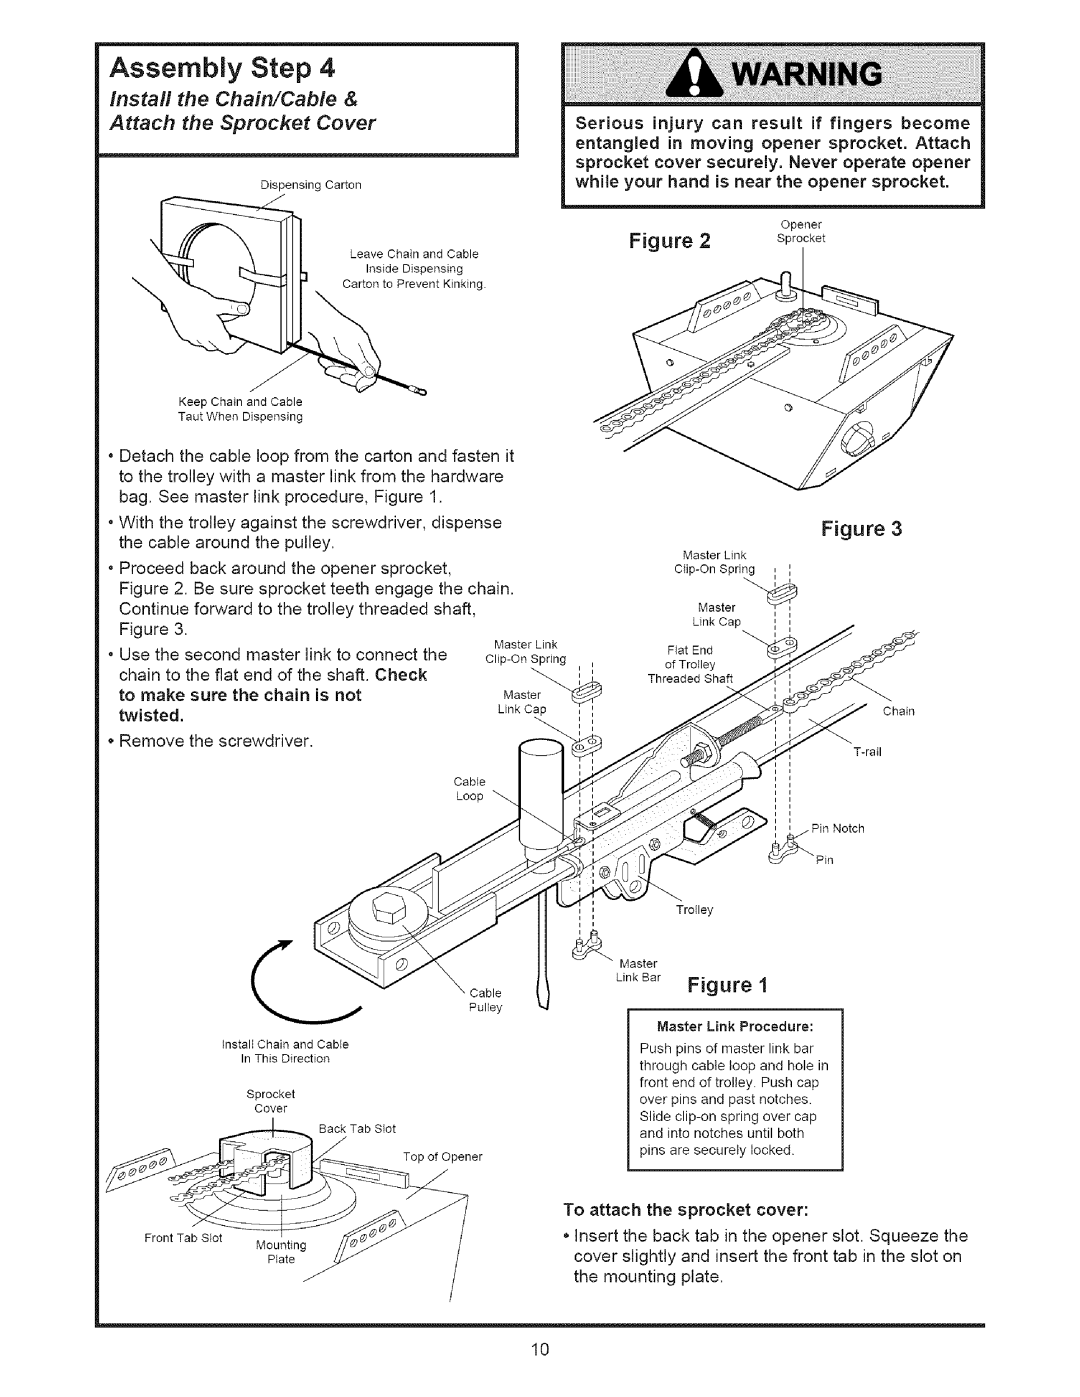
Installation of the 139.53535SRT1 is user-friendly, thanks to its comprehensive guide and compatibility with most standard garage door setups. Its sleek design also adds a modern touch to any garage space, blending functionality with aesthetics.
In summary, the Sears 139.53535SRT1 garage door opener encompasses a host of innovative features like a powerful motor, advanced security technology, Wi-Fi connectivity, and battery backup. These characteristics make it a top choice for homeowners aiming for both convenience and safety in their garage door solutions.