CHANGING VOLTAGE
See Figures 2- 4.
Your radial saw has been set up at the factory to operate efficiently on a 120V AC single voltage circuit, However, if heavy duty operation is required, the circuits are overloaded, or the circuit is low voltage, have a qualified electrician change the voltage on the main power system to a 240V AC voltage circuit,
,_ WARNING: The control cut device is set up for a 120V AC single voltage circuit. Do not modify
the control cut cord. Identify the control cut cord and tie it back out of the way.
•Correctly identify the control cut cord, unplug it, and set it aside.
•Unplug the main power cord,
•Remove the blade following the procedure in the Assembly section,
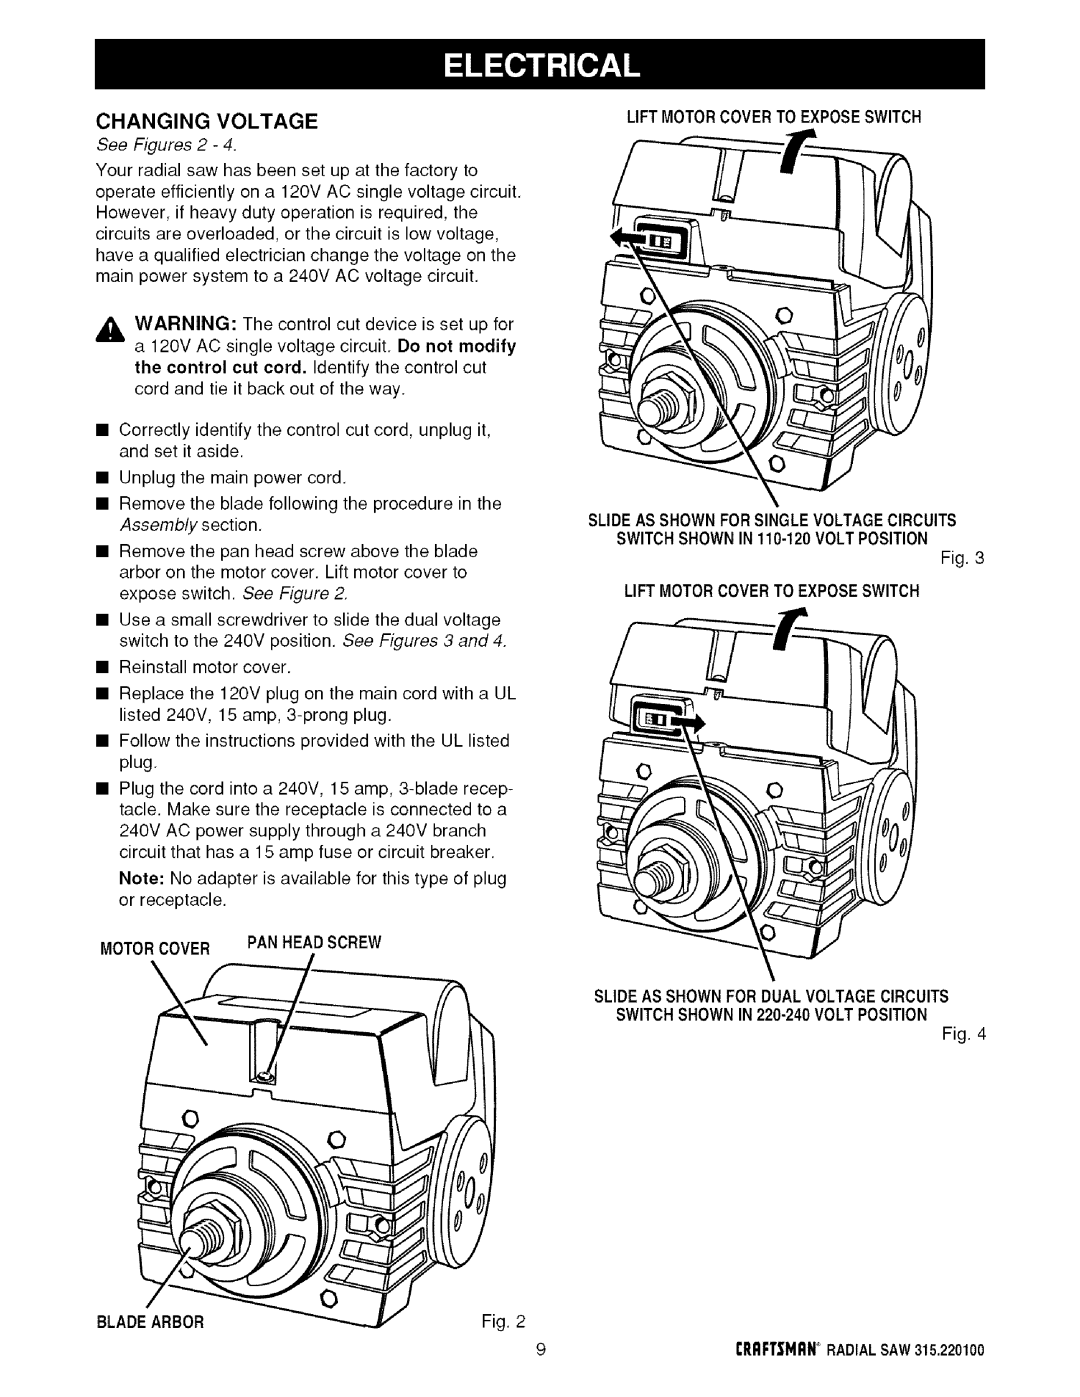
•Remove the pan head screw above the blade arbor on the motor cover, Lift motor cover to expose switch. See Figure 2,
•Use a small screwdriver to slide the dual voltage switch to the 240V position, See Figures 3 and 4,
•Reinstall motor cover.
•Replace the 120V plug on the main cord with a UL listed 240V, 15 amp,
•Follow the instructions provided with the UL listed plug,
•Plug the cord into a 240V, 15 amp,
Note: No adapter is available for this type of plug or receptacle.
MOTORCOVER PAN HEADSCREW
LIFT MOTORCOVERTO EXPOSESWITCH
SLIDEASSHOWNFORSINGLEVOLTAGECIRCUITS
Fig. 3
LIFT MOTORCOVERTO EXPOSESWITCH
SLIDEAS SHOWNFORDUALVOLTAGECIRCUITS
SWITCHSHOWNIN
Fig. 4
/ |
|
|
BLADEARBOR | _ | Fig. 2 |
rRFIFTSMRNRADIALSAW315.220100