[] Rotation Check: To check the rotation, hold the front of the arm with one hand and grasp the top of the column support with the other. Press the arm to the side. if there is play between the column support and the column tube, it needs to be ad= justed. See Figure 20B.
COLUMNTUBE
X
COLUNNSUPPORT | Fig. 20B |
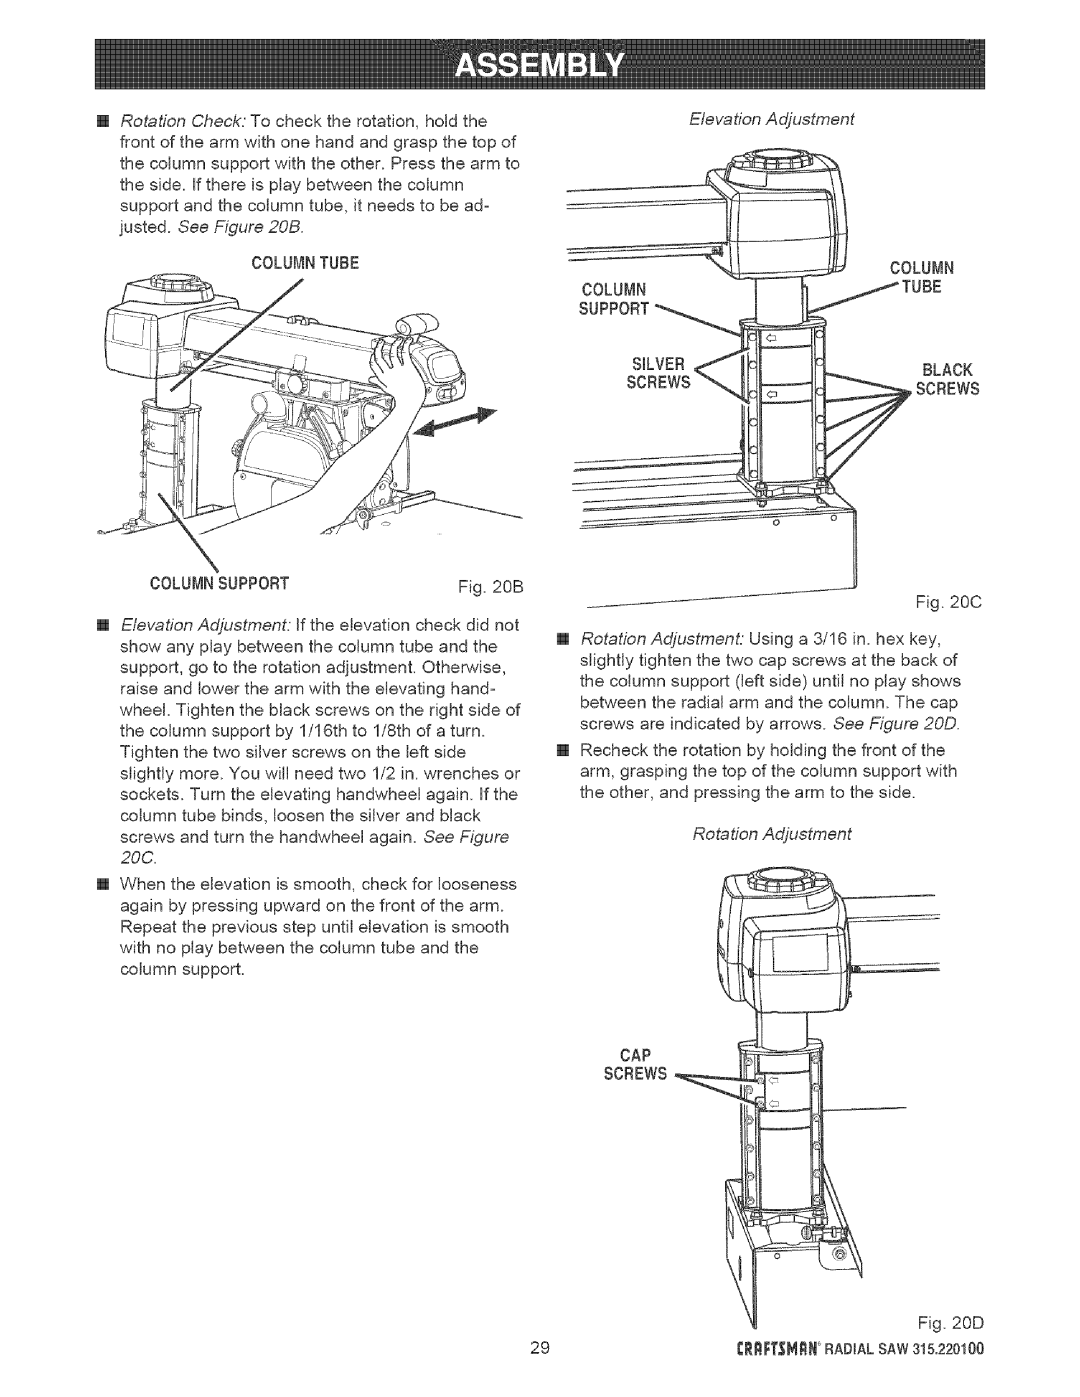
[] Elevation Adjustment: If the elevation check did not show any play between the column tube and the support, go to the rotation adjustment. OthenMse, raise and lower the arm with the elevating hand= wheel. Tighten the black screws on the right side of the column support by 1/16th to l/8th of a turn. Tighten the two silver screws on the left side slightly more. You will need two 1/2 in. wrenches or sockets. Turn the elevating handwheel again. If the column tube binds, loosen the silver and black
screws and turn the handwheel again. See Figure 20C.
[] When the elevation is smooth, check for looseness again by pressing upward on the front of the arm. Repeat the previous step until elevation is smooth with no play between the column tube and the column support.
Elevation Adjustment
|
|
| COLUMN |
COLUMN | 1 | h | _TUBE |
SUPPORT_ |
|
|
|
SILVER _ | _] | IF[_ | ..... |
_LA_R | |||
|
|
| SCREWS |
Fig. 20C
[] Rotation Adjustment. Using a 3/16 in. hex key, slightly tighten the two cap screws at the back of the column support (left side) until no play shows between the radial arm and the column. The cap screws are indicated by arrows. See Figure 20D.
[] Recheck the rotation by holding the front of the arm, grasping the top of the column support with the other, and pressing the arm to the side.
Rotation Adjustment
CAP
SCREWS