8 . HANDLEBAR
![]() In order to prevent an electric shock and short circuit, be sure to turn power off before performing work by touching the interior parts of the product.
In order to prevent an electric shock and short circuit, be sure to turn power off before performing work by touching the interior parts of the product.
![]() Be careful so as not to damage wirings. Damaged wiring can cause an electric shock or short circuit accident.
Be careful so as not to damage wirings. Damaged wiring can cause an electric shock or short circuit accident.
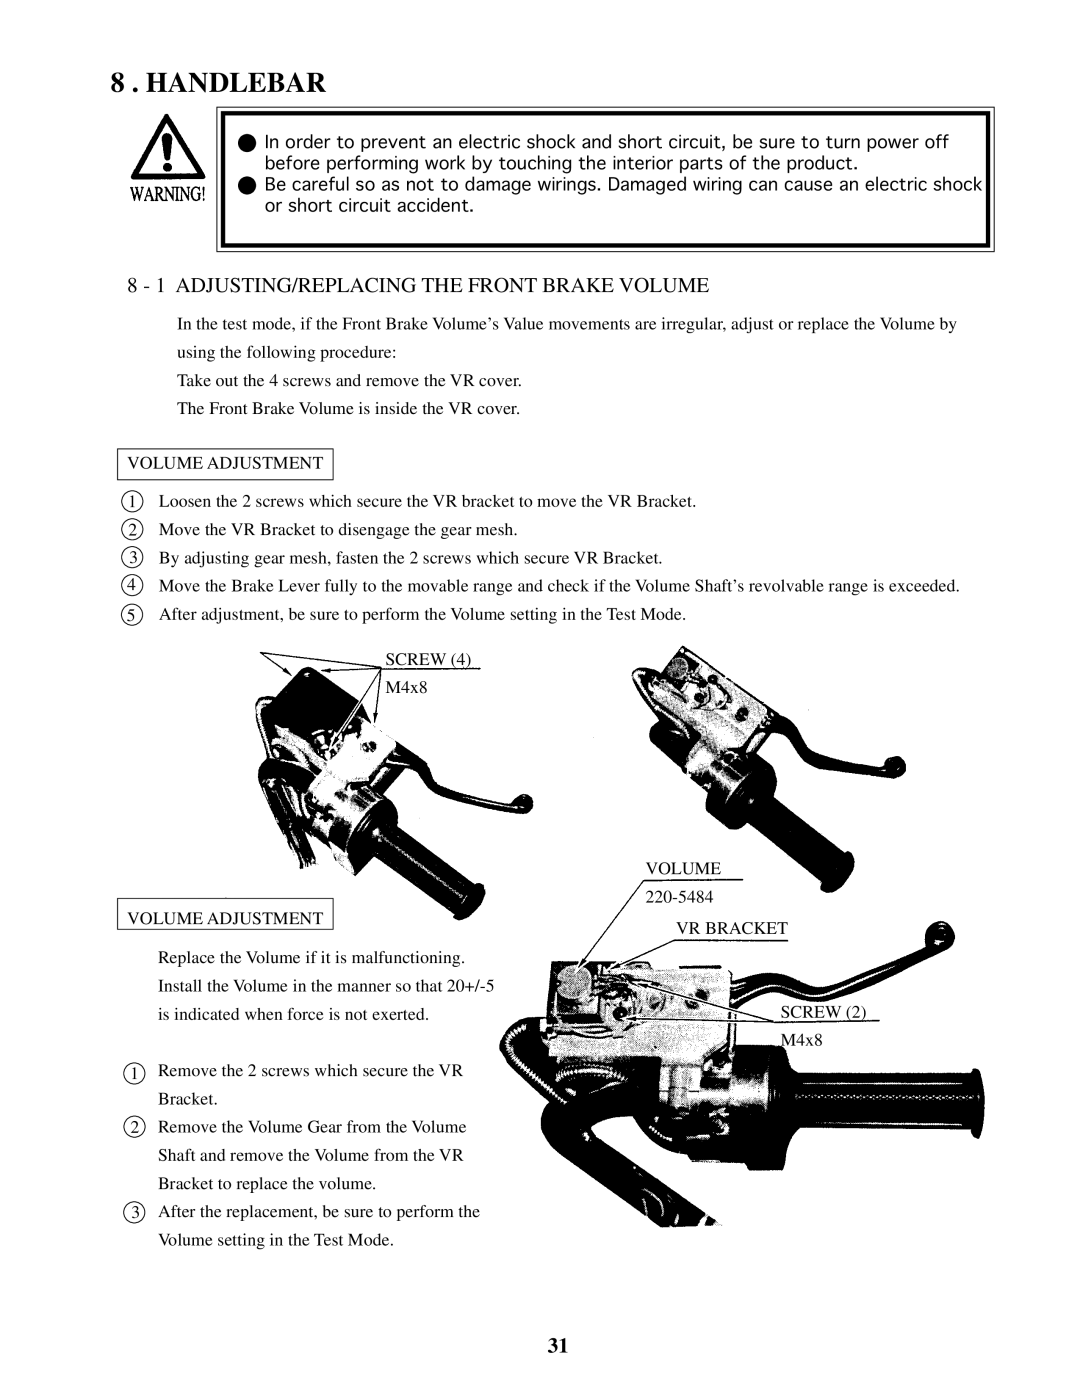
8 - 1 ADJUSTING/REPLACING THE FRONT BRAKE VOLUME
In the test mode, if the Front Brake Volume’s Value movements are irregular, adjust or replace the Volume by using the following procedure:
Take out the 4 screws and remove the VR cover.
The Front Brake Volume is inside the VR cover.
VOLUME ADJUSTMENT
1Loosen the 2 screws which secure the VR bracket to move the VR Bracket.
2Move the VR Bracket to disengage the gear mesh.
3 By adjusting gear mesh, fasten the 2 screws which secure VR Bracket.
4Move the Brake Lever fully to the movable range and check if the Volume Shaft’s revolvable range is exceeded.
5After adjustment, be sure to perform the Volume setting in the Test Mode.
SCREW (4)
M4x8
VOLUME ADJUSTMENT
Replace the Volume if it is malfunctioning. Install the Volume in the manner so that
1Remove the 2 screws which secure the VR Bracket.
2Remove the Volume Gear from the Volume
Shaft and remove the Volume from the VR Bracket to replace the volume.
3After the replacement, be sure to perform the Volume setting in the Test Mode.
VOLUME
VR BRACKET
SCREW (2)
M4x8
31