V.R. ADJUSTMENT
Do not touch places other than those specified. Touching placers not specified can
cause an electric shock and /or short circuit accident.
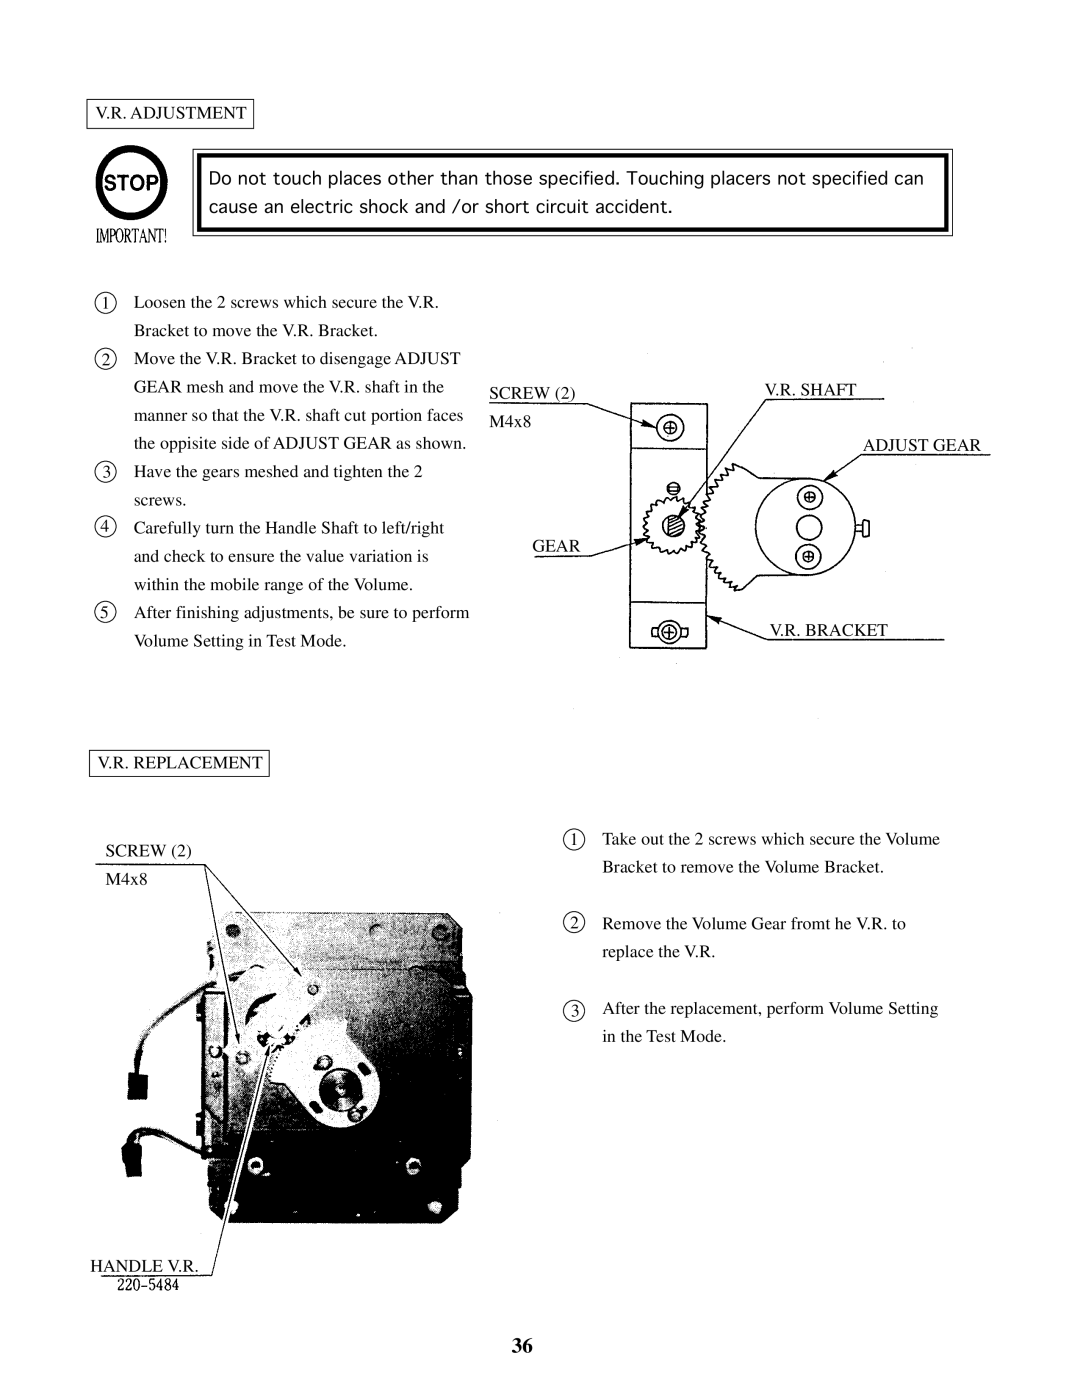
1Loosen the 2 screws which secure the V.R. Bracket to move the V.R. Bracket.
2Move the V.R. Bracket to disengage ADJUST GEAR mesh and move the V.R. shaft in the manner so that the V.R. shaft cut portion faces
the oppisite side of ADJUST GEAR as shown.
3 Have the gears meshed and tighten the 2 screws.
4Carefully turn the Handle Shaft to left/right and check to ensure the value variation is within the mobile range of the Volume.
5After finishing adjustments, be sure to perform Volume Setting in Test Mode.
V.R. REPLACEMENT
SCREW (2)
M4x8
SCREW (2) | V.R. SHAFT |
M4x8 |
|
ADJUST GEAR
GEAR
V.R. BRACKET
1Take out the 2 screws which secure the Volume Bracket to remove the Volume Bracket.
2Remove the Volume Gear fromt he V.R. to replace the V.R.
3After the replacement, perform Volume Setting in the Test Mode.
HANDLE V.R.
36
