
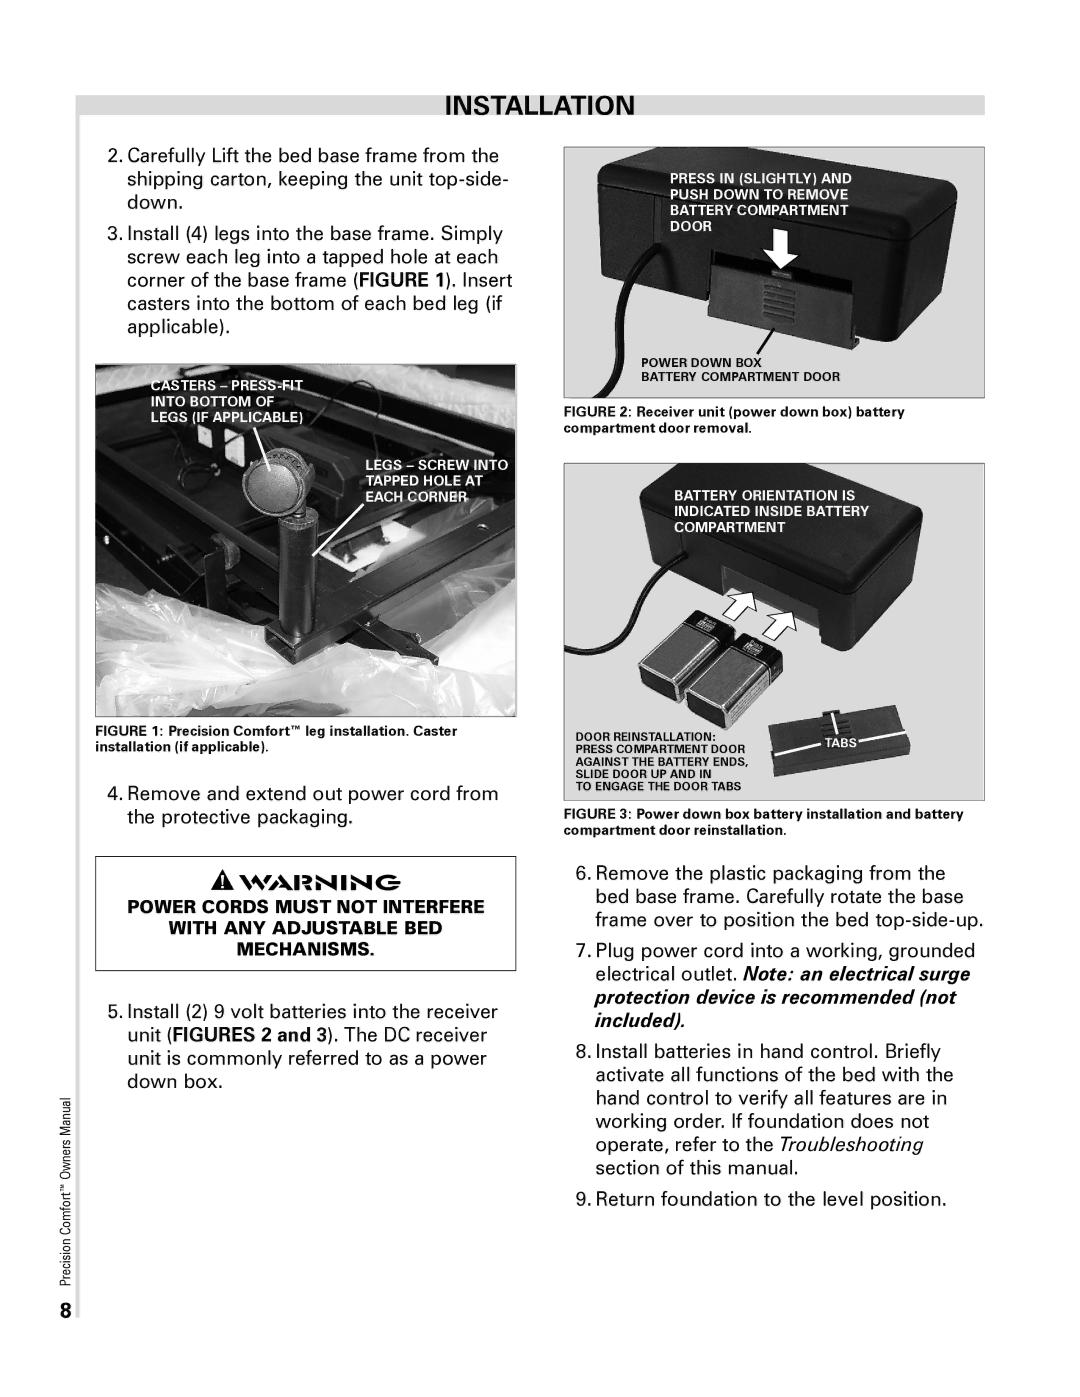
Precision Comfort Adjustable Foundation specifications
The Select Comfort Precision Comfort Adjustable Foundation is designed to enhance your sleep experience by providing customizable support and comfort. This adjustable base seamlessly combines innovative technology with user-friendly features to help address individual comfort needs.One of the standout characteristics of the Precision Comfort Adjustable Foundation is its ability to adjust the head and foot positions. With a simple touch of a button, users can elevate their head or legs to find the perfect sleeping or lounging position. This feature not only aids in promoting better sleep posture but can also provide relief for those with specific health conditions, such as acid reflux or sleep apnea.
The foundation is engineered with powerful, yet quiet, motors that allow for smooth transitions between positions. This means that you can adjust your bed without disturbing your partner. Additionally, users can set their preferred position and easily return to it with the one-touch memory feature, creating an effortless transition between sleeping modes.
Equipped with a responsive mattress technology, the Precision Comfort Adjustable Foundation works in harmony with Select Comfort's Sleep Number mattresses. This allows for the ultimate customizable sleep experience, as users can adjust their mattress's firmness in conjunction with the adjustable base's position. By syncing these features, couples can achieve their personal comfort preferences, even if they differ significantly from one another.
The Precision Comfort Adjustable Foundation also boasts a sleek and modern design that complements any bedroom décor. Its elegant look is enhanced by a customizable headboard bracket, making it easy to attach your preferred headboard style.
Furthermore, the foundation includes under-bed lighting, which offers convenience during nighttime hours, helping you avoid any accidents when getting up or returning to bed. Wireless remote control functionality is another key feature, allowing users to make adjustments easily, whether they're in bed or at a distance.
Overall, the Select Comfort Precision Comfort Adjustable Foundation is not merely an adjustable bed base; it is a comprehensive sleep solution designed to deliver superior comfort, support, and convenience, making it a worthwhile investment for those looking to elevate their sleep experience. With its innovative features and seamless integration with Select Comfort mattresses, this adjustable foundation promises to transform the way you experience rest and relaxation at home.