2Replacing the paper roll
Precaution: Be very careful for the manual cutter mounted on the printer cover when removing and replacing the cover, so as not to hurt yourself.
Removing the paper roll
When a red dye appears on the paper roll, it is time to replace the existing paper roll. Replace the paper roll with new one.
1.Remove the printer cover.
2.Turn the mode switch to the “REG” position with the AC cord connected.
3. When the take-up spool is not used:
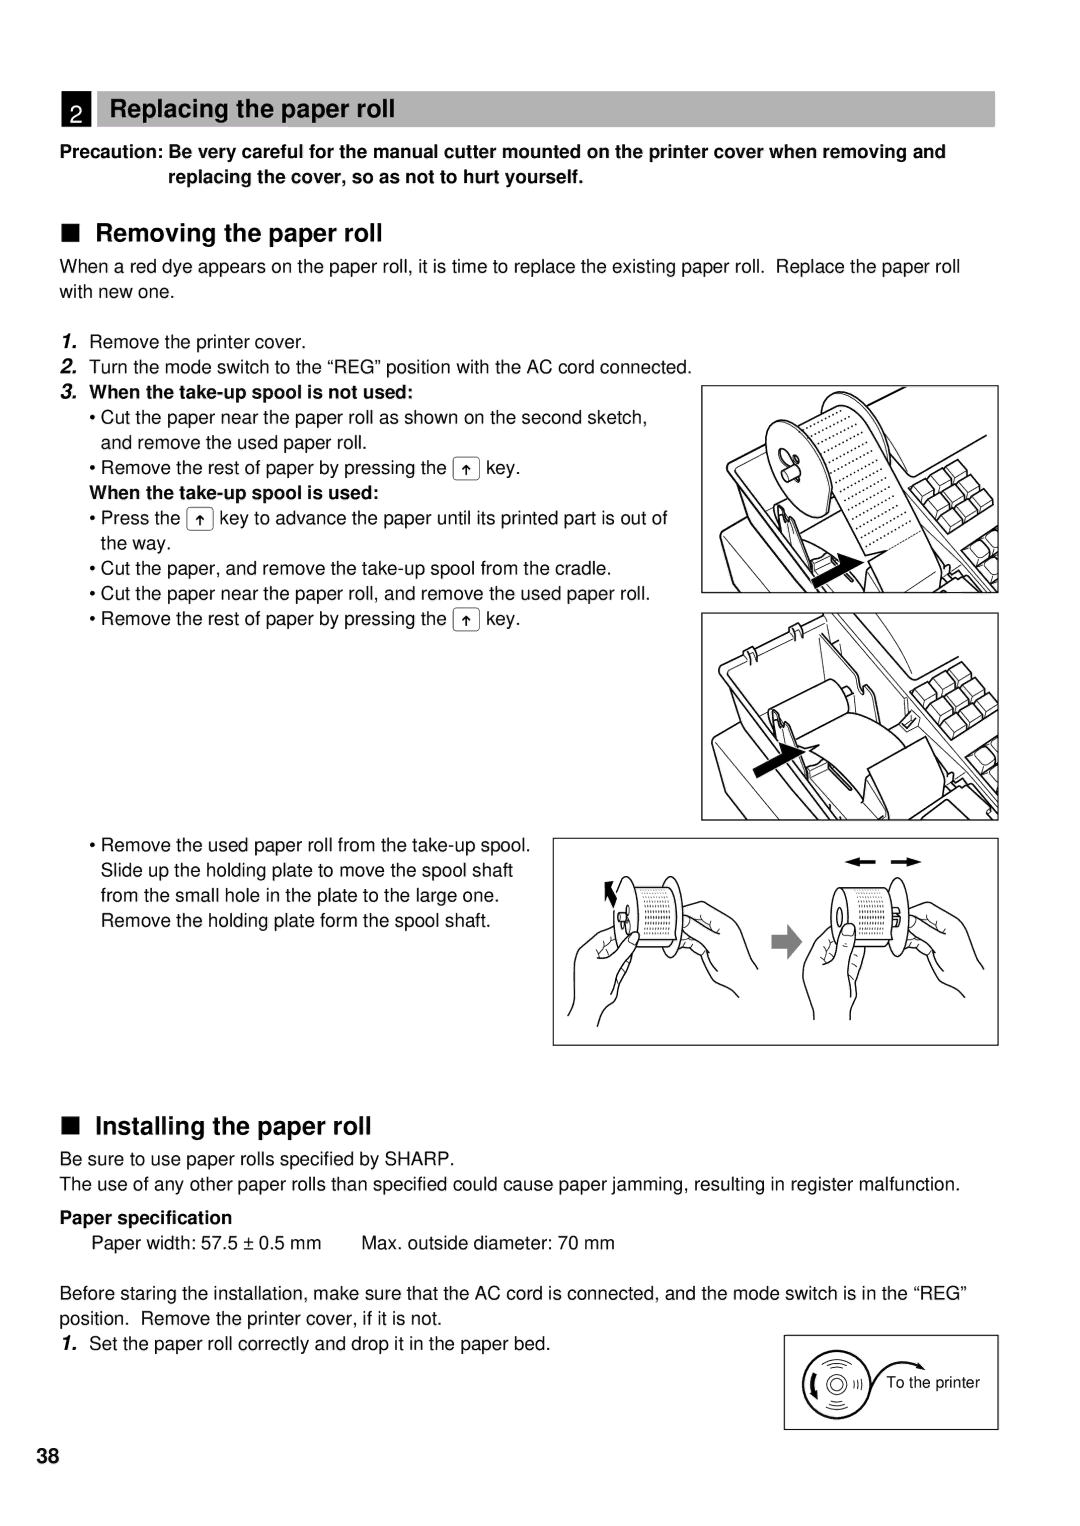
•Cut the paper near the paper roll as shown on the second sketch, and remove the used paper roll.
• Remove the rest of paper by pressing the
When the take-up spool is used:
• Press the the way.
• Cut the paper, and remove the
• Cut the paper near the paper roll, and remove the used paper roll.
• Remove the rest of paper by pressing the ákey.
•Remove the used paper roll from the
from the small hole in the plate to the large one. Remove the holding plate form the spool shaft.
Installing the paper roll
Be sure to use paper rolls specified by SHARP.
The use of any other paper rolls than specified could cause paper jamming, resulting in register malfunction.
Paper specification |
|
Paper width: 57.5 ± 0.5 mm | Max. outside diameter: 70 mm |
Before staring the installation, make sure that the AC cord is connected, and the mode switch is in the “REG” position. Remove the printer cover, if it is not.
1.Set the paper roll correctly and drop it in the paper bed.
To the printer
38
