Connecting the monitor and turning
the monitor on and off
English
Connecting the monitor to a power source
Use only the AC adapter and power cord supplied.
Notes:
•Do not overly bend the cable or add extension cords as this could lead to malfunction.
•Do not remove the label next to the
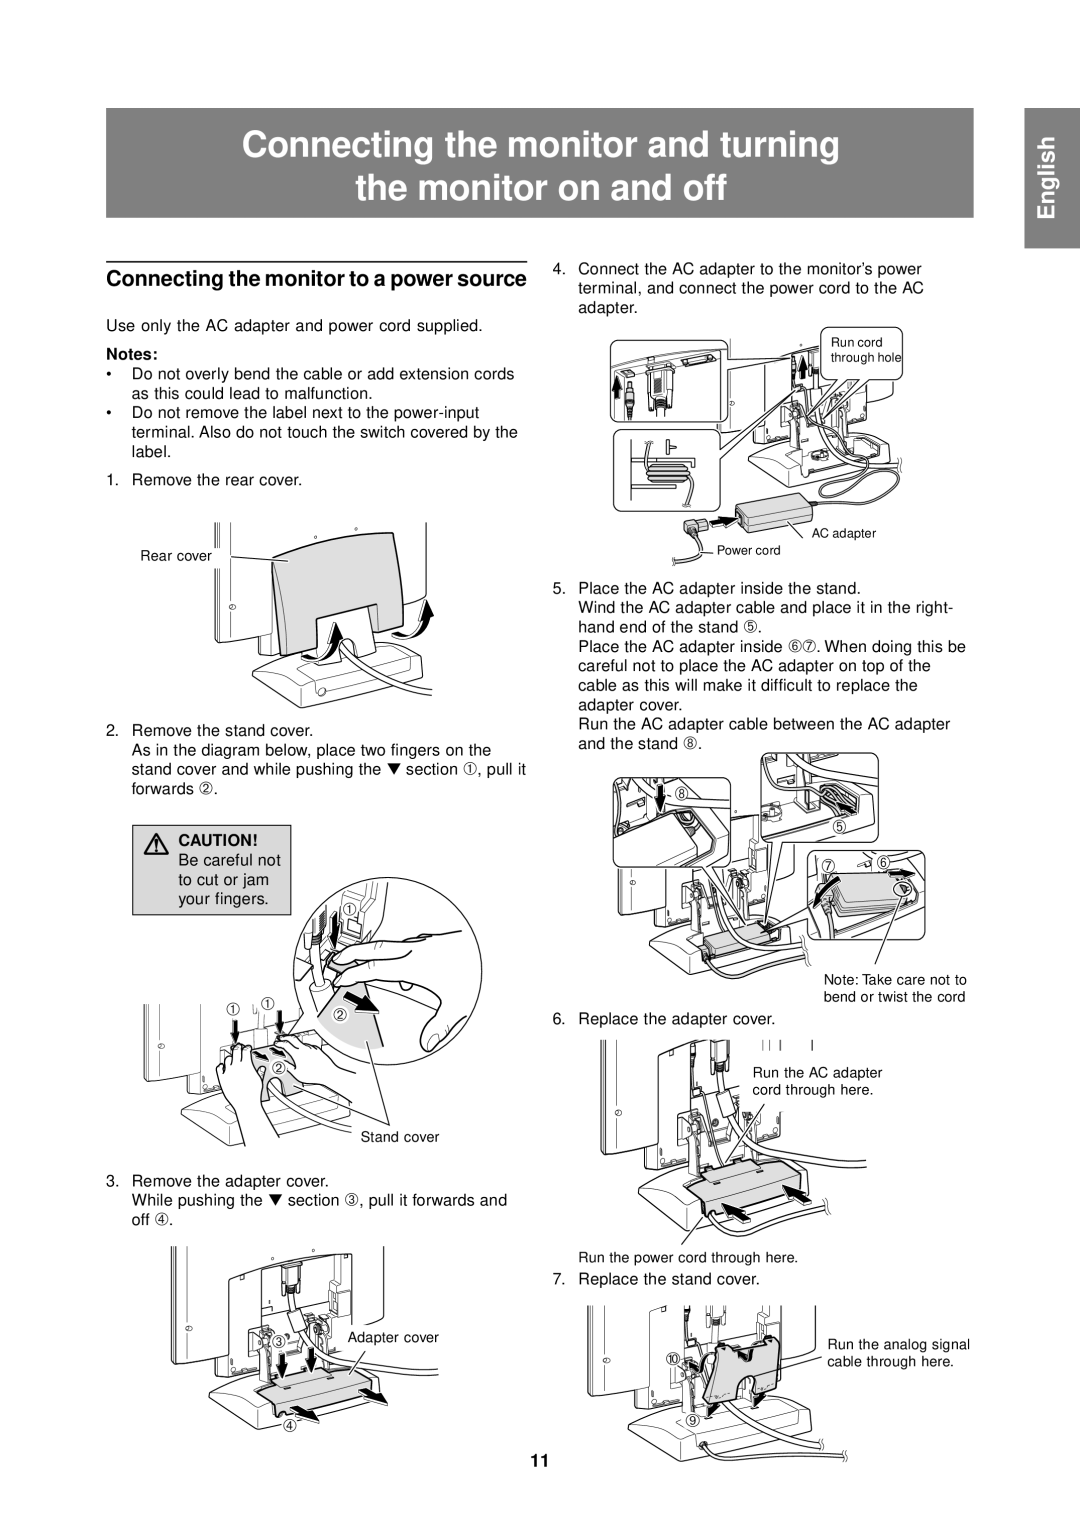
1. Remove the rear cover.
4.Connect the AC adapter to the monitor’s power terminal, and connect the power cord to the AC adapter.
Run cord ![]()
![]()
![]() through hole
through hole
Rear cover
2.Remove the stand cover.
As in the diagram below, place two fingers on the stand cover and while pushing the ▼ section 1, pull it forwards 2.
AC adapter
![]() Power cord
Power cord
5.Place the AC adapter inside the stand.
Wind the AC adapter cable and place it in the right- hand end of the stand 5.
Place the AC adapter inside 67. When doing this be careful not to place the AC adapter on top of the cable as this will make it difficult to replace the adapter cover.
Run the AC adapter cable between the AC adapter and the stand 8.
![]() 8
8 ![]()
![]()
![]()
![]()
![]()
![]() 5
5
CAUTION! Be careful not to cut or jam your fingers.
1 1
![]() 2
2
1
2
Stand cover
![]() 7
7 ![]() 6
6
Note: Take care not to bend or twist the cord
6. Replace the adapter cover.
Run the AC adapter cord through here.
3.Remove the adapter cover.
While pushing the ▼ section 3, pull it forwards and off 4.
Run the power cord through here.
7. Replace the stand cover.
3 | Adapter cover | Run the analog signal | |
0 | |||
| cable through here. | ||
4 |
| 9 | |
|
|
11