Connecting the monitor and turning the monitor on and off
8.Replace the rear cover. q 


w
9. Place power plug into AC outlet.
Connecting the monitor to a computer (PC etc.)
For analog RGB output terminal
Connecting to a computer with analog RGB output. When connecting, ensure that both the monitor and computer are switched off.
Notes:
•If using the monitor for the first time or after having changed the system settings during use, perform an automatic screen adjustment (p. 19).
•Be careful not to overly bend the cable or add extension cords as this could lead to malfunction.
•When connecting to a notebook, if the notebook computer's screen is set so that it is displaying at the same time, the
Analog RGB output terminal (mini
Firmly insert the plug then tighten the screws each side.
Computer
If connecting to a
Macintosh conversion adapter
Analog signal cable
After connecting the adapter, tighten the screws on each side to fix into place
Note:
If connecting to the Sun Ultra series, a conversion adapter (purchased separately) may be required.
For digital RGB output terminal
Connecting to a computer with digital RGB output. When connecting, ensure that both the monitor and computer are switched off.
Notes:
•A computer with an output terminal conforming to DVI
•Be careful not to overly bend the cable or add extension cords as this could lead to malfunction.
1.Remove the rear cover and the stand cover.
To remove them follow steps 1 and 2 of Connecting the monitor to a power source on page 11.
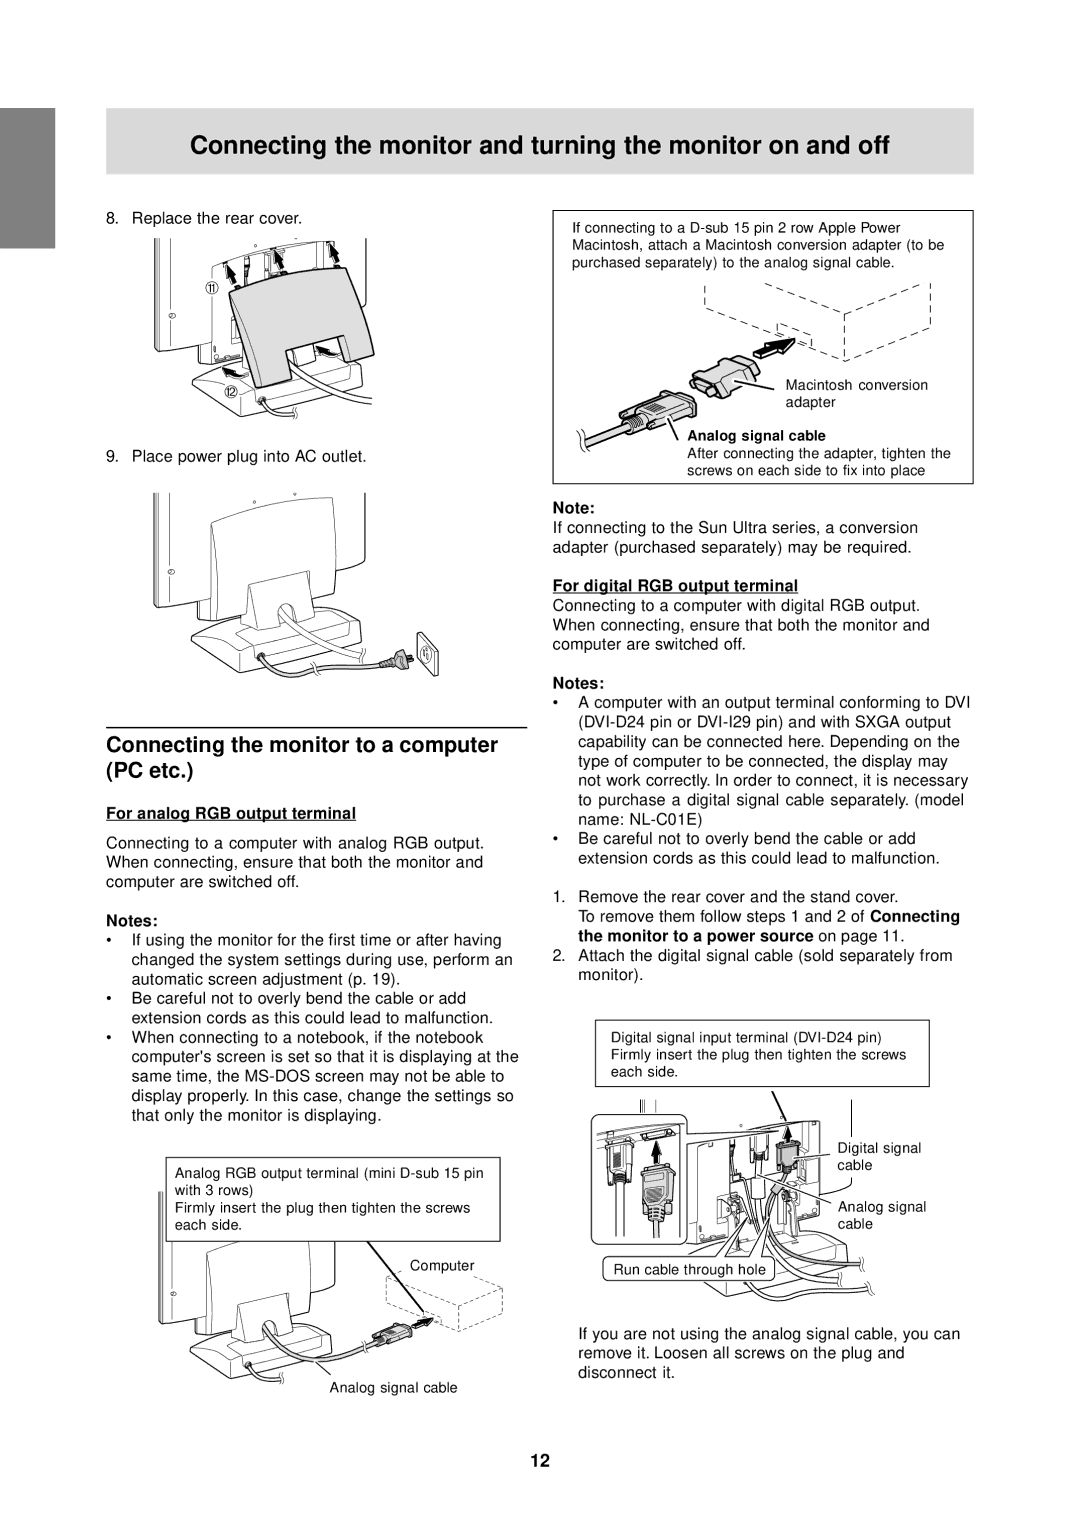
2.Attach the digital signal cable (sold separately from monitor).
Digital signal input terminal
Digital signal cable
Analog signal cable
Run cable through hole
If you are not using the analog signal cable, you can remove it. Loosen all screws on the plug and disconnect it.
Analog signal cable
12