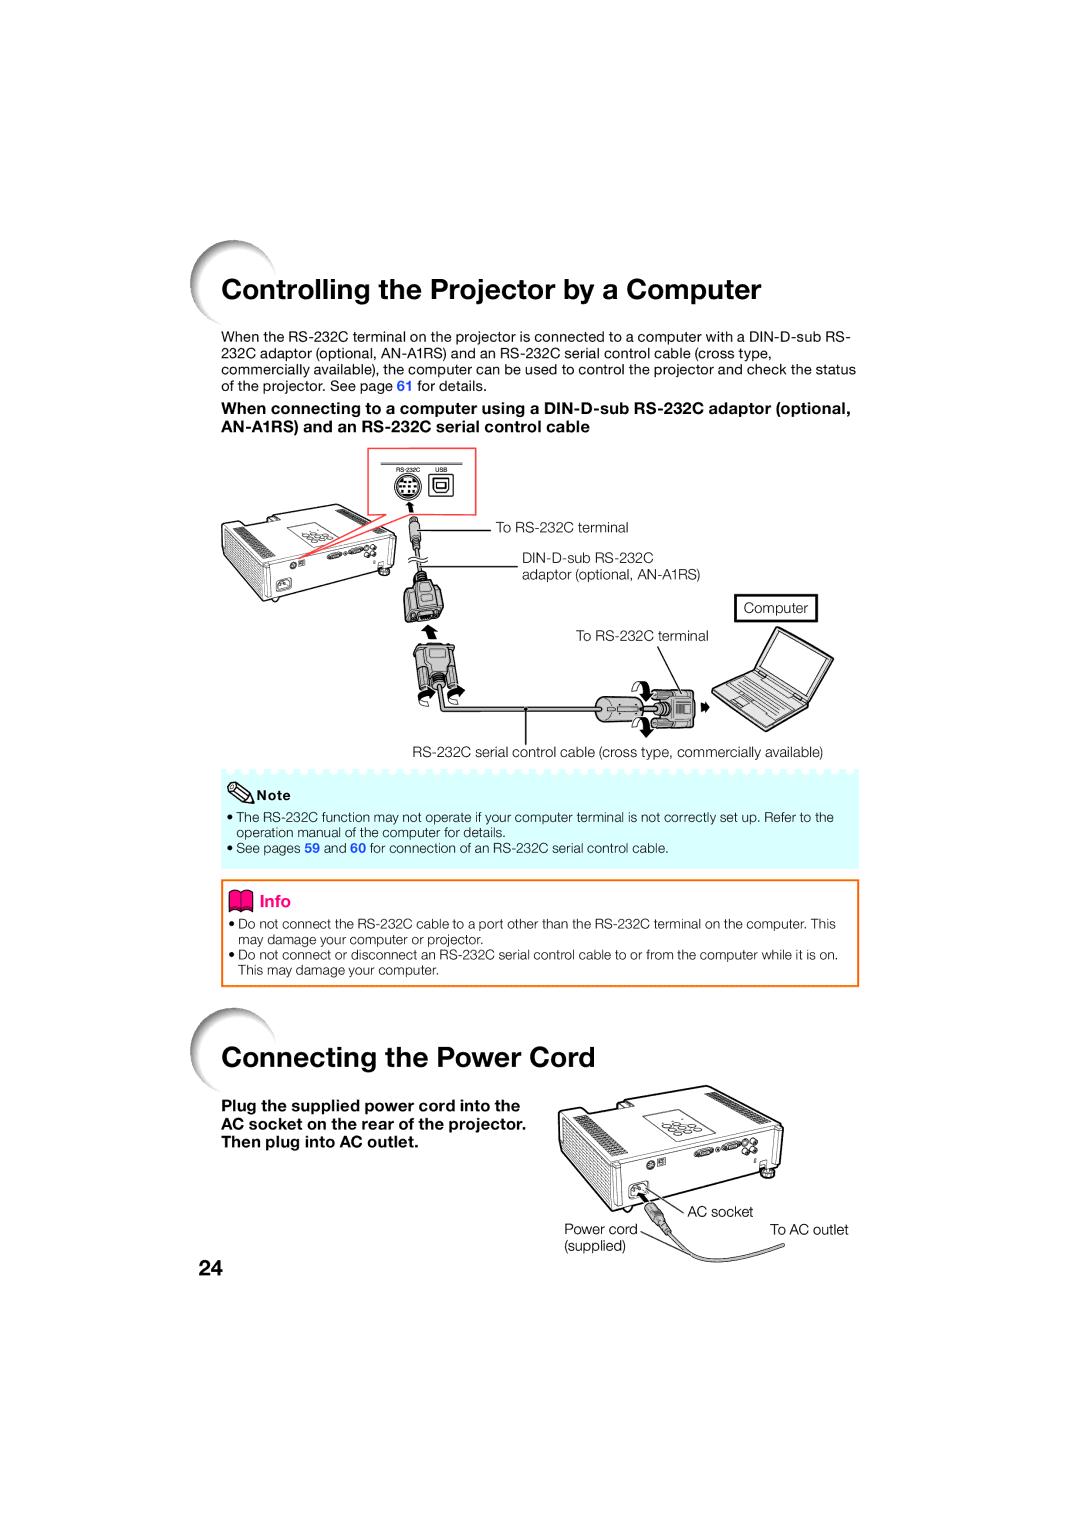
Controlling the Projector by a Computer
When the
When connecting to a computer using a
![]() To
To
Computer
To
![]() Note
Note
•The
•See pages 59 and 60 for connection of an
 Info
Info
•Do not connect the
•Do not connect or disconnect an
Connecting the Power Cord
Plug the supplied power cord into the
AC socket on the rear of the projector.
Then plug into AC outlet.
 AC socket
Power cord  To AC outlet (supplied)
24