Initial Assemble & Installation
Install New Master Valve
1.Remove the two screws that connect the plastic upper dash to the left side of the lower air screen to provide access to the master valve.
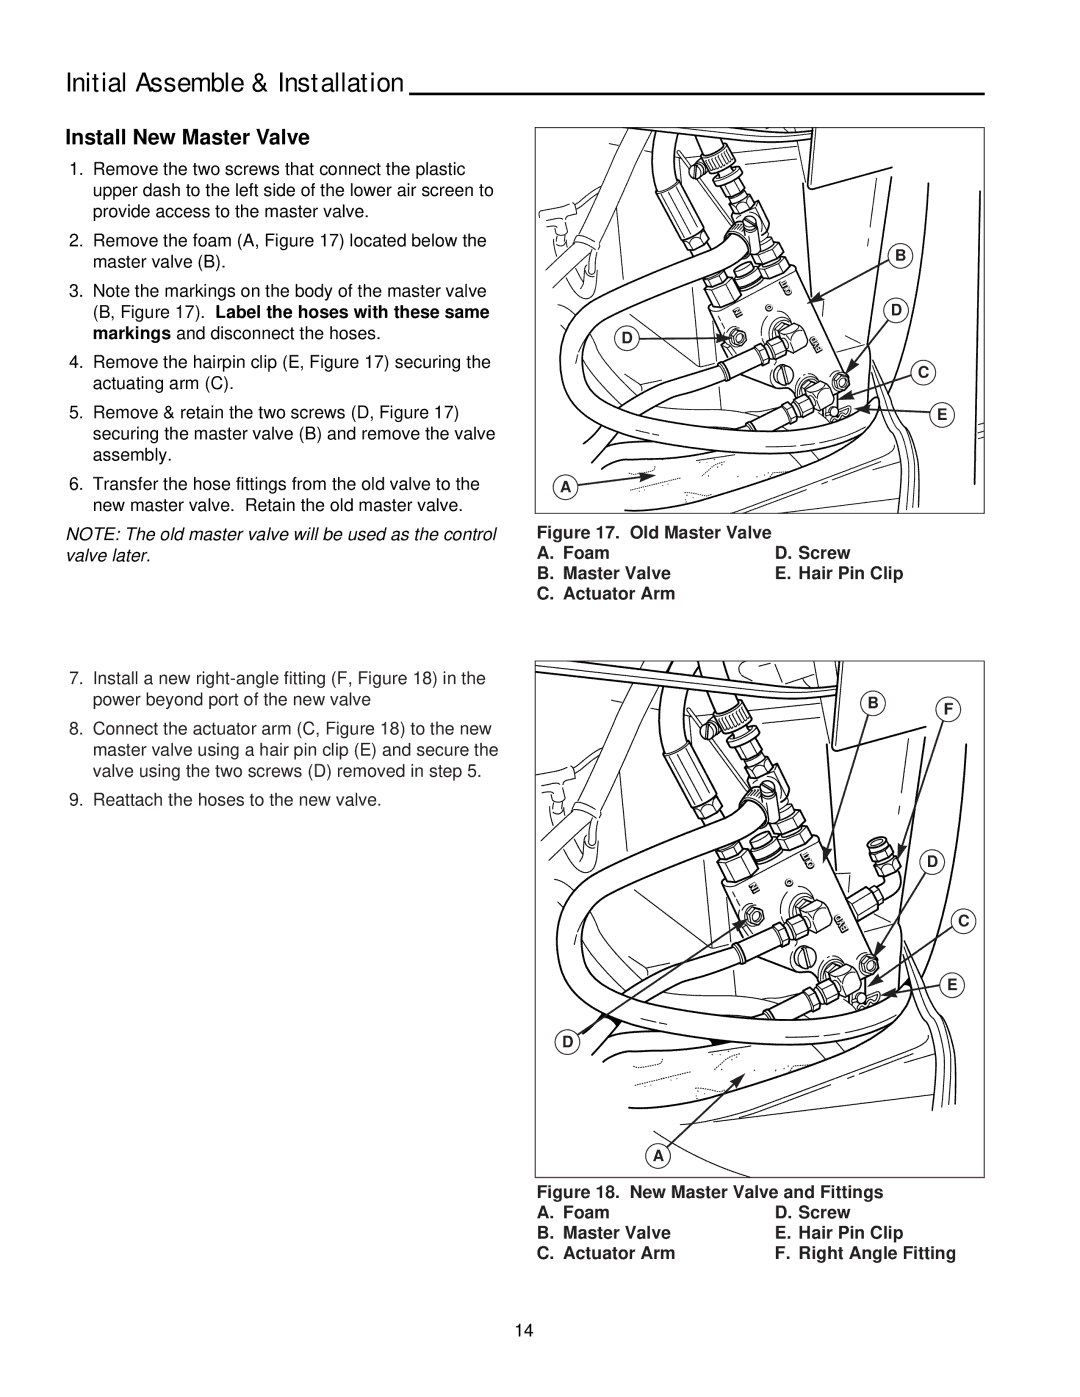
2.Remove the foam (A, Figure 17) located below the master valve (B).
3.Note the markings on the body of the master valve (B, Figure 17). Label the hoses with these same markings and disconnect the hoses.
4.Remove the hairpin clip (E, Figure 17) securing the actuating arm (C).
5.Remove & retain the two screws (D, Figure 17) securing the master valve (B) and remove the valve assembly.
6.Transfer the hose fittings from the old valve to the new master valve. Retain the old master valve.
NOTE: The old master valve will be used as the control valve later.
|
|
| B |
|
|
| OUTT |
| IN | O | D |
|
| ||
|
|
| |
D |
|
| BYD |
|
| D | |
|
|
| C |
|
|
| E |
A |
|
|
|
Figure 17. Old Master Valve |
|
A. Foam | D. Screw |
B. Master Valve | E. Hair Pin Clip |
C. Actuator Arm |
|
7.Install a new
8.Connect the actuator arm (C, Figure 18) to the new master valve using a hair pin clip (E) and secure the valve using the two screws (D) removed in step 5.
9.Reattach the hoses to the new valve.
|
| B | F |
|
|
| |
OUTT |
|
| D |
|
|
| |
O |
|
|
|
IN |
|
|
|
| BYD |
| C |
| D |
| |
|
|
| |
|
|
| E |
D |
|
|
|
A |
|
|
|
Figure 18. New Master Valve and Fittings
A. Foam | D. Screw |
B. Master Valve | E. Hair Pin Clip |
C. Actuator Arm | F. Right Angle Fitting |
14