ADJUSTMENTS
Skid Shoe Adjustment
When clearing snow off smooth surfaces such as con- crete or asphalt, the scraper bar should scrape the sur- face. On surfaces such as gravel, the scraper bar should be set high enough so that it will not pick up debris.
1.Loosen the capscrews (A, Figure 3) securing the skid shoes.
2.Raise or lower the scraper bar to the desired height. Use wood blocks to hold the blade in position.
3.Set the skid shoes so that they are in contact with the ground and tighten the capscrews (A, Figure 3).
Adjustments
![]() WARNING
WARNING
To avoid serious injury, perform maintenance on the tractor or dozer blade only when the engine is stopped, parking brake is set and all moving parts have stopped. Always remove the ignition key before beginning maintenance or adjustments to prevent accidental starting of the engine.
When performing service work, support the blade using wood blocks placed under the scraper bar or skid shoes.
Never put hands or feet under the dozer blade.
Rotate / Replace Scraper Bar
If the scraper bar has become worn, it can be rotated end over end once, or replaced.
1.Raise the dozer blade and support the skid shoes using wood blocks.
2.Remove the carriage bolts (B, Figure 3), lockwashers (C), and nuts (D).
3.Rotate the scraper bar end over end, or replace the blade.
4.Secure the scraper bar to the blade using the car- riage bolts (B, Figure 3), lockwashers (C), and nuts (D), removed in step 1.
Lift Height Adjustment
To adjust the lift height:
1.Fully raise the attachment lift and shut off the engine. Set the parking brake and remove the key.
2.Loosen the nuts (C, Figure 4).
3.Turn the lift height bolts (D) until the dozer blade is at the desired height and level.
4.Hold the lift height bolts (D) in position and lock in place with the nuts (C).
Downward Pressure Adjustment
1.Fully lower the attachment lift and shut off the engine. Set the parking brake and remove the key.
2.Turn the nuts (E) evenly until the desired downward force is achieved. Do not
IMPORTANT NOTE
Do not
A
C
E
D
B | C |
| |
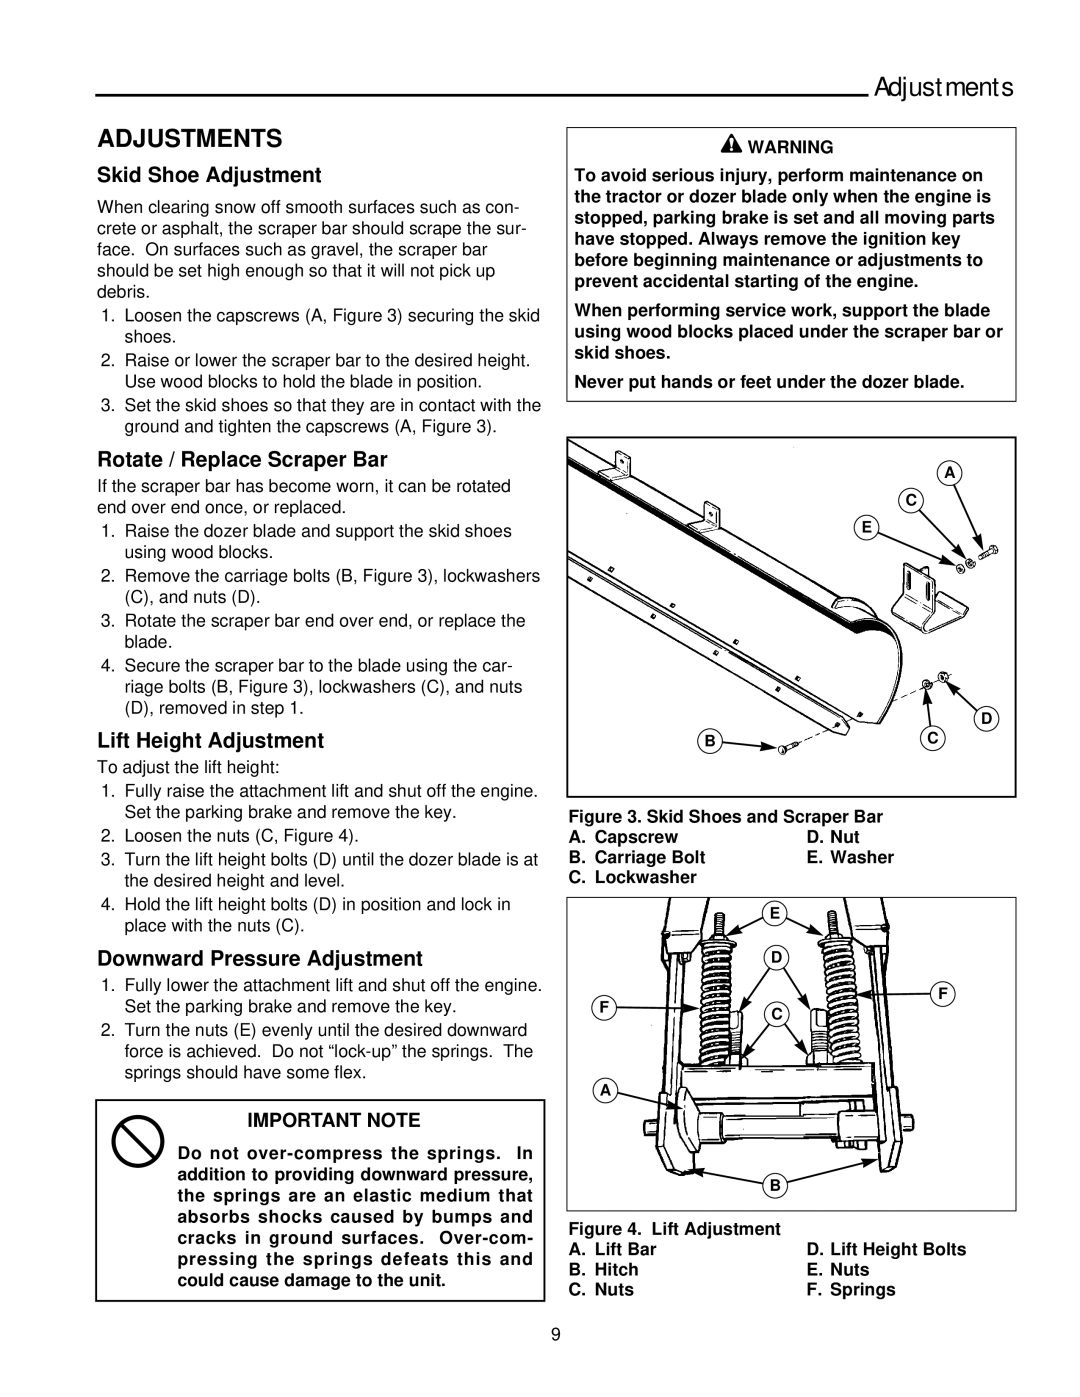
Figure 3. Skid Shoes and Scraper Bar | |
A. Capscrew | D. Nut |
B. Carriage Bolt | E. Washer |
C. Lockwasher |
|
| E | |
| D | |
F | F | |
C | ||
| ||
A |
| |
| B |
Figure 4. Lift Adjustment |
|
A. Lift Bar | D. Lift Height Bolts |
B. Hitch | E. Nuts |
C. Nuts | F. Springs |
9